Transitioning from a Cot to a Toddler Bed

Transitioning From A Cot to a Toddler Bed at 17 Months Tips CityGirlSearching Blog-01.png

Everly is now 20 months old, and has been sleeping in a ‘bed’ for the last 3 months. She has surprised us all with how well she has transitioned (although this is something I kept reading would happen…that our kids are capable of far more change/independence than we expect) and so I’d like to share how we went about making the change.

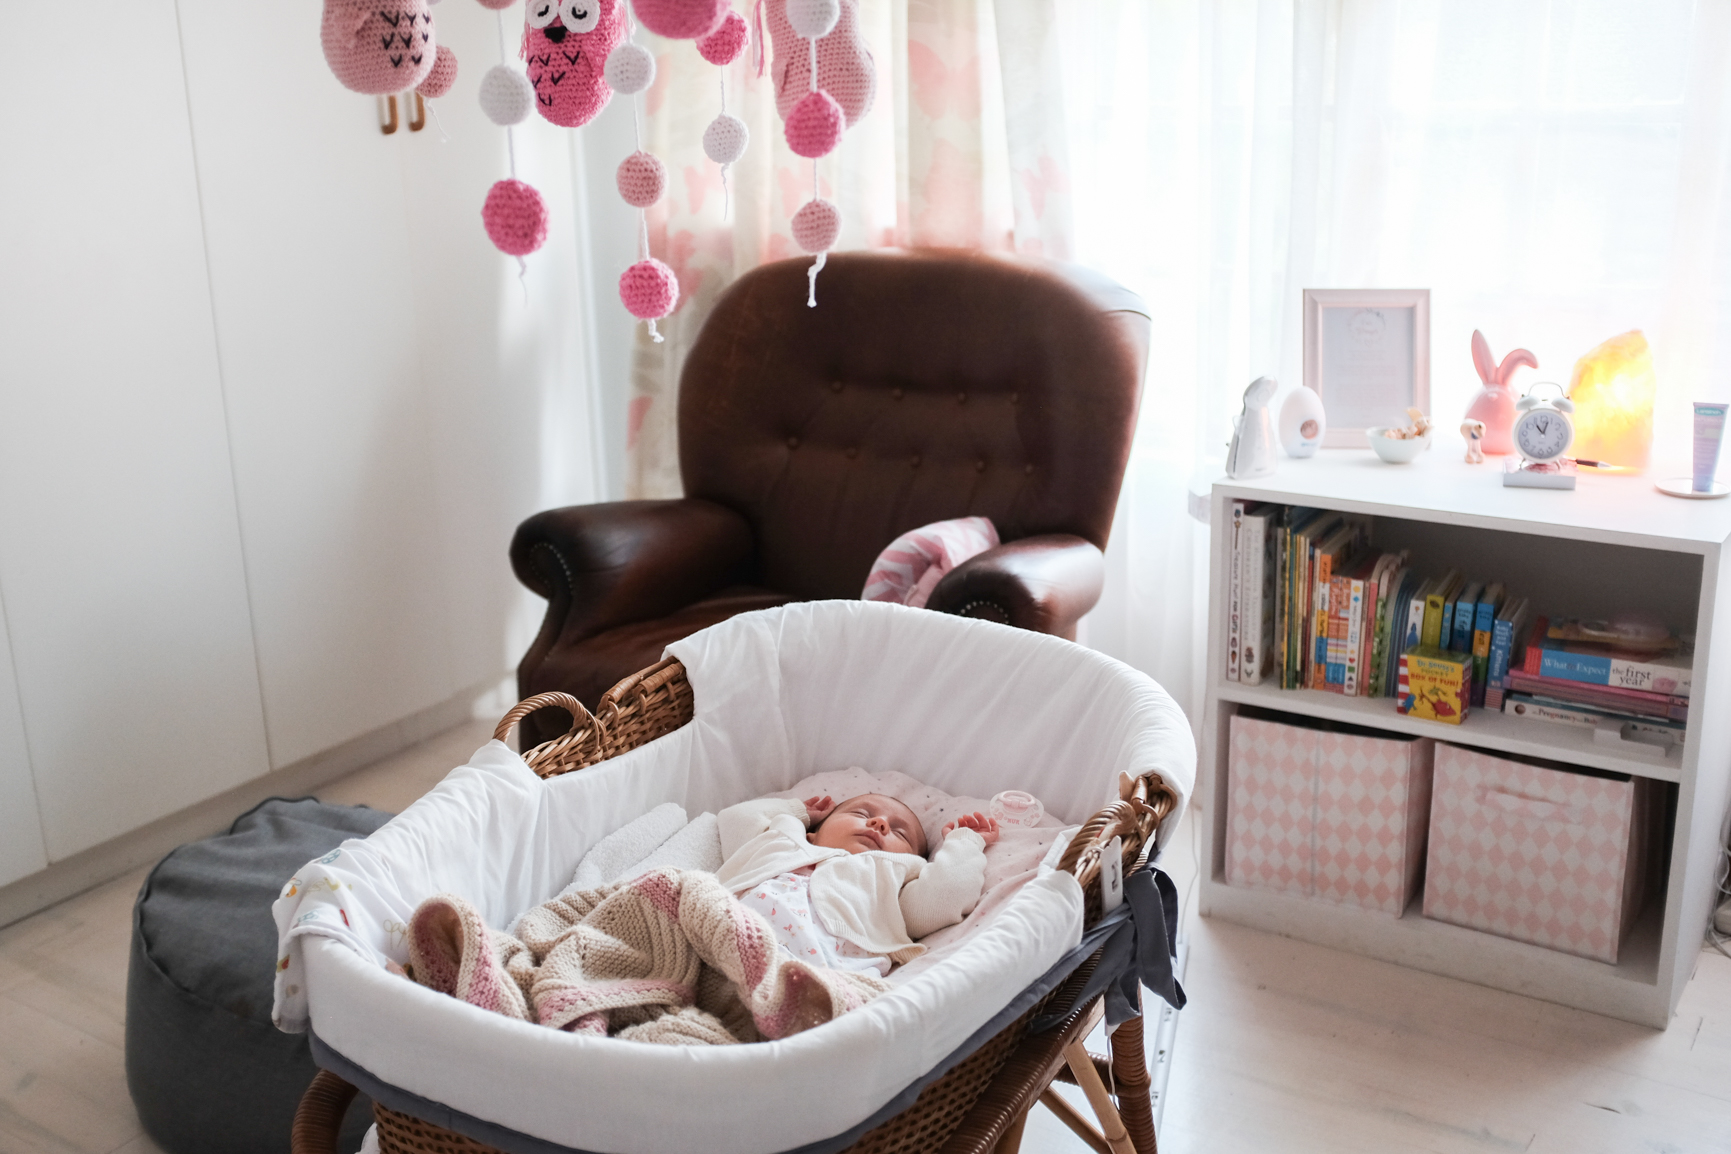
Although some people told me Evs was too young to be in a bed, in reality, we didn’t have much choice. Aaron was on the way, and I wanted Everly to have some time to adjust to her new bed (and the freedom that came along with it!) before a new baby entered the house and life as we knew it would change. We also didn’t want to have to buy another cot, preferring to rather put Aaron in the cot and Evs in a bed. While I had planned to put her straight into a regular single sized bed (she has one in her room that was left over from when our new home was a guesthouse…click here to see photos of our home as it barely 6 months ago!) but the bed is an extra high one, and she is still rather little. I wasn’t worried so much about her falling off the bed (in my mind this could be solved with pillows on the floor/a pool noodle put under her sheet etc) it was more the getting back up on the bed that I knew she wouldn’t be able to do unless we had a ladder/box for her to climb on. And seeing as her cot converted into a toddler bed, this seemed like the perfect first step for her. Now that Aaron is getting too big for his bassinet, we will move Evs into the regular bed in her room (maybe by taking the legs off the base/removing the base altogether and just putting the matress on the floor) in the next few weeks and he will go straight into the cot. I’ll also be sharing photos of what her room looked like when she was in her toddler bed soon, and I’ll also share a post of what Aaron’s room looks like while he is in his bassinet. Once Everly is in her new bed, Aaron will then go into the cot and I can finally share photos of the gorgeous custom bedding I had made for his room. Look out for those blog posts coming soon.

Transitioning from Cot to Toddler Bed CityGirlSearching Blog (6 of 7).jpg

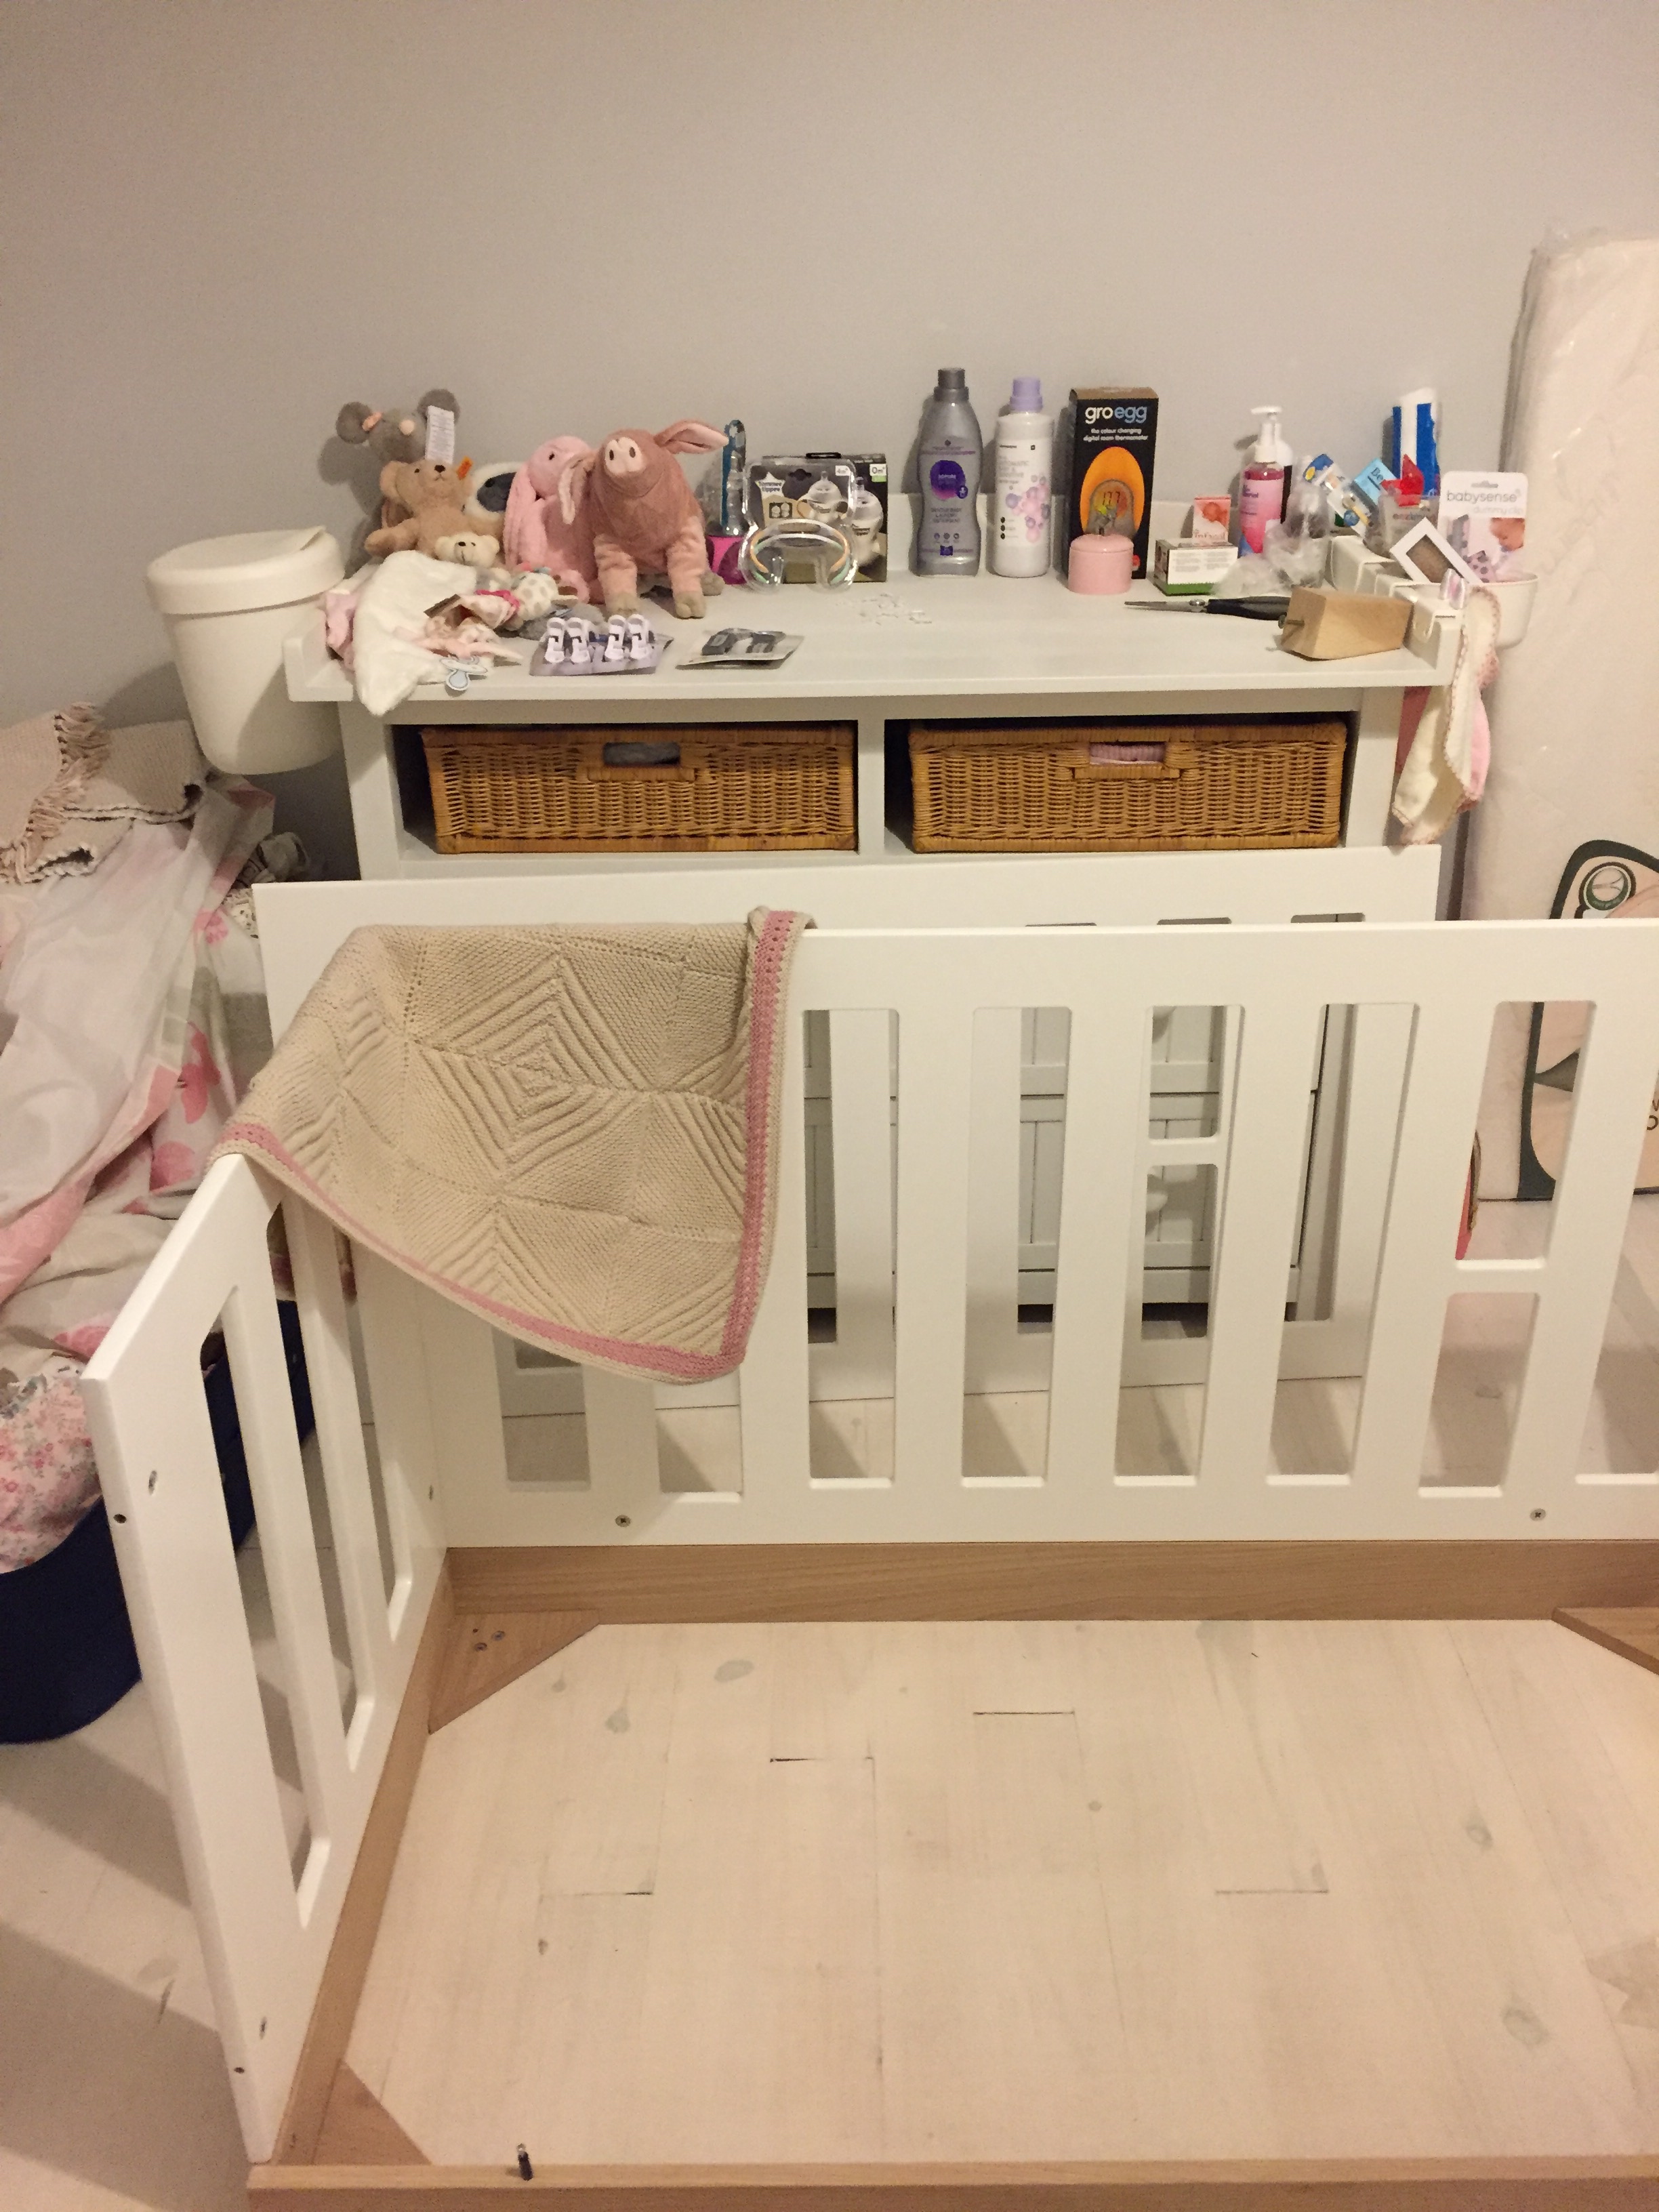
The cot we have is the Stihl from CoziCot (which retails for R4708) but I bought it on special in 2016 for about R3500. The cot comes with toddler panels, and these were pretty easy to put on once the rails were taken down.

I love the simplicity of the cot, and the fact that it has two levels, meaning no more sore backs from lifting baby in and out. The only concern I have had since having it, is once you’ve lowered the cot so the mattress is on the lowest level, the sides have grooves where the cot base fits to raise it to the higher level, and for the more adventurous baby/toddler, these would provide the perfect ‘step’ to break free from their cot. Everly didn’t ever attempt this, which is why I only recently thought about it. We did put cot bumpers on the cot from about 7 months which hides the ‘steps’, but also to bear in mind, Everly was rather slow to reach her physical milestones. She only started crawling at 13 months, and only walked at 17 months. So she wouldn’t have really been able to break out even if she had wanted to. Just something to keep in mind if you’re looking at this cot.

MVAR7311.jpg

So, how did we go about actually transitioning Everly?

We didn’t mess around, and basically took down the panels, and she had her first morning nap in it right away. Her first nap she barely moved in her bed, the second nap (she still naps twice a day) was shocking as she got off the bed and straight away bee-lined for the door and opened it. Our house is an old farmhouse, and the door handles are really low, and the latch on the door is very precarious, you can just about blow on it and it will open. And so, once she realised she could open then door, it was all bets off and so, after using all sorts of contraptions to keep the door closed (mainly ties tied around the door handle and a chair) we went out and bought a small hinge lock that secures her door shut. Her first night sleep wasn’t too bad, she got off her bed a couple of times and came to the door winging a bit, but I was most surprised that after 10 minutes she put herself back to bed. We had about 2 days of really horrible day naps, where she cried and cried outside her door, but I would go back in after about 10 - 15 mins and put her back on her bed. Often she would actually put herself back on her bed and cry for a bit longer before passing out. Her night time sleep was not affected at all, and it only took a few days for her day naps to go back to usual, especially once she realised she couldn’t open the door any more.

She did fall off the bed a couple of times in the following weeks, but after a few tears, she always got up again and put herself straight back to bed (I watched her on our video monitor…something I HIGHLY recommend to parents once your little ones are older so you can keep an eye on what they actually get up to when it’s nap/bed time). I think it really helped develop her own confidence to let her sort herself out when she fell off the bed, as I think us going in there every time would have disrupted her sleep. Toddlers are really incredible, and will continue to surprise you all the time at just how much independence they can actually handle (and how much they actually love being able to problem solve!) when given the chance.

Transitioning from Cot to Toddler Bed CityGirlSearching Blog (1 of 7).jpg

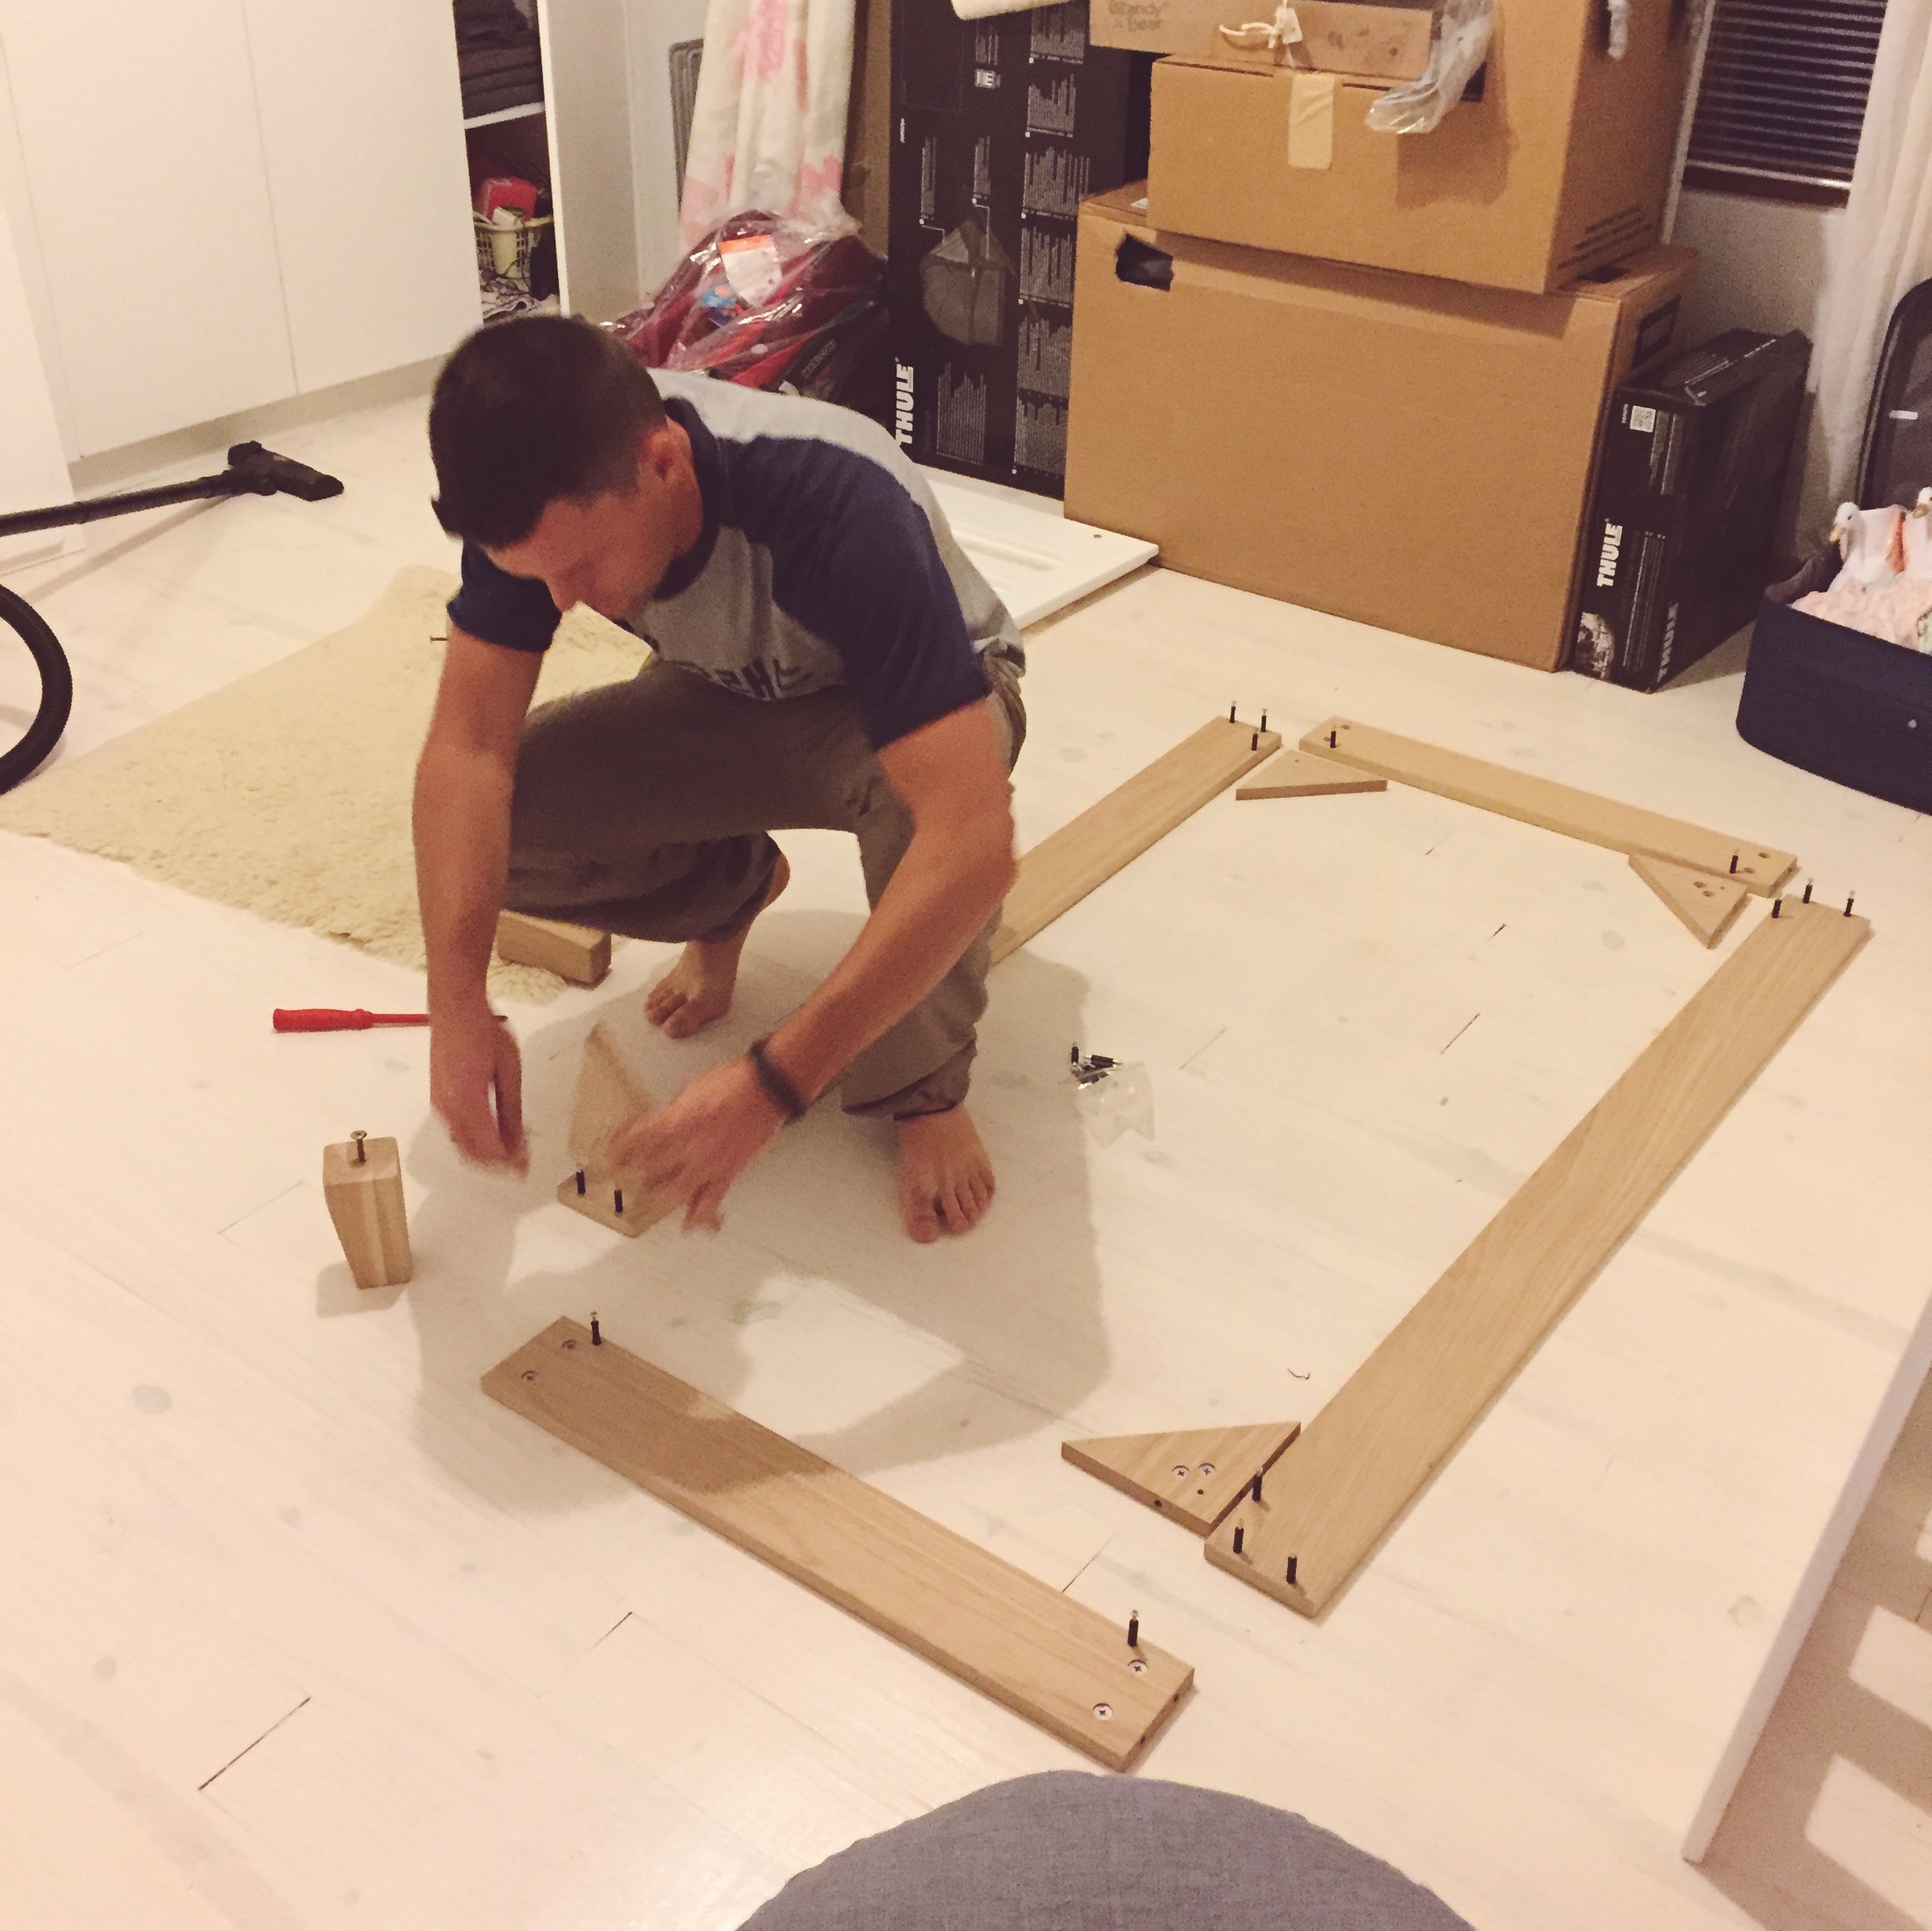
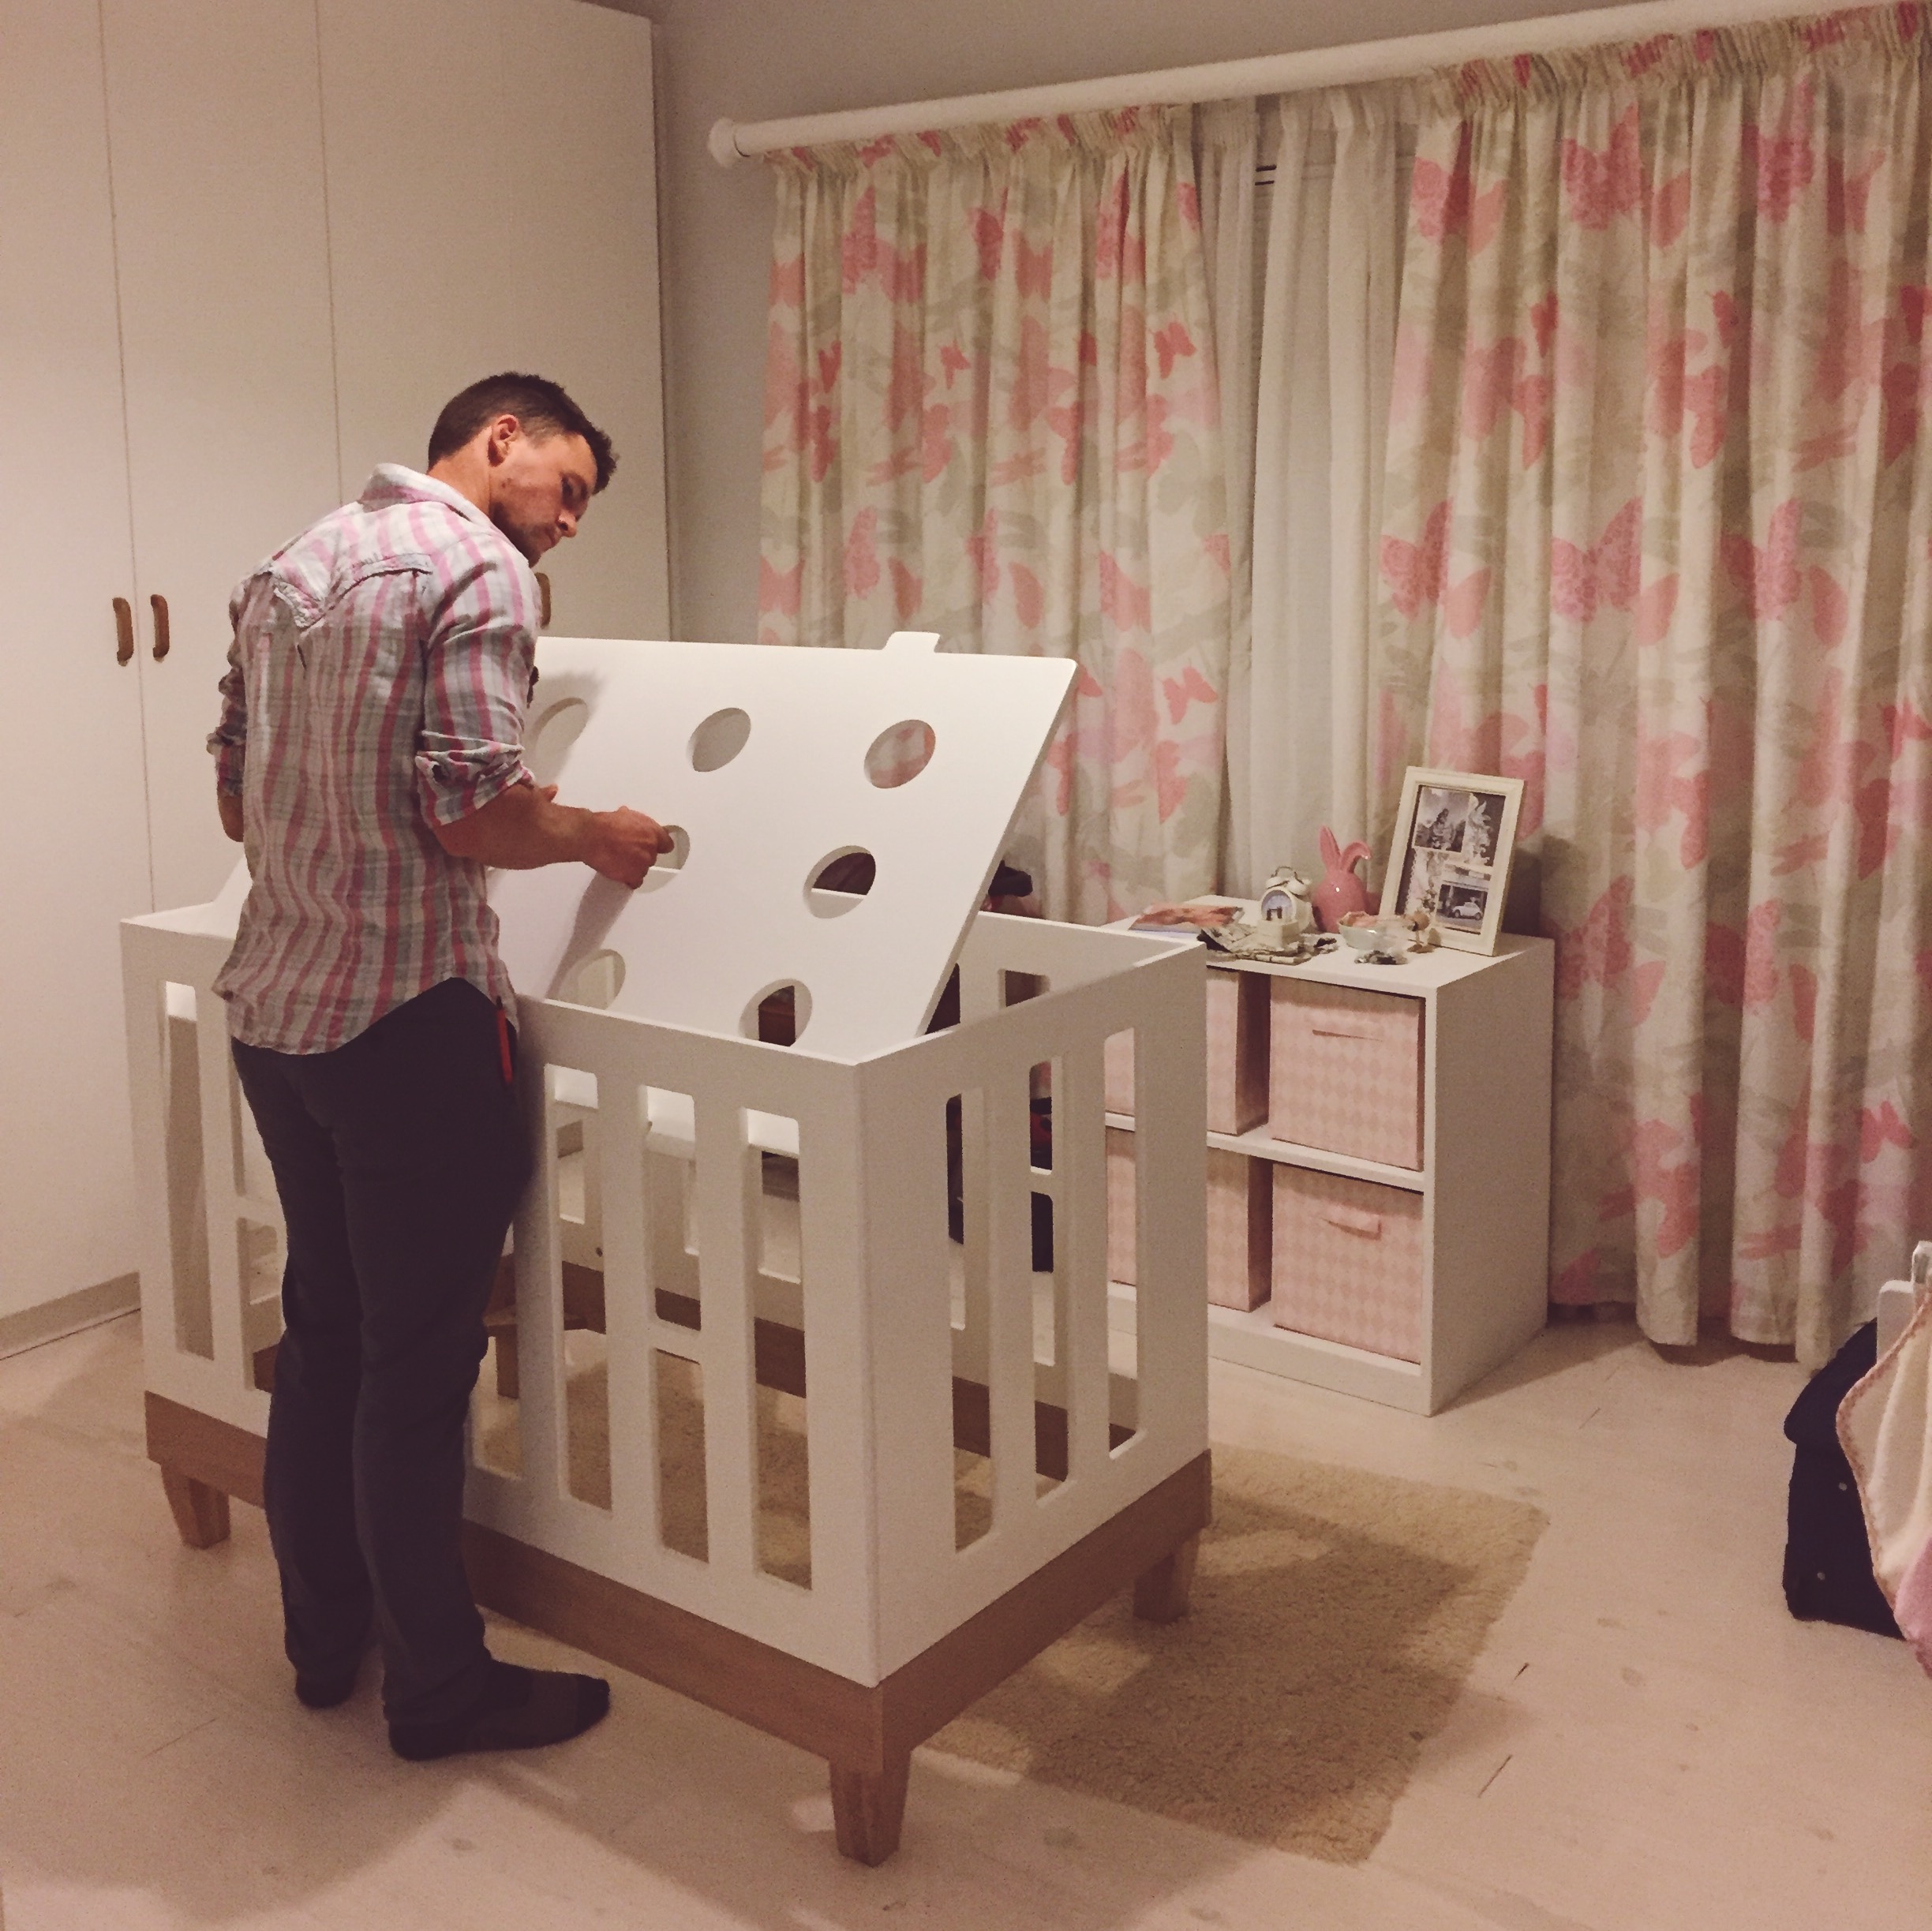
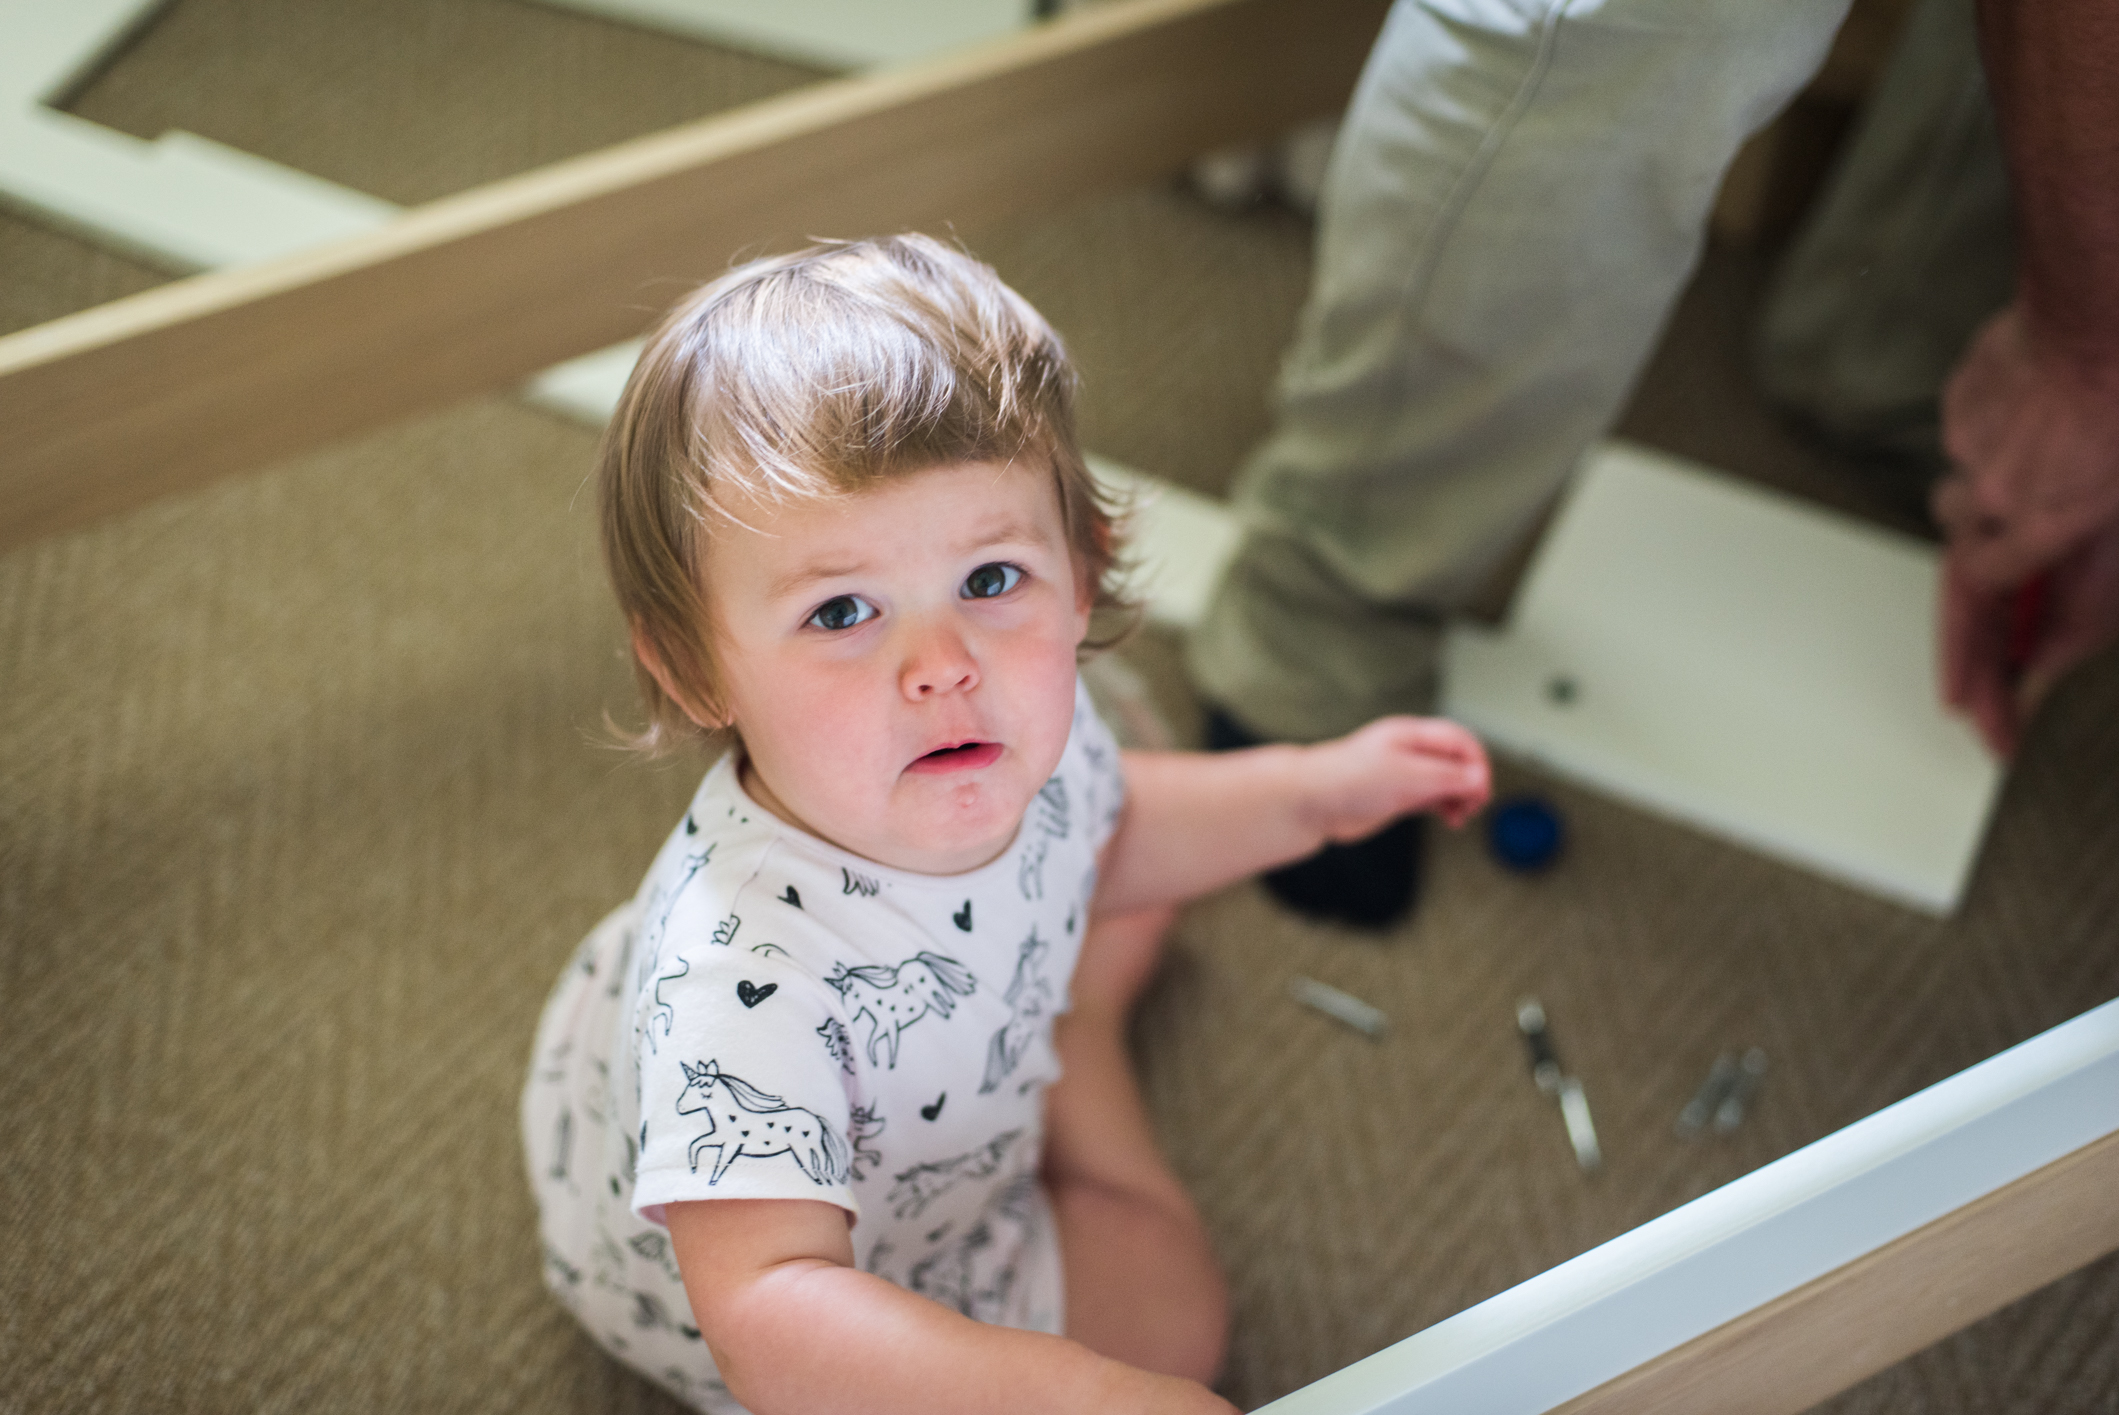
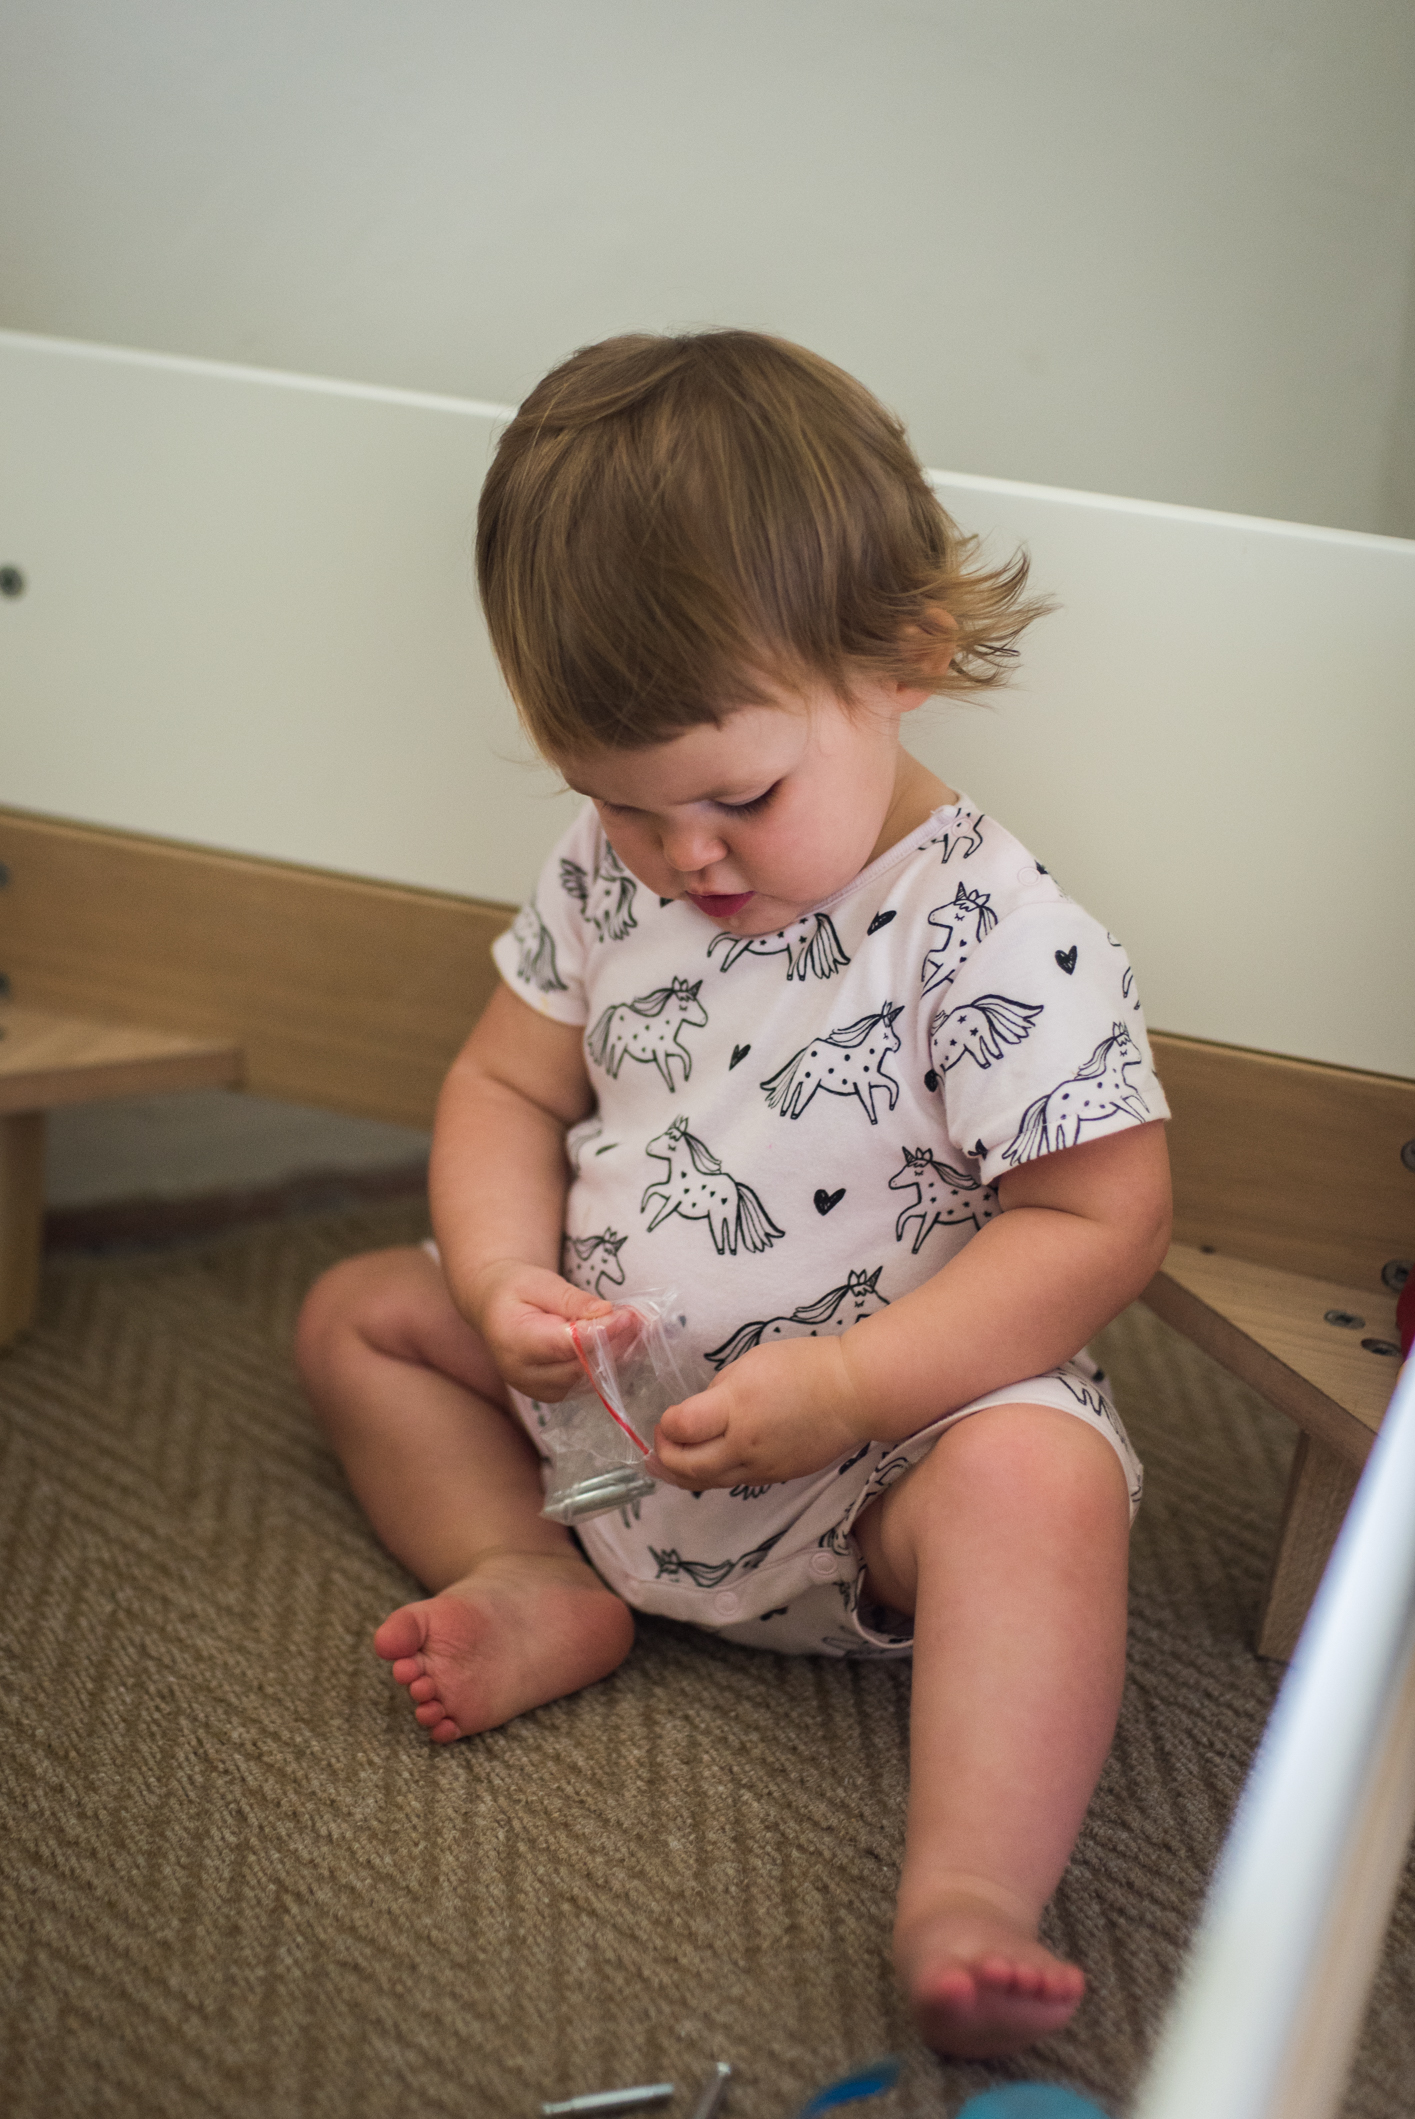
All in all it was a rather quick and easy transition. Something that I do think helped a lot, was to make a big fuss of the fact that she was now going to be in a big girl bed. We also included her in the actual dismantling of the cot (look at her cute cross face when we had to take away the sharp screwdriver so she didn’t stab herself in the eye!).

Making her a part of the physical side of her new bed, and then being firm with her when she got out of bed in the beginning helped too. Giving your little one freedom in their room is a huge step not just for them, but for us as parents too. It’s not for everyone, but I really love the Montessori approach of giving your child the freedom to be independent.

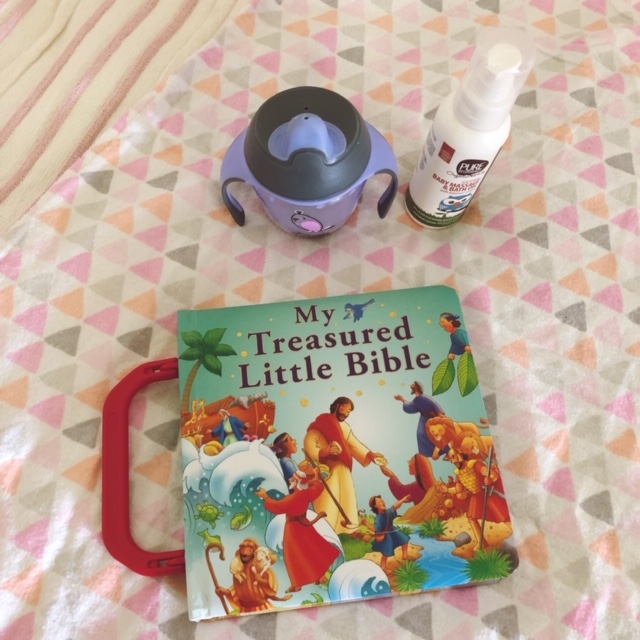
We did go through a few patches of Everly waking up much earlier than usual from her night sleep, but as she could now get off her bed, instead of crying for me to pick her up, she simply got off her bed and would go get books to read on her bed. Although I’m not sure what on earth she was actually looking at as we keep her room pretty dark with block out curtains. We have also gone through a few patches of her resisting her afternoon naps lately. I have spent a few afternoons listening to her play the xylophone for over an hour, but it’s my thinking that as long as she’s quiet and not crying, she can do what she likes in her room during nap time.

Sometimes I do still go in and firmly put her back lying on her bed with her blanket and dummy, and often she does then go back to sleep (we got a video monitor from the time we transitioned her into a bed so we could see what she was getting up to), but sometimes she just lies there quietly singing to her toys/reading her books. I know this might mean she is ready to drop that second nap, but rather than drop the nap time, I am moving towards a ‘rest time’ where she has to be in her room, with the curtains drawn, and I don’t mind if she isn’t actually sleeping at this time. This allows me a bit of breathing room during the day, especially as I have another little one to care for.

Transitioning from Cot to Toddler Bed CityGirlSearching Blog (7 of 7).jpg

Some things to keep in mind if you are going to allow your little one freedom in their room:

  • Safety wise, you need to make sure the room is completely childproof. We do have a few electronics around her room, but I have moved the plugs and hidden them from view. She has never shown any interest in those plugs, and when she has gone close to them we have been sure to firmly explain that they aren’t for touching.

  • You also need to keen in mind the heights of furniture, and make sure any furniture you have in their room is sturdy and won’t fall over if they climb up onto it.

  • I was also quite ruthless with her toys, as she now has access to all of them. Her chest of drawers is very solid and the drawers are very sticky so she can’t actually open them herself, and then all the other toiletries (wipes, creams, medicines) are put up high out of her reach.

  • Think about what you want to do with the bedroom door. Our old farmhouse is a little trickier with fitting a baby gate onto door frames, and this is why we decided to put a lock on her door from the outside. Everly no longer tries to open the door, so we don’t actually need to use it anymore during the day, but at night we definitely lock her door because I don’t want her roaming around the house while we aren’t there to make sure she’s safe. What friends have done is to put a baby gate on the door frame, meaning you can actually keep their bedroom door open if you want to. What you do to keep your little one ‘contained’ is up to you. Let me know in the comments below if you have any other creative suggestions.

How old was/is your little one when you moved them into a regular bed/plan to move them into a bed? How did the transition go? Let me know if you have any questions about the whole process, and I’d also love to hear how it goes for your toddler makes the big move.

Our Toddler's Evening routine - what we've done (and still do!) from +-3 months

Our Toddler Evening routine what we've done from 3 months citygirlsearching blog-01.png

Seeing as we now have a toddler and a newborn, I wanted to share the bedtime routine we have done with Everly since she was about 3 months old. I want to write it here so I am also able to reference it in a few months time when Aaron wakes up from is sleepy newborn slumber and starts being more wakeful. Hopefully you find this post useful/interesting, and as always, I’d love to hear from you in the comments if there is anything else you do that you find works for you and your family.

Before having Everly, I was adamant that a baby would just slot into our lives and we wouldn’t be ‘those people’ who plan their day around their little one’s naps. But alas, I have since realised, a happy baby = a happy mommy & daddy and wherever possible, we try to keep to our routine as much for their sake as for our sanity. Everly has always slept well, and slept a lot. It even got to the point where I was googling ‘can a toddler sleep too much’ because the majority of my friends seemed to have babies and toddlers that just ‘hate sleep’. And while I am going to be a bit controversial here (because I’m sure there are little ones out there that REALLY struggle to sleep) I am going to say that the majority of babies/toddlers want & need sleep, they may just need more help to actually get to (and stay!) asleep. Even at 17 months old, Everly still naps twice a day (mostly) and these two naps range from 1.5 - 2.5 hours each. She also sleeps at night on average, for 12 - 13 hours. This post isn’t meant to be an ode to how wonderful my child is (from what I can tell with my friend’s kids, Everly may be more of the exception to the rule than the norm) but I do wish at least one person had shared with me that it is possible to have a good sleeper, and that you shouldn’t feel bad about the fact that your child genuinely needs/wants lots of sleep. I think there are lots of factors that play a role in ‘creating’ a good sleeper (things like diet, routine, patience and a WHOLE lot of strong will when it comes to ‘sleep training’…I’ll share our thoughts on this in another post) but as always, each child is different and each family is different too, you need to find what works for you.

Everly Rose Newborn Photos by Roxy Hutton of CGScreative & CityGirlSearching (6 of 18).jpg

We have done the same evening & bedtime routine since Everly was about 3 months old. Before that, she just fed & slept anywhere and everywhere. From Day 2 home from the hospital, we put her in her own room, mostly because she was so noisy when she slept, that neither me or hubby could get any sleep. I LOVE the idea of co-sleeping, I just know that it wouldn’t work for our family. I am a very deep sleeper, but Farmboy isn’t, and as he is up at 4h30 every morning to go and milk the cows, co-sleeping is just not something either of us feel would work for us. Having baby/toddler in their own room, away from you so you don’t hear every single sniff and gurgle, helps a whole lot in ensuring a better sleep for mom & dad…but again, if this isn’t for you and you prefer to have baby in your room, that’s a choice completely up to you to make. This post is not a post to bash moms and dads who co-sleep etc but more about sharing what we do and what works for us.

Everly’s evening & bedtime routine

  • Supper is at 5pm.

Everly has been brought up on a low carb, no sugar way of eating right from day 1 of starting solids. If you’re South African, I guess you would say she was & is a Banting Baby (although we aren’t strict with carb counting) and if you’re not sure what Banting is, it’s basically a low carb high fat way of eating. What this means is Everly doesn’t eat any form of processed carbs (no toast/crackers/cereal/pasta etc) and no form of processed sugar (no juice/sweets/chips/cake/commercial kids snack bars etc). You would be surprised at just how much hidden sugar is in most baby food products…and while I can control what she eats, this is how we have chosen to raise her. You may be wondering what on earth I feed my child, so here are all my posts on #whateverlyeats:

I strongly believe diet plays a huge role in sleep/development/overall contentedness (and the same applies to us adults!) and it would be my first suggestion to look at your little ones diet if they are struggling with sleep.

  • Bath & bed time starts at 6pm sharp

If she’s been cranky/hasn’t had proper naps during the day we often start earlier so she’s in bed by 6pm, but very rarely is she in bed past 6h30pm.

Farmboy has always done bath time, as it’s his special time to with her. After her bath, she has her milk (I breastfed her up until 13 months - around the 3 month mark of my second pregnancy, at which time it just became too sore for me, and she got too big to be lying on me and my growing tummy) and that’s when we started her on cows milk. She gets a 150ml non spill cup of milk (it’s raw farm milk…which she has grown up on and is the same milk I used to make her homemade yoghurt which she ate from about 7/9 months old).

We started her milk in a TommeeTippee Explora Cup, and she’s still using it today. Even though this cup is probably more suited to babies than toddlers, Everly wasn’t ever weaned from breast to bottle, we went straight onto asippy/drinking cup from the breast, and so this was her water bottle, and now this is what she gets her milk in. I don’t worry about how much milk she drinks, and didn’t ever measure out exact quantities, even after I stopped breastfeeding. Reason being, she eats a LOT of dairy (mainly cheese and homemade yoghurt) and so I knew she wasn’t ever going to be calcium deficient, even if some days she would only drink a few sips of her milk at bedtime. Whatever she doesn’t drink at night, gets put back in the fridge and she gets that in the morning when she wakes up.

While Farmboy is bathing her, I get her milk ready, close the curtains and put her nightlight on (we use a beautiful pink Quartz lamp that she’s had in her room since she was born) as it gives off the warmest, softest glow. I bought her pink quartz lamp (and the white quartz lamp in Aaron’s room from StaticEnergy in Jhb).

I then lay out her pyjamas and night nappy (we use cloth nappies and the night nappy is always a rather big and bulky situation as it needs to last +-12 hours). Then I say goodnight to her, we say some prayers (when I can remember…I really want to reinforce this with her but haven’t been so great at it up till now) and I leave the room. Farmboy dries her off, puts cream/massage oil on her (we still use and LOVE Pure Beginnings Massage Oil), and then dresses her for bed. She has a dummy (which she has nicknamed ‘Nunni’ and a special sleep time soft toy, ‘Dudu’), which she only gets to have when it’s nap or bedtime.

We’ve always had a bedtime song that we have and still sing at bed time. It’s more of a lullaby that we hum, but it’s such a nice way to reinforce that it’s bedtime. When Everly would wake up often at night, one of us would always use that lullaby to calm her down and help her get back to sleep.

Once she’s dressed, it’s story time. Sometimes she will still have her milk at this point, but we take it away once we leave the room. Story time is mostly a full blown discussion of ‘what’s da’ or ‘what’s that’ as she points to each and every picture in the book. It’s the sweetest thing listening to the Daddy & Daughter chatter before bed. Once story time is done, it’s a quick kiss good night and and ‘I love you’ and then whoever is doing bedtime walks out. 9 times out of 10 she settles quickly. But since getting a video monitor a few months ago, I’ve actually seen that she isn’t always sleeping when I think she is! I don’t mind though, as long as she’s happy and quiet in her bed, I don’t really mind what she’s getting up to. I’ve watched her for over an hour just lying there, legs in the air, playing wit her DuDu and stroking her face with it…funny thing.

We also recently took the sides down of her cot (CoziCot Stijl) and turned it into the toddler bed it’s able to convert into, as we slowly transition her to the single bed in her room. It’s been about 3 weeks of her in her ‘big girl’ bed and it’s been a relatively painless process (blog post to come on that move soon). I was REALLY nervous about the whole thing, especially as she is now able to get in AND out of her bed whenever she wants to, and has free access to everything in her room, but I have been pleasantly surprised at how it’s all gone. I was most worried that her night time sleep would be disrupted by the move, but apart from one night of her falling out the bed, and her waking up slightly earlier than normal (6am instead of 7am), it’s like nothing has changed. I think it’s been such a smooth transition because of the same routine we follow every night. Even when we go away, we follow the same ‘bath, milk, pj’s, story, bed’ routine and 9 times out of 10 she goes down without a fuss. We also, as much as possible, stick to the 6pm bath & bed time routine no matter where she goes to sleep.


I weaned Everly off her last night time/early morning (it was at about 3am) feed at about 7 months. We had a couple of rough nights, but she adjusted quickly. We then went on an overseas trip to the UK, and she went back to demanding that early morning feed, which I went back to giving her during the trip as we were staying in relatively small homes with family and I didn’t want to keep everyone up. But once we got home I weaned her off that feed again and within a few days she went back to sleeping +-12 hours at night.


If you’d like me to share our sleep training ‘methods’ I’d be happy to write about them in a separate post. Hubby and I are very strict when it comes to bed and nap times, and do leave Everly to cry if it’s time to sleep and she’s up and about. This has worked extremely well for us, and I’d be happy to share what we’ve done, right from the beginning…let me know in the comments below!

I hope you’ve found this post interesting. I’d love to hear about your families routine, and what you’ve found works for you. Leave me a comment below, I always enjoy hearing from my readers.

x

What's in my hospital bag - What to pack for baby

What to pack for for hospital for baby-01.png

I have T-minus 10ish days until my little boy joins us in the world (unless he comes early like his sister did, in which case I may only have 1 or 2 days to go!!!!), and I have finally finished packing his bag for hospital! They always say you should have your bags ready early, as you just never know what might happen, but I’ve really been rather late to the party with this second pregnancy. But, after a couple of really achey days and loads of cramps and contraction like symptoms, I decided enough was enough and washed everything that needing washing, and packed everything into it’s place. I had packed my own bags a little while ago (click here to read) and I can officially say we are ready! To be fair, babies don’t care whether you’ve taken the perfect photo of their bags before they decide THEY are ready to be born, but it does feel good to have packed everything I’ve wanted to pack, as well as photograph it all and write this blog post.

What you pack will largely depend on what hospital you go to, and what that hospital provides you with during your stay. Some hospitals give you a baby bag with lots of essentials (like nappies, cotton wool etc) and others don’t. Your hospital also won’t provide clothes for your baby, and if you’re anything like me, you might be quite particular about the nappies & products used on your newborns skin. I will be having my baby at Mediclinic in Pietermaritzburg (if all goes according to plan and I am able to have the VBAC delivery I am hoping and praying for, and if I need to schedule a caesar for any reason, I am hoping to book in at Life Hospital in Hilton) and they give new moms a lovely baby bag upon delivery which contains one pack of newborn nappies, as well surgical spirits for the umbilical cord, cotton wool, and a few other sample sized versions of baby wash/shampoo/lotion. Even though these are really lovely extras, I will be packing everything baby needs from the nappy & skincare side myself, and then will share below what blankets and clothes I’m packing too.

what to pack for baby for hospital citygirlsearching blog

Here is the basic guide I was given by my hospital:

  • Five sets of clean baby clothes: vest, babygro, wrapper/receiving blanket, socks, beanie

  • One warm blanket

  • If you are bottle feeding, our milk kitchens are fully stocked and equipped. You are welcome to bring your own bottles, teats, formula milk and sterilising unit if preferred

  • Dummy and holder (optional)


Here is a breakdown of what I’m packing for baby, as well as the brand names in case you like what you see and want to now where I got each item from. I also am pretty sure I’m going to add things to the bag last minute (like more swaddles/receiving blankets) but I am trying not to overpack like I did with Everly:

Blankets:

  • 1 soft cotton receiving blanket (Woolies)

  • 1 soft cotton swaddle blanket (Giggle & Beans)

  • 1 bamboo muslin (Kapas Baby)

  • 1 fluffy fleece blanket ( Not packed or pictured yet)

what to pack for baby for hospital citygirlsearching blog

Nappies & Wipes

We used cloth nappies from the newborn stage with Everly (I started cloth from about Day 5, just after we had gotten home from the hospital) and plan on doing the same with BabyBoy. But I’m not going to pack any cloth nappies for hospital, opting to rather use bio-degradable disposables which I had family bring over from the UK.

Eco-friendly/bio-degradable nappies are unfortunately really pricey here in South Africa, but they are available online from places like Faithful To Nature and The Organic Shop. I love the Kit&Kin range of nappies (from the UK) and luckily had family go there on holiday who could bring them back for me. I’m packing 2 packs (40 nappies in total) for our hospital stay. In case you’re wondering what I do with the packs of disposable nappies I get given (like for example the packs that come in the Dischem Baby Bag (click here to read about how to get your free baby bag) and the Mediclinic Baby Bag) I either donate them or re-gift them to friends. I do keep a couple on hand in my nappy bag for emergencies, but haven’t bought a disposable nappy for Everly in over a year!

As for wipes, I absolutely LOVE Pure Beginnings, and always to stock up on their wipes at the MamaMagic Baby Expo as they are always at a really good price. I also buy a pack here and there when I am in BabyCity or Dischem, as it hurts less to buy them gradually rather than all at once. The Pure Beginnings baby wipes are biodegradable (but please try not to flush them down your toilet…although the odd one won’t hurt, flushing wipes…even the ones that say ‘flushable’ can really wreck havoc on your drainage system! These wipes are so soft and gentle on the bum, and smell wonderful…I highly recommend them!

what to pack for baby for hospital citygirlsearching blog

Skincare

I really, really, really love all the Pure Beginnings baby products I’ve used. And I especially like their Probiotic range for newborns. I used the cream wash and the body cream on Everly until she was about 5 months old, and still use the cream wash every now and again. For hospital I”m packing their travel sized products (where I can) even though we know we will only bath baby once during our stay, choosing to only do this right before leaving the hospital. I think it’s so important that baby. You can read up yourself as to why some parents choose to delay their baby’s first bath, here is a nice article.

Here is what I’m packing in a little toiletry bag:

  • Baby Wax (Oh Lief) this was a sample from Everly’s baby shower, and I just love how smal and compact it is and it does a great job at moisturising dry patches.

  • Wecsin Powder (for the umbilical cord…this all natural antiseptic powder is AMAZING for wounds, and so much nicer than the Surgical spirits traditionally used…it’s also amazing to use on your Caesar scar).

  • Probiotic Baby Cream Wash (Pure Beginnings)

  • Massage Oil (Pure Beginnings) I’m not sure if we will even use this as I prefer to use the Pure Beginnings Sensitive range for the first few weeks at least, but I love this oil and want to have it on hand, just in case.

  • Bum Cream (Pure Beginnings) & a small tub of Sudocream

Something else you might want to pack is a pair of nail scissors. Lots of babies (especially if they arrive past their due date) have really long fingernails. I personally just used to bite Everly’s nails while feeding her (they are so soft and easy to bite) and although it sounds weird, I was too scared that I would hurt her with the scissors and found I was able to be far more careful with my teeth. I only started using nail scissors from about 6 months or so.

what to pack for baby for hospital citygirlsearching blog

Clothes

Eeeek this was really hard.

When Everly was born it was the beginning of September, and as the weather was more on the cool side, it was easier to pack for that than I’ve found now that I’m having a baby in the height of Summer. Hospitals are generally kept at a pretty standard temperature, but I’ve never been very good at gauging what I should dress Everly in. I have gone with what friends recommended, and that is long sleeve baby vests and long sleeve baby grows:

what+to+pack+for+baby+for+hospital+when+giving+birth+citygirlsearching+blog

I have also packed each outfit in it’s own ziplock bag to help keep things organised:

  • 3 x outfits consisting of long-sleeved vests with poppers, long sleeve long leg baby grow/onesie, socks) and beanie (not pictured)

  • 1 x going home outfit consisting of sleeveless vest, long sleeve top with poppers, footed leggings and a beanie

  • Extras: 2 long sleeve vests with poppers, footed leggings, socks, beanie

Long-sleeved white vests: Woolworthes

Socks: Woolworthes & H&M

Onesies: Next UK & Woolworthes

Going home outfit (green & cream): H&M

Goodness me I can’t get over the size difference between certain brands. The two mostly white onesies above were Everly’s, and came from Next in the UK. They are TEENY TINY compared to the Woolies (blue) onesie and the other newborn outfit from H&M (green and cream). On the other hand, the newborn sleeveless vests I bought for Everly just before she was born only fit her for about half a day as they were SO tiny. I ended up having to use scissors (I kid you not) to cut them off her. It does seem that Woolies has adjusted their sizes to be more appropriate these days.

what to pack for baby in hospital when giving birth citygirlsearching blog

Extra’s

I’ve also packed a dummy, a Blue NUK Silicone Size 0 Soother (part of the Blue & Rose collection). It comes in a set of two and also comes with a handy sterlizing/carry case to keep them clean. These are the same dummies Everly used, and the same brand she uses now. We didn’t ever have any problems with nipple confusion etc, and she took to a dummy pretty easily (thank goodness!)

I plan on breastfeeding, and so won’t be taking any bottles along with me, but you might choose to pack your own preference of bottles and teats. I was given a set of TommeeTippee Closer to Nature bottles for Everly’s baby shower, so I will have these on hand at home. We didn’t really do much bottle feeding with her, as I work from home and was around to feed her 99% of the time (click here to read more about our breastfeeding journey).

Sleep association/teddy/fluffy toy of some kind is also a nice extra to take with you. I won’t be packing one as I’d rather not worry about it getting lost in the nursery during our stay, and let’s be real, newborns are pretty much allllll about sleeping and feeding at this stage of their lives. Everly LOVES her Nattou Mini DouDou (you can buy these from Kids Emporium & Hamleys here in SA) but word of warning, whatever cuddly toy you choose for your baby (or whichever one they choose for themselves) make sure you rush out and buy a back up to have on hand for wash days/the times you forget it at Granny’s house ;)


There you have it, the items I’m packing in my hospital bag for my baby boy.

Here is a link to the post on what to pack for mommy (I have packed a bag for labor & a bag for recovery…just to help keep things organised and so hubby knows where everything I might possibly need is)…click here to read.

Please let me know if I’m leaving anything out, or of there’s something you wish you had packed. And as always, feel free leave any questions you may have in the comments below, I love hearing from you!

x

What's in my hospital bag - What to pack for mommy

what's in my hospital bag - what to pack for labor and recover after birth-01.png

The photo below shows what was in my hospital bag for when I gave birth to Everly in September 2017.

I wasn’t sure how hot or cold the hospital would be (although I was told to expect all sorts of ‘seasons’ even during my 3 day stay due to the aircon working/not working). I had Everly at Mediclinic Pietermaritzburg, and had my husband and doula present through the entire labor (it ended up being an awful long time….nearly 36 hours!) and unfortunately ended up in an emergency ceasar. I feel as though I pretty much experienced both types of births (i.e. went into labor and laboured naturally, with no pain meds and then had the recovery for an emergency caesar) and would like to share what I packed and found useful, as well as the things I will definitely be packing this second time around.

I’m now 35 weeks pregnant, and have been told it’s probably a good time to get all my bags together (you know, just in case things start happening earlier than expected). So whether you are hoping for a natural birth or planning on having an elective caesar, this post should give you a good idea of what to pack. I

What to pack for hospital.jpeg

Not everything I packed last time is pictured above, as I had two separate bags, one for labor and one for my stay in the maternity ward afterwards. It helped separating everything and not having to dig around in one huge bag, and it really helped Farmboy and my Doula find things when I wasn’t able to be very coherent. I’m also going to mention afterwards what I plan on packing this time around, so you will be able to see what I actually ended up using, what I wished I had, and what I would highly recommend packing in your bag.


What I’m packing this time around:

As I’m not sure how this birth will go (I’m planning on/hoping for a natural delivery and spontaneous labor) but have learned from my first birth to be prepared for everything. Because of this I’m going to make sure to pack for both a natural & a caesarian…what you would pack isn’t very different, but if you have a natural delivery you might only spend 2 nights in hospital, whereas a caesarian is generally a 3 night stay.

You still need ALL of those maternity pads (I thought you only needed them if you had a natural delivery!) and those mesh panties WILL become your new best friend.

I am also packing two bags again, one for labor and the other for the time I spend recovering in the maternity ward.


What I’m packing in my ‘recovery’ bag:

  • Feeding bras (I actually only ended up wearing one when I had visitors, and the rest of time was far more comfy without one). My favourite ones are the soft nursing bras from H&M. I also really like their nursing tops (strappy tops that have a built in bra that you can lower the straps down to breastfeed). These tops are amazing for layering under your clothes and give your tummy more support, while also making you feel less exposed when feeding.

  • Comfy Pyjamas: last time I packed about 4 different sets of cute pyjamas, and ended up wearing the same one. I packed long night dresses that buttoned up the front, but found the buttons to be a pain to keep having to do up. This time around I am packing one ‘nice’ sleep shirt that buttons up, a soft cotton/viscose nightie (these ones from Woolies are my favourite as they are easy to pull down to feed) and this top and bottoms from PerryWinkle…see below:

  • Breast-pads: Generally your milk only comes in around day 3 or 4, and before that your body is only producing colostrum and so you don’t generally need to worry about leaks. My milk came in when I got home, and from the very beginning I had a very forceful let down. What this means is your milk pretty much comes gushing out (of both sides) as opposed to it flowing in a slower, more manageable way for baby to be able to drink nicely. Often, women with a forceful let down have problems with baby having lots of wind as they are trying to drink as fast as the milk flows and end up gulping lots of air. There are lots of things you can do for a forceful let down (different feeding positions etc) and it’s generally considered a positive problem to have. But one of the effects of having such a strong letdown was a lot of leaking, and so went through boxes and boxes of breast-pads (the Pigeon ones were my favourite disposable ones, and the Biddykins Breast Pads were my favourite washable/re-useable pads). Having to wear breast-pads was always such a pain, and the worst was forgetting to pack a stash of them when leaving the house. I always make sure to keep a whole stash in the car for those ‘just in case’ moments.

  • Breastpump & Nipple Shileds: While it isn’t advised to start pumping before your milk supply has properly established (usually around 6 weeks) I highly recommend taking a pump with you to the hospital. I had a few moments when my boobs were so full and uncomfortable, and while I didn’t really know what I was doing with the pump, it did help relieve them a little. Ideally you would want to pop baby straight onto the boob rathe than pump, but Every was placed under the lights to treat her mild case of jaundice for a couple of hours a day, and so it was during that time on our last day in hospital that I found the pump really handy. All that I was able to pump was a teeny bit of colostrum, but it did help.

    What pump you buy is a very personal choice. I didn’t want to invest in a really expensive pump as I didn’t know how my breastfeeding journey would turn out. Personally, I would recommend buying a manual pump in the beginning, and then depending on how your breastfeeding journey goes, and if you have to go back to work, then perhaps you can invest in an automatic one if you find the manual one too time consuming/frustrating. I did pump quite a bit of milk and ended up building quite a large stash of milk in my freezer that I didn’t ever end up using. I donated my frozen stash to one of the Doula’s in the area who was helping a new mommy and her very prem baby. This was so special for me.

    The reason I didn’t end up using the stash I had so lovingly built up was because I work from home and so was always around to be able to feed Everly directly. When she got older and I did leave her with Granny, she didn’t every really take to a bottle (I didn’t force this issue because I realised I didn’t really need to and while it may have been nice and convenient to have hubby feed her, I really cherished our special time together). Once baby gets older they go longer and longer between feeds, and so you do end up being able to leave them for longer periods of time without needing to worry about feeding. In these instances it was me that ended up suffering more, as my boobs adjusted to not being ‘drained’ and so I made sure to pack my pump in the car with me just in case I needed to pump for my sake. This is another bonus of having a smaller, more compact manual pump as you can pop it in your bag for emergencies. I really liked the Avent Manual pump, but have heard from loads and loads of mums that the Clicks Manual pump is just as good and about half the price. I have also heard amazing things about the teeny tiny and compact silicone breast pump (you can buy this one online from Biddykins or Faithful To Nature.

    Before having Everly, I had no idea what a nipple shield was. It just sounded like some sort of weird kinky object, but now, after using them, I would recommend them 100% and strongly recommend friends pack them in their hospital bags for just in case. While a lot of the very ‘pro breastfeeding’ groups don’t recommend the use of them (they say they can cause nipple confusion and make your breastfeeding journey harder when it comes to weaning baby off them) I just feel that if they help you continue to breastfeed (even if they require effort to wean baby later on) they are 100% worth it. Breastfeeding isn’t always easy, and doesn’t always come naturally to a lot of moms. I wrote a post on my own 13 month breastfeeding journey (click here to read it) and offer lots of tips and encouragement for new moms. I say pack a set of nipple shields in your hospital bag for just in case. You don’t have to use them by any means, but if you have them then at least you have the option if things get off to a difficult start with your little one.

  • Gown & slippers: definitely pack a comfy gown & slippers to wear while wondering around the hospital. Just bear in mind the time of the year (in Winter you might want to wear a fluffy gown and fluffy slippers vs Summer…although the hospital will be temperature controlled). As with all the clothes I packed for hospital, I washed everything in a baby friendly detergent. Newborns have such a sensitive sense of smell, their teeny little bodies haven’t had any time to adjust to their new life outside of your tummy, and so you want to try and ensure they aren’t going to get a rash/reaction to the smells on your clothes (the same goes for body washes, perfume etc). My favourite baby detergent is the W.LAB brand from Woolworths. I washed all of Everlys clothes in it until she turned a year (she only officially started crawling then and so before then her clothes didn’t really get very dirty) and after that started washing all her clothes and blankets in the same washing powder we use for everything else in our home (Ariel). You don’t have to use a baby washing detergent, it all depends on how reactive your baby’s skin is.

  • Pads & Panties: whether you have a natural or a caesarian birth, you will bleed (for up to 6 weeks postpartum) and so will need to have a stash of pads on hand. I am so thankful to my sister-in-law who told me about this, as I had no idea. Maternity pads are your best bet (the Carriwell and Dr White ones are great) and then I recommend having a smaller stash of regular pads for later on when the flow lightens up. You will be given a pack of pads to use during your hospital stay (I was also given a pack in my Dischem Baby Bag and in the Baby Bag given to me when I had Everly in hospital) but if you want to stock up, you can buy maternity pads at most pharmacies, and then Clicks and Dischem have a really good selection. You can also buy lots of the Carriwell range on Takealot. Then I have to mention the mesh panties…these bad boys will become your best friend! They are gently on your tummy (especially if you’ve had a caesarian) and are big and stretchy enough to be comfortable. They are basically designed to hold your maternity pad in place, and while they aren’t the most glamorous of things around, they are super comfy! They come in packs of two, and you can either throw them away after each use, of you can gently handwash/machine wash them and re-use. I gave them a good wash in the shower between uses and then they dried really fast as they really are just a soft mesh material.

  • Pillow, extra pillow cases, a couple of dark coloured face cloths & 3-ply toilet paper: I really, really, really loved having my own feather pillow in hospital. If you do pack your own pillow, make sure to pack an extra pillow case (it’s so nice to put a clean and fresh one on) make sure they are brightly coloured so you don’t loose it during your stay. Dark facecloths are so you can freshen up nicely in your first few showers postpartum (you won’t want to use a white facecloth during that time, trust me!) and then my absolute MUST PACK is soft toilet paper. Maybe it’s just me, but having something soft to use when on the loo felt like a HUGE luxury after my long labor. My mom was the one who thoughtfully brought me a small pack of 3 ply paper for my stay. Needless to say it’s not something I would have thought about before hand, but it makes such a difference to use that instead of the horrible and scratchy 1-ply that is usually in the hospital loos.

  • Snacks: while you will get a good 3 meals a day during your stay (as well as tea/coffee mid morning and afternoon…gosh those first few cups of tea were heaven sent!) I was hungry ALL of the time, and often just wanted something handy to snack on and drink. I really enjoyed those small juice boxes from Woolworths, home baked bran and raisin muffins, biltong, nuts and those yummy oat bars from Nature Valley. I made sure to stock up on all these things for home (we stay about 1.5 hours from the nearest grocery store) but while in hospital, it was easy for hubby to pop out and grab me snacks and drinks during my stay.

  • Comfy going home outfit: I packed one of my Cherry Melon maternity dresses to wear for the car ride home as it was loose fitting and nice & cool. Bear in mind you will (probably) still have a tummy for the next good while (I read somewhere that you still end up looking about 4-5 months pregnant after baby) and so I knew I wouldn’t want to wear anything tight. If you have had a caesarian, you will especially not want to wear anything that is tight on your scar. A dress was really comfy.

  • Toiletries & Makeup:

    • wet wipes: my absolute favorite are the Garnier Skin Active Micellar Oil Infused Cleansing Wipes as they are super soft, gently, smell amazing and leave my skin feeling wonderfully soft and moisturised) .

    • Face Cleanser, Cream & Tonic from Skin Creamery. Their all natural & organic range of facial products smell amazing, and are really gentle on the skin. I love that they contain no nasty additives and leave your skin feeling wonderful. Just what every new mom needs. I also use the Oil-Milk cleanser & Everyday cream on my body.

    • Shampoo & Conditioner

    • Concealer/BB cream, Pressed Powder, Blus, Lip balm & Mascara: just a few of my favourite makeup products so I feel a little more like myself, especially for photos during my hospital stay.


What I’m packing in my labor bag:

  • 2 Big fluffy towels: during my labor with Everly, I was in and out of the hot shower constantly. The hot water really helped with the contractions, and I really didn’t enjoy using a wet towel every time I came out the shower. The hospital did supply one towel, but I really liked having my own.

  • 2 gowns: I wore one gown while things were ‘easier’ in the beginning of labor (this is the same pink gown I had packed and used for my stay in the maternity ward), and then really liked having my fluffy gown on hand to use in between showering. It also was the only thing comfortable enough to wear that actually made me feel covered up, and at the same time was easy to take on and off when needed.

  • Slippers: I packed one pair of slippers that I had in my labor bag, and then used those same ones once I was in the maternity ward later.

  • Dark coloured face cloths: these were absolutely essential during labor, and my Doula used two for cooling me off and keeping me comfortable when things got tough later on in labor.

  • Snacks: I didn’t want to eat much while in labor, but devoured a whole bag of Woolworth’s soft gummy sweets. I also enjoyed being able to drink apple juice in the beginning, but later on only wanted to suck on ice chips and drink water. Having some of your favourite snacks and drinks on hand (this is hospital dependant and not always allowed especially if you have an elective caesar booked but pack them anyway, you’ll get to eat them afterwards in any case).

  • Music: having something to listen to when things really started heating up was essential. It helped me to stay relatively ‘out of my body’ and focus on my breathing. Make sure you pack your charger for your phone/ipod and that you have comfy headphones too.

  • Nice smelling candle: this was another MUST have for me. I had a very special candle from South Korea which I just love and always makes me feel nice and calm when lit. Some ladies prefer some essential oils for massage or their favourite hand cream.

  • Toiletries: I’ll have my toiletry bag with me during labor with everything packed as specified above. As I was in and out of the shower, it felt great to be able to put cream on every now and again, and to use face wipes as the time went on.


There you have a full run down of what’s going into my hospital bags this time around. It’s on my To Do list to make a video of the above, and if I get around to it I’ll post it below. I am also writing a post on what to pack for baby next, so keep an eye on the blog for that. I’ll link it below when it’s up.

Please feel free to leave me a comment below if you have any questions or comments, I love hearing from you! Also, let me know if I’m leaving anything out!

x

15 months - What Everly Eats along with tips & ideas for your little one

What Everly Eats at 15 months Banting Baby Low Carb High Fat for Toddler CityGirlSearching Blog-01.png

I haven’t done a post on Everly and her eating habits for a while, and so thought it time to remedy that and hopefully inspire you with some meal ideas. And at the same time, I’d love to hear from you in the comments as to what your little ones are eating to help inspire me!

In case your new around these parts, Everly eats a pretty much Banting/LowCarbHighFat diet with no processed foods or sugar. This means she doesn’t get bread or pasta, and lives off of meat, fish, veggies, lots of full cream dairy products, loads of eggs and a bit of fruit. She’s a healthy, happy chubby baby and is never sick (I could chalk this up to good genes and the fact that I breastfed her till over a year) but I really believe her diet plays a big role in her health). I don’t judge any of my fellow moms, we all make our own choices, but we choose not to give our daughter anything processed (and try as much as we can to steer clear of store bought baby food….although those food pouches have their place!). This decision isn’t an easy one, especially when it comes to birthday parties, but like I tell family and friends, while I am able to control what Everly eats 99% of the time, I want the food going in to nourish her completely, and so she’s stuck with a mom who feeds her chicken liver sardines ;) It’s also a lot more work to prepare your own baby food, but as with our decision to do cloth nappies, you get into a routine and it just becomes a part of your day. Also, a low carb ‘diet’ (although I hate that word and my little girl is not on a diet…let’s go with the term lifestyle) doesn’t mean NO carb. We don’t count carbs at all like a lot of very strict Banters, but as we also eat a pretty low carb diet, we swop out white potatoes for sweet potatoes, and the veggies she eats regularly are butternut, sweet potatoes, beans, broccoli, cauliflower and carrots.

Here are my older posts on our journey to solids:

I’m 7 months pregnant with Baby#2 and so haven’t been feeling the most inventive when it comes to preparing meals, and as much as I love the idea of Everly eating what we eat, our meals are pretty sporadic too, and we eat a lot later than her so she either eats leftovers the next day or I end up preparing her something much earlier on in the day. This leaves me only feeling up to opening a tin of tuna by the time supper time comes around for us.

Also…how many days can a child survive on cheese alone?!?!? I remember seeing my friend Deborah post about that a few weeks ago and I really had a good giggle. While Everly is a pretty amazing eater and gobbles down just about everything we throw at her, she has been very fussy with texture lately. It’s really strange as she will eat hard/crunchy/very textured things but then went through a funny stage of refusing meat and spitting out most of the food I’d try give her. After a week or so of VERY frustrating meal times, I realised it would very unlikely that she would starve herself and we seem to be coming out of that phase.

My friend Sophie gave me some wonderful words of encouragement. She said it’s our jobs as moms to decide when baby eats and what they eat, and for them to decide on how much they want to eat. This helped me a lot during what felt like a very dark time. Luckily we are out of that fussy season, but it really just goes to show you that ALL babies/toddlers go through phases and they do (hopefully for everyone!) emerge and return to their old selves before you know it.


Here is Everly’s current rough schedule:

  • 6 - 7am wake up (I give her a spill proof cup of milk to drink in bed while she ‘logs on’ in the morning). I also leave her in her bed till about 7am as most of the time she is happily playing with her teddy and talking to herself at this time. I also give her a book or two to look at which generally keeps her occupied for a good 20 minutes or so.

  • 8am Breakfast

  • 9am - anywhere between 10h30/11h30 nap time

  • 12 lunch

  • 1h30/2pm - 3ish nap time

  • 4pm snack

  • 5pm dinner

  • 6pm bath, dressed for bed with a cup of milk, story and bed by 18h30


Here are some ideas for meals and snacks that I give Evs.

I find I go through patches of being super inspired to whip up gourmet meals, and other days where pieces of cheese and baby tomatoes seem to be like the loaves & fishes and keep her going.

Breakfast

  • Scrambled Eggs (I whisk 2 eggs and a dollop of cream cheese together and add that to a pan of melted butter) and cook. I keep the eggs soft as I am not a fan of rubbery, dry scrambled eggs! Everly eats scrambled eggs pretty much every day of the week, and then I throw in a breakfast or two (if it last that long!) of chia porridge.

  • Chia Chocolate Porridge: this is a great recipe from the Real Meal Revolution: Raising Superheroes book for Kids by Tim Noakes. This is where I usually turn for low carb meal inspiration.

  • Both of the above are usually followed by a bowl/cup (I still use and LOVE these Avent breastmilk storage cups for storing/freezing/feeding Everly her food) of full cream, homemade yoghurt with either a pinch of cinnamon or some frozen berries.

SCF618_10-IMS-en_SG.jpeg

Lunch & Snacks

Lunch is usually a mix of whatever I have on hand, so veggies she can feed herself and then some leftovers…usually followed by another cup of yoghurt or fruit she can chew on herself. I mostly end up doing snacky type foods at lunch time:

  • chopped up cherry tomatoes

  • pitted olives - you’d be surprised at the flavors your toddler may enjoy! Everly is currently VERY into olives.

  • blocks of cheese/squares of Kiri cream cheese

  • half a tin of tuna/oven baked hake in butter (recipe posted below)

  • roasted vegetables (I usually do a tray of sweet potatoes or butternut that lasts for a few days). Simply chop up veggies of your choice, drizzle with oil (I usually use avocado oil or butter) and then sprinkle with your choice of herbs. Roast in the oven until crunchy and serve warm.

  • beans (I’ve only just realised how great canned beans are!). Farmboy is going through a bean phase, so there are usually leftovers from his lunch. Kidney beans & butter beans are a favourite at the moment. These are also the perfect thing for little fingers to pick up.

  • steamed veggies (Broccoli, green beans and cauliflower etc.)

  • leftover braai meat (boerewors/sausages are a firm favourite in our household!)

  • whole fruit - Everly annihilates apples…like, whole, the entire thing, core, peel and all! Lots of great fibre in those fruit peels! I usually give her Granny Smith apples so she doesn’t get hooked on the sweetness.

  • biltong/drywors - often biltong/drywors can be covered in salt an flavourings…simply rinse until cold running water and dry off before giving to your little one…the fattier the better ;) Just keep an eye when giving them drywors as sometimes the skin casing can get a bit stringy and be a potential choking hazard.


Dinner

For supper I like to give Everly a big meal so she goes to bed with a full tummy that lasts her through the night. She sleeps from 6 - 6/7 (long may this last!) and so needs lots of good & nutritious food to keep her content. I often cook up a big stew on a Sunday night that lasts the week, and then I freezer portions of it for future meals (again, those Avent cups I mentioned above are perfect for freezing food!).

  • Lamb/Beef Stew: using a slow cooker, I brown the meat (usually lamb or beef…you can buy cheaper cuts of meat at the butcher and remember, the fattier the better!) in lots of butter & garlic, add a chopped up onion, chop up what ever veggies you have on hand (I usually use sweet potatoes, butternut, celery, carrots), chuck in a tin of chopped tomatoes (I vary the flavour by using either the plain/Indian/Italian flavoured tins), a cup of barley, a cup of lentils/tin of mixed beans, and then top up with water and leave it overnight to stew. I serve it as it, as it’s got all the veggies in it, and then I usually follow with some fruit, depending on the season, it’s often blueberries or starwberries etc. Alternatively Everly has more yoghurt.

  • Oven roasted hake: I buy the Woolworths frozen hake fillets and pop them (frozen) into a dish with loads of butter, some garlic and then sprinkle with herbs. I then usually serve this with steamed broccoli & cauliflower and brown rice. This is a nice finger meal if your little one likes to feed themselves.

  • Liver Pate: Liver is an INCREDIBLE brain boosting food packed full of nutrients for your little one. You can buy tubs of chicken livers from the butcher/grocery store, but you can also use all those left over bits that usually accompany a chicken (giblets, kidney, liver…basically the offal). I know it sounds really gross, and while I’m not the hugest fan of the giblets etc when they are cooked up they taste rather yum! I pop whatever I’m using to make the pate (liver/giblets etc) into a pan with lots of butter and a bit of garlic and onion, fry until just brown, and then add to a blender with a dollop of cream cheese and blitz until smooth. I freeze this in smaller containers as it’s very rich, and your little one probably won’t eat that much of this at a time. This was one of the first foods I gave Everly, and often serve it with steamed veggies (nice for the first few months of weaning as it’s easy to add to pureed veggies). It’s also nice to add to a soft boiled egg, mashed up or serve it with pieces/mashed up avo…depending on how your little one does with texture.

Treats

Ideas for treating your little one, while still ensuring they are able to steer clear of added sugars and other nasties:

  • Ice-lollies: I bought these awesome lolly moulds from PouchLove (R155 for a pack of 4) and Everly loves them! I use rooibos tea (I make litres of the Apple Kids flavor) and keep that in the fridge for me to drink all day, and it makes a really great base for ice lollies! Then I just add whatever bits of fruit I have on hand…Everly loves blueberries and strawberries so that’s what I usually add. Then pop in the freezer over night and voila! The perfect healthy, summer keep-cool treat. They are re-useable and there are endless ideas for different flavors. I think this would also be a a great way to serve soup or chicken/beef/lamb stock on a hot day (I am MAD about stocks and made litres and litres of the stuff for Everly when was just starting solids. It was a great way to make pureed veggies taste nicer, while giving them loads of great vitamins and nutrients).

  • Stewed Fruit: it’s so easy to make your own stewed fruit, which is great to add to yoghurt, or to serve as is. Simply chop of your fruit of choice, add water (or you can add rooibos instead for a bit more flavor and anti-oxidants) and then boil away on the stove until soft and mushy. A combo Everly loved was apples and cherries.

  • Frozen Yoghurt: just as the recipe above for ice lollies, except use yoghurt instead of water/rooibos.

  • dried fruit - I only give Everly this on special occasions as it can be hard to find dried fruit that isn’t full of extra sugar…but mango is a great snack for little hands that will keep them busy, and so are dried apples & apricots. Don’t give too much as too much dried fruit can lead to runny tummies.

  • popcorn - cover in butter (although this can be messy) and sprinkle with dried herbs for extra tastiness. Avoid adding salt if you’re cooking it from seed.


From the above you can see Everly doesn’t have any allergies, and is especially okay with any and all dairy. If your little is lactose intolerant, adjust accordingly (although expensive, Almond milk is an option, but I would steer clear of Soy milk). Often babies and toddlers grow out of their allergies, so keep offering them yoghurt/etc every couple of months etc and see how they manage. On another note, I make all my own homemade yoghurt, this way I ensure there are no nasty hidden preservatives etc. If you are buying yoghurt, try to always give your baby full cream, plain yoghurt. This ensures no hidden sugars, and you can adjust the flavour yourself by adding frozen berries/stewed or steamed fruit/cinnamon and honey when they are a little older.


I hope you found this post helpful. Please feel free to ask any questions in the comments below, or to leave your favourite toddler meals & snack ideas. I always love hearing from you!

My Breastfeeding Journey + Feeding Essentials & Tips to help you in your own journey

My Breastfeeding Journey Essentials & Tips to Help you-01.png

Breastfeeding, although a very natural thing, doesn't come naturally to a lot of moms.

It can be hard...an hourly/daily/weekly struggle that you may feel you will never get the hang of. And then suddenly, one day it's not so bad. I wanted to write this post to encourage moms to breastfeed their babies, and to seek help & support if they'e struggling. It's not something that just 'comes easy' to everyone, and there can be all sorts of reasons why it's hard (lots of these reasons can be fixed really quickly, and aren't all to do with a bad latch). I am really passionate about breastfeeding (mostly because your breastmilk is perfectly formulated by your own body, and designed to nourish your baby...giving them everything they could possibly need to grow big and strong in those first few crucial months and beyond!). I am also passionate about it because it makes life so easy...popping out a boob is SO much quicker and easier than having to worry about bottles & sterilising and temperature etc. I also do feel that formula is the cause of a lot of tummy & gut problems in babies and kids/adults later on in life...but that's a post for another day.

But, in saying all of the above, I have lots of friends who really struggled with breastfeeding/had to put their babies onto formula/chose to give formula and I just want to say, I really do understand. I don't judge. At the same time, I REALLY do feel there isn't nearly enough support for moms who want to breastfeed but end up giving up/stopping/feeling completely discouraged and it's these moms that I write this post for. I believe the breastfeeding journey starts out in pregnancy, and is greatly affected by how easy/difficult your pregnancy was, how easy/difficult the birth was, and most importantly, the support structures (friends & family, the nurses present when baby is born, the nurses who are on duty during those long and scary first nights in the hospital with a screaming newborn) and their attitudes towards breastfeeding.

So mommies & mommy-to-be's, here are a few tips, as well as bits and pieces of my own personal story that I want to share with you to help you in your own breastfeeding journey.

Breastfeeding tips what you need

  • Your diet affects your baby, not just during your pregnancy, but especially when breastfeeding. 

I think everyone knows that you need to eat healthy foods when pregnant, so your body can build a happy, healthy baby. This is especially difficult for those of us who are carb addicts (this is most definitely me...and one of the many reasons Farmboy and I follow a pretty much Banting/Low Carb High Fat way of eating). I say way of eating because we don't diet, and there are days when we will eat a pizza or order a pasta when we are out at a restaurant. But when we are home, we keep home filled with real foods (lots of veggies, locally sourced meat, eggs, lots of dairy and fruit).

My mom is an avid Tim Knoakes fan, and has also read just about every piece of literature on Banting & Low Carb High Fat. She also comes from a science background and so I trust her recommendations on food and the reasoning behind her strong convictions. I have also seen for myself the benefits of eating this way. The most important thing to take away from the idea of a Low Carb High Fat/Banting way of eating is this: no refined carbs or sugar, but real food. Get your carbs from veggies like sweet potato & butternut, fats from sources like full cream cheese & milk, almonds & meat plus eat lots of green veggies! 

Hubby and I are not strict Banters, and I am definitely not being very strict because I am breastfeeding. I eat quite a lot of things that are on the Orange list for Banters, and I definitely don't count my carbs. But I just know that what goes in, is directly feeding my baby and I believe in this way of eating. Here is a really good article on Banting & Breastfeeding that you might find interesting if you have been wanting to explore this way of eating, there is also a basic introduction to Banting below:

Breastfeeding & Banting: Is it safe to eat a LCHF diet

Introduction to Banting

Please note, I am just sharing my first experiences with this way of eating. I eat a lot of oats, add honey to sweeten food, and do eat bread (although I try to eat rye/sourdough bread as much as I can). I have never had an issue with a low milk supply...I have in fact had the opposite problem at times (I try to drink a lot of water and also really enjoy Kombucha...I am aware of the articles that caution against drinking it during pregnancy/while breastfeeding) but I was doing all of this before I was pregnant, and so it was what my body was used to & it's what helped form my baby when she was growing in my tummy. All of this has also shaped my view on solids for my baby, and it's why I don't give her any cereals or pre-package foods (when I can avoid it...while traveling overseas I bought a few of the organic, seemingly free from nasties foods to make life a little easier). And although it's not always convenient, I still make all of her food when I am at home. She is a Banting Baby and is flourishing. Here are a few blog posts on starting solids with your little one:

#EverlyStartsSolids: Our Baby Weaning Journey - The Beginning

#FromFarmToTable: Homemade Baby Food

#EverlyStartsSolids: Meal Ideas for 8+ Month olds


breastfeeding tips how to help for first time breastfeeding
  • Join the La Leche breastfeeding group on Facebook

There is so much knowledge shared on this group, and the Leaders of the group are always around to encourage and answer any and all questions you may have. I joined the group in the beginning of my pregnancy, and while it was a bit overwhelming at first (and yes, there are always 'those' people in groups like these that can be a rather overbearing and righteous) I found popping in there during nights when I couldn't sleep to be really helpful. I had ZERO idea about breastfeeding, the only thing I knew is that I wanted to do it, and planned on feeding Everly until she is at least a year old, and I am so proud of myself for still going strong 9.5 months in. If you're wanting to know what pump to buy, how to increase your supply, how to deal with a forceful let down/oversupply, how to get a good latch, different positions to suit different babies, advice on tongue ties/thrush, bottles, nipple shields, expressing, pumping for working moms...gosh the list could go on and on! I learned so much just from reading through all the posts and using the search function when I felt a bit embarrassed to ask certain questions. Just bear in mind that the group is a PRO breastfeeding group, and some people feel VERY passionately about breastfeeding being the ONLY way to feed your child. If you are having difficulty in your breastfeeding journey, keep an open mind and rather seek help from a friend/lactation consultant before giving up entirely. You have to do what you have to do, and for some women, that means formula feeding. Please don't put any pressure on yourself, you're doing the best you can. Although I do feel that breast is best, it's not always as simple as that, and I have lots of friends who really struggled in their own breastfeeding journey. 

Here is a wonderful post from my friends Kerri & Bailey, they are both real, raw and honest, and talk openly about their struggles with breastfeeding and what ended up working for them. Click here to read Kerri's story & click here to read Bailey's story. 


Breastfeeding journey tips & essentials to help breastfeed by citygirlsearching
  • Nipple Shields are your friend

Although lots of posts on the La Leche FB group talk about nipple shields being the devil, I will sing their praises from the rooftop! If they help you to successfully breastfeed your baby in those first few days & weeks, they are worth their weight in gold.

The biggest downside to them is some people have a hard time weaning baby off them. I just feel, if you're able to breastfeed successfully because they help you, then weaning baby off them is a small price to pay. Yes, they are a bit of a pain because you have to have them on you wherever you go, but I just made sure to keep a whole bunch of them all over the house/in the car/at Granny's house so they were always on hand. I used them on both sides for the first couple of weeks, and then sporadically attempted feeding without one/both. We had a few rough days where Everly would just scream because she couldn't latch properly but then suddenly I didn't need them anymore. I was at a wedding and needing to desperately feed my baby (full boobs and a screaming baby will really put you on edge!) and I didn't have a shield on hand. Hubby was nowhere to be found and so I just had to feed without one. It took a little while, but I just persevered and suddenly she was latching without it...what a wonderful feeling! 

So while you may have your reservations about that, just buy a set and pop them into your hospital bag to have just in case. I only tried the Tommee Tippee brand, so those are what I would recommend. I have also heard the Pigeon ones are great too.


Breastfeeding journey tips & essentials to help breastfeed by citygirlsearching
  • Pack a breast pump in your hospital bag

Thank you to my sister in law for this tip.

Although you might have read about how pumping is not advised in the first 6 - 8 weeks of breastfeeding, let me tell you, there are those days (or nights!) when your boobs will be rock hard, full to bursting and your baby won't be able to latch properly that you just need a little relief. It's recommended to rather hand express in the shower (here's some links on this >>>click here) but when you just need to quickly get rid of some milk, a pump is your friend. You also won't know when exactly your milk will come in (this is usually around day 3) but can be earlier/later and so having a pump on hand is useful. Another thing, you won't know how your birth is going to plan out. I was dead set on a natural birth, but ended up having an emergency c-section and so was in hospital for longer than I had planned. My milk came in while in hospital and I was so grateful to have a pump. My little girl also had to be under the UV lights for Jaundice and as your body really just goes haywire after having a baby, there were moments when I couldn't just pick her up to feed and relieve my aching boobs. A pump was a life saver.

Also, having it n your bag doesn't mean you have to use it. It's there for those 'just in case' moments.

If you're wondering what pump to buy, the best advise I was given was to buy a manual pump (I was recommend the Avent Manual Pump...but have heard the Click brand of Manual pump is amazing and just as good for a fraction of the price) and rather invest in an electric one if you need to later on. As I work from home, I am always around to feed Everly, and the few times I've been away from her, the manual pump has done the job just fine. You also don't know how your breastfeeding journey is going to pan out. If there are complications and your baby has to go into NICU and you decide it's just to much stress to pump all day and all night, a fancy electric pump might be a waste of money rather spent elsewhere.

Breastfeeding journey tips & essentials to help breastfeed by citygirlsearching
  • All Breast Pads were not created equal

I've tried just about every breast pad under the sun, and have recommendations for both disposable & re-useable/washable pads. Some of my friends said they never needed to use breast pads, but as I had such a forceful letdown (and no old told that when you have a let down, the milk comes down from BOTH sides...this may seem obvious now, but when you forget/don't have a cloth on hand, you're going to end up with a VERY unsightly wet patch on your shirt. 

Although we are an environmentally aware household, using cloth nappies (click here for more on cloth nappies) and my ultimate preference for breast pads being the washable ones, there was many a day in the first few weeks when I used disposable ones. While I highly recommend washable breast pads (and I'll share which brand gets a double thumbs up from me below) not just because they are cost effective & environmentally friendly, but also because I found them to be the most absorbent.

Here are my top recommendations:

  • Disposables: Pigeon (I've gone through SO many of the big boxes and they are not only budget friendly, but they work well).

  • Re-useable/Washable: Biddykins Washable Resuseable Pads

I'm still using breastpads today, nearly 10 months down the line, although I just use one a day, and move it over to the other side when feeding. It helps me remember which side to start with next!  Although this has definitely been easier since Everly started feeding from just one side at around 6 months old. I had never heard of that being a thing, and was worried she wouldn't be getting enough milk, but she clearly is not milk deprived (she still has the cutest fat rolls everywhere) and she would have complained about being hungry long ago if that was the case. Feeding from one side a feed just makes everything easier (and faster!).


Another myth busted...big boobs don't necessarily mean lots of milk. I certainly don't have the biggest bust around, and have always had lots of milk. So don't let the fact that you have small boobs make you think you won't be able to breastfeed.


My Breastfeeding Schedule

I also thought I'd share my breastfeeding 'schedule' with you, as I always was on the hunt for info on how long to wait before feeds in the beginning, and also to work out what worked for other moms. I hope you find this helpful:

  • Newborn: I pretty much fed on demand, but this for Everly was roughly every 3 hours. After bedtime (which was between 5 & 6 pm), she woke 2-3 times for night feeds right from the very beginning (so usually around 10pm, 1am & around 4am.) She would wake at 6/7am and that's when we would start the day.

  • Around 3 months she dropped one of her night feeds, waking up around 11pm & then 3-4am. I was still feeding every 3 - hours during the day. Her morning wakeup time was still 7am.

  • Around 4-5 months I started stretching Everly to 4 hour feeds during the day, and she also dropped her 11pm feed, waking just once at night, some time between 3 - 5 am. Her wakeup time was still 7am.

  • At around 6 months, after we had been started solids, I went back to a 3ish hourly day feed schedule, as I found this worked best for me with making sure she wasn't too full/too hungry when it was time for solids. She also started stretching her night feed, going from 6pm bedtime to one night feed between 3 - 5am. By 7 months I had weaned her off her night feed, and she was going from 6pm - 6/7am. I didn't know this, but at about 5/6 months old, babies are physically able to stretch the whole night without a feed. This doesn't mean that all babies will though, and many wake for comfort. In fact, it seems that babies who sleep through (and through being 10 - 12 hours are the exception to the rule as I think most of us first time moms are really just winging this whole parenthood thing and figuring it out one day at a time). I found this to be very reassuring, as I was always worried she was waking up after 6 months because she was hungry, but once I realised it was more for comfort, then it became my choice to either feed her, or go into her room and settle her and soothe her back to sleep without a feed. We went through about 3 nights of very little sleep as she cried and really complained about dropping that feed, but then by the fourth night she didn't wake at all.

  • At around 7.5 months we went overseas to the UK for 3 weeks, and she started waking up at around 3am again, and I just went back to feeding her at that time because we were traveling with family and I didn't want to keep the whole house up with her protests. I was very worried about weaning her off it when we got home, but it only took 2 night of protesting before she started sleeping through again.


From 8 months to where I am now, Everly feeds 4 times in 24 hours. Here is the rough schedule we are on now:

  • 7am wake up, breastfeed

  • 08h30 nap

  • 10h00 wake up, breastfeed

  • 11am breakfast (solids)

  • 12h00 nap

  • 14h00 wake up, breastfeed

  • 15h00 lunch (solids)

  • 16h00 nap (although she has just about dropped this nap and is fighting it hard!)

  • 16h45/17h00 supper (solids)

  • 18h00 bath, story, breastfeed, bed

I've tried to always follow a wake up, feed, play, nap routine so that she didn't ever get dependant on being breastfed to sleep (although, as with everything, there have been times when I've been at my wits end and just nursed her and popped her down). It also takes a bit of time to get into a routine, especially when introducing solids, and then of course realising that every baby is different. 

Everly has always needed/loved her sleep. Some kids her age (9.5 months) have 3 hours of awake time between naps. Ev is literally a crying wreck by the 2 hour mark, and her first awake time of the day is never longer than 1.5 hours. Some babies refuse to sleep any sooner, you just have to figure out what works best for you, and to learn your babies sleep cues. I had lots of people tell me that I forced Everly to sleep too much, but I always said if she didn't want to sleep she wouldn't sleep. While we do follow a little bit of the cry it out method, I don't leave her crying in her cot for hours on end. But I can tell when she's just fighting her nap, and usually will put herself to sleep within 10 minutes of being put down. Even though those 10 minutes may be filled with an awful lot of protesting and winging.

Everly Rose 9 months (3 of 3).jpg

But as is always the case with these little humans, the moment you feel like you've got the routine waxed, they go and shake things up (with teething, a growth spurt, a sore tummy, learning a new skill that they suddenly want to pracice at every opporunity they get) and then you start all over again figuring them out. We did and do still have nights when she wakes up (sometimes multiple times) and we have no idea why. We always leave her for at least 5 minutes once we hear her wake up, and 90% of the time she puts herself back to sleep. The other 10% of the time it's hubby or I going in to do bum pats, pop the dummy back in, and gently coax her back to sleep.

At the end of the day, you have to figure out what works best for you, for your baby, and for your family. Everly has been in her own room since day 1, and I have chosen to get up and go to her for feeds/nappy changes rather than have her in our room. But every family is different, just as every parenting/birthing/breastfeeding journey is unique.

So there you have it, lots and lots of what's worked for me, with a few tips thrown into the mix. If you have any other questions you'd like me to write about, please feel free to leave me a comment below. 

Here are all my posts so far on this wonderful journey to being and becoming a mommy:

#EverlyStartsSolids - Meal Ideas for 8+ month olds

#EverlyStartsSolids Meal Ideas for 8 month olds-01.png

Everly has now been eating solids for about nearly 4 months now, and we are really having a lot of fun together. We didn't take things slow in the beginning (click here to read more about the first few days of solids) but she has developed a VERY healthy appetite and is incredible adventurous with her tastes. Sometimes I'm at a loss as to what to give her (I'm not the biggest cook around and really don't enjoy cooking as much as Farmboy does) and then I scrounge around in the fridge, grab the first thing I see thinking she will turn her nose up, and lo and behold, she devours the entire tub of said 'weird and wacky' food item. This happened this morning actually, I grabbed some double cream greek yoghurt and gave it to her as is (usually I add cinnamon/pear/apple/nut butter to it but alas, nothing on hand today) and she gobbled it up. I can't even bear to eat yoghurt plain...yuck! But she really went to town on it, her dairy farmer Dad would be proud!

Now, a lightbulb went off my head the other day when I realised, 'hey, who says we have to eat eggs for breakfast and meat for dinner!' and now I play around with giving Everly traditional 'breakfast' style meals at supper time, and vice versa. It all depends on how I'm feeling, whether I have time to make up new meals in that moment,  or whether Everly is up to being adventurous (this is pretty much most of the time).

**NB I am not a Pediatrician, or a dietitian or any other form of the 'tion' family, so please use your mommy guy when it comes to food for your little ones. We also have no family history of allergies, and both Farmboy and I loosely follow a LowCarb/HighFat or Banting lifestyle and so Everly eats accordingly. If you are feeling nervous about giving your little one something I mention below, rather chat to your Doctor/Paed. I'm simply sharing what I do and what my little girl has loved eating. We follow the school of thought that encourages the introduction of ALL food groups before the age of one (this includes all allergenic foods from fish to peanuts to eggs). The only exception to this is raw honey. As for cow’s milk, I give Everly full-cream dairy yogurt (preferably homemade), cream cheese, cottage cheese, yellow cheese etc. Please listen to your mommy gut, and if your family has a history of allergies speak to your paed about introducing allergens.

Also, some days Everly refuses to eat more than a sprinkle of the specially prepared meals I offer her, and other days she devours the whole bowl and demands more. I try to listen to her and not force her to eat things she doesn't want to eat. I try and remind myself that these are little humans we are dealing with, and I often have days when I don't feel like eating oats, or eggs or tuna...they are entitled to feel the same :)

Some of these ideas are for foods that your little one can feed themselves with (loosely based on the Baby Weaning method) and others are for the more traditional spoon feeding method. We've done a mixture of the two approaches to weaning, and it's going very well so far. I have also been feeding Everly more of our left overs, which makes life SO much easier. I have included a few of these ideas too, that you can make for the whole family, and then feed to baby the next day.

I was going to put these ideas under Breakfast/Lunch/Supper headings, but then realised there really is no reason to box your baby into meal types. I've given each of these things to Everly at all sorts of weird and wonderful times of the day and she hasn't complained once. So go wild! And let me know in the comments if there is something you love making for your little one, and what their favourite meals are.

  • Butternut Omelette (mix a few cubes of pureed or steamed/roast butternut with an egg and fry in a pan with lots of butter/coconut oil)

  • Broccoli Omelette (mix some steamed broccoli florets with an egg and fry in a pan with lots of butter/coconut oil)

  • Tuna Omelette (same as above but using tinned tuna...aim for tuna in brine/olive oil).

  • Berry Yoghurt (mix some frozen berries with full cream/Greek yoghurt...bonus points for using homemade yoghurt...recipe to come soon!)

  • Apple/Pear Oats with Cinnamon (cook up some steel cut oats with breastmilk/formula and add some

  • Sardines (as in...a tin of sardines! These are an AMAZING food for babies, and full of omega rich fatty acids! I feed Everly these straight from the tin, sometimes mixing them with whatever veg I have on hand. Be sure to buy sardines in oil, not sauce & don’t buy a boneless ones – remember you want the calcium from the bones - these are super soft so you don't need to worry about your little one choking. Try buy the olive oil rather than soybean oil. Make sure to check the ingredients for added preservatives, some tinned sardines do have added salt, so just rinse them off before mushing (click here for an awesome post by BabyJakesMom on why Sardines are the ultimate brain food for your baby).

  • Veggie mash & Chicken/Beef Stock (I always make sure to have lots of cubes of frozen chicken stock to add to veggies etc. It's so easy and will make all those healthy veggies that aren't always so tasty, so go down a treat. Make your own batch of stock so you ensure your little one isn't getting any of those nasty preservatives...recipe to follow soon).

  • Lemon Butter Grilled Hake with Steamed Brocolli, Cauiflower & Cous Cous (this one is a family meal that can easily be mashed up for baby's next meal. Grill hake fillets in the oven with butter & lemon, serve with steamed veg & cous cous).

  • Veggie Mash & Cream Cheese (choose a mixture of veg and add a scoop of full fat cream cheese)

  • Berry Beetroot (steam beetroot and add a mixture of berries...frozen berries from Woolies work well! This can be served mixed with yoghurt too).

  • Liver Pate (another EXCELLENT brain food for little ones! Buy fresh and gently fry in butter, then mash together with cream cheese. It's delicious on it's own, or added to veggie mash).

Try and offer your little one water in a sippy/straw cup with every meal. They may not actually drink anything (those cups sure do make for fun chew toys it seems) but it is important to get them in the habit of drinking water. It's also good for their little tummies to help avoid/deal with constipation issues that often follow when transitioning to solids.


385A8B6A-E094-4CA5-BF5E-D86C1C32F9FF.JPG

When I mention cubes, I mean ice tray cubes of pre-made steamed baby food you've previously made and frozen

>>>click here for a full post on how I make and store fruit & veg, especially in the first few weeks and months of weaning. I love my TommeeTippee Steamer Blender machine which helps save time when it comes to meal prep.


Happy cooking!

x

My Cloth Nappy Wash Routine - A How to Guide to Washing Cloth Nappies

How to wash cloth nappies washing routine for cloth diapers -01.png

I think 'the washing' is one of the biggest things that puts people off even trying out cloth nappies. I know when I first heard about cloth nappies, my first thought was 'you want me to willingly put poo into my washing machine?!' I really thought the process would be difficult, or time consuming, or just plain old gross...but the reality is, it really just takes an extra 5 minutes of your day once you get into a god routine.

Please do bear in mind that it does take a bit of time to figure out what works best for you and your cloth. Your routine will depend on your water (we have hard boerhole water here on the farm), the kind of nappies you have (I have a good mix of flats & covers, pockets and snap in ones), and the type of machine & detergent you use. The South African Cloth Nappy Facebook group is a wonderful place to troubleshoot and ask for advice. 

And for my Cape Town friends, I have loads and loads of water saving tips that are allowing moms to carry on using their cloth, even in the current water crisis.

Make sure you keep reading to find out more!

Cloth Nappy Wash Routine How to Wash Cloth Nappies South Africa by CityGirlSearching Blog (11 of 14).jpg

The basics of washing cloth nappies: 

(I'll post my routine down below too)

  • If you are exclusively breastfeeding your baby (ie you aren't feeding formula or solids) then you baby's poo is water-soluble and the poo nappies can go straight into the machine without needing a rinse. This is a personal preference...you may want to rinse them all before hand, as I do now. Although, I didn't for the first four months or so. This first rinse can be done in your machine, or in a bucket/bath before you put them in the machine. Once you start solids (or are feeding formula) you need to rinse the poo nappies to make sure your washing machine doesn't get clogged.

  • Once babies are bigger and eating solids, you can use install a Bidet sprayer/use the shower head on your bath (or even a garden spray bottle) to remove most of the poo before washing. Alternatively, use liners** (flushable/disposable/fleece liners) to catch most of the grossness before rinsing or putting into the machine

  • You need to use a loooonnnnng cycle (so there is lots of agitation i.e. the nappies get rubbed against each other long enough to get thoroughly clean). This is usually the cotton cycle on your washing machine. FYI just because the cycle is long, doesn't mean it uses up more water than the other cycles in your machine.

  • Temperature: Most nappies are safe at 40 Celsius, but make sure to check with the brand/seller before hand. Some nappies can be washed at a higher temperature. I have been washing all of mine at 40C and haven't had any problems. A few loads have even gone through a 60C cycle a few times by accident and all survived.

  • Washing machine should be 3/4 full (you can bulk up a load with towels...even dedicating a particular set of old towels as your nappy towels)

  • No softener should ever be used (this includes washing powders that are '2in1')

  • All Washing Powder/Detergent without softeners are safe to use with cloth (always follow the recommended dosage...a good tip is to follow the amount suggested for 'heavily soiled'). I use Ariel powder, and use Ariel liquid for our clothes and towels.

  • Technically, it's recommended to do a wash and 2 rinses: ie a pre-rinse in the machine, then a long wash cycle, and then a final rinse. See my routine below for how I've adapted this slightly.

  • I have started tumble-drying my nappies (on low heat) and found this just makes my life SO much easier. And the nappies come out super soft (in the case of my hemp flats and cotton/bamboo fitteds). Most people I have spoken to warned against tumble drying nappies as they said extensive heat could damage the natural fibres (ie the hemp/bamboo). If you have pockets, these generally dry very quickly and you wouldn't need to tumble dry.


How often should you wash your nappies?

I wash every day. Why?**

  1. Because I don't have a HUGE stash of nappies,

  2. I don't like dirty nappies sticking around

  3. I love doing laundry...haha call me crazy!) but you can wash as often as you like. Most moms I know wash every 2 - 3 days.

**Everly is now using less nappies than she was when I first wrote this post, and now I wash every second day. Although since having Aaron (I actually do the odd wash every day when he has gone through loads more nappies than usual).

Bear in mind drying time. Hemp nappies take a lot longer to dry than microfibre or cotton.

If you live in a humid area, your nappies will probably take longer to dry. This is also a big reason I chose to use flats and covers for the first few months. They dry SUPER fast. Some nappies can be popped in the tumble dryer to speed up the drying process (just make sure to read your labels/ask the seller about tumble driers). Also note that nappies with a plastic/waterproof cover & covers shouldn't be exposed to the sun. These can either be dried in the shade (most covers dry within an hour or so) or turned inside out so the PVC (plastic part) is not exposed to the sun.


What about those horrid stains?

You won't even believe it, but the majority of nappy stains will disappear in the sun! For any stubborn stains that aren't removed by the sun, you can rub them with a green sunlight bar before washing (the sunlight soap bars are cloth safe) or rub after washing and pop into the machine again. I've yet to need to do this, as the magic of the sun has taken care of all my stains so far (it is particularly effective for breastmilk stains...so pop your damp burp cloths into the sun for instant whitening & bleaching!).

Here's some proof:

IMG_0006.jpg

If you've still got stains, then a good rub with the green sunlight bar, and popping the item back in the machine should take care it.


My wash routine:

Up until 5 months (i.e. before I started solids), this was my routine for Everly's nappies:

I'd wash every morning:

1. Off the bum & into the nappy bin:

All nappies go straight into the nappy bin till the next morning (will do a blog post on what I use for a nappy bin soon).

2. Quick Rinse:

After her first morning nappy change, I put all the dirty nappies straight into a bucket of hot water for a quick rinse (this is especially important for night nappies that will be on your baby for longer than the recommended 2-3 hours during the day, as they will be full of wee/ammonia and need a warm rinse to make sure you don't get any stinky nappies...the warm water breaks down the ammonia crystals). You can skip this step and add a pre-rinse to your washing machine cycle. This does use more water so if you're wanting to cut down water usage, a bucket of water works just as well. Some moms rinse their nappies in their baby's bath water. I bath Evy at night and like to wash in the morning so that didn't work for me.

**I have since gone back to doing a quick wash cycle/pre-rinse on the machine, without any detergent, as my pre-rinse. I now only hand rinse night nappies in hot water, and then these also get added to the quick wash cycle with the other nappies.

3. Set Washing Machine:

Cotton cycle on the machine (about 2.5 hours) with an added rinse (40 degrees C with the recommended amount of detergent  for a very dirty load). I have done a few 60C washes as pictured below and haven't had any problems.  I also wash Evy's burp clothes (I use the old school white towelling nappies...BEST ones are the Glodina Baby towels which you can buy at Baby City...the ones from Pep and even the ones from Woolies aren't nearly as durable). It's also important for your washing machine load to be 3/4 full so that the dirty nappies get enough agitation. I often throw in our towels to bulk up the load. Another idea is to have two or so old towels that you dedicate to your 'nappy load' so you always throw them in your machine with the nappies. 

4. Hang nappies up to dry/pop into tumbled dryer

Hang up nappies in the sun to dry(soft fabric side up in the case of pocket nappies & all-in-one's...PVC/plastic side of nappies down). I hang my pail liners (the washable PVC bags I use inside my nappy bin and my covers in the shade as the sun can delaminate them and cause tearing.

I have just found out that it's possible to tumble dry your nappies on low. This works especially well for hemp flats and cotton/bamboo/microfibre inserts. This isn't always recommended by retailers, but if you live somewhere where it takes forever for your nappies to dry (or you just like the feeling of very soft nappies) then it's possible to tumble dry them on low. You can also iron hemp flats to make them nice and soft again, or line dry them and then pop them in the tumble dryer for 10 mins or so on hot.

That's the basic just of washing your cloth nappies. If you're having issues with anything at all, the South African Cloth Nappy Users Facebook Group is amazing! Head on over there and ask the friendly community your questions, there is always someone on hand to help. 

A few extra notes:

  • Stinky nappies? Could be from a variety of reasons ie. an ammonia build up and your washing routine needs to be adjusted or you might need to do a strip (with bleach to 'strip' your nappies of any detergent buildup etc. Don't freak out about the bleach...click here for more info on stripping your nappies.) 

  • Bought some pre-loved nappies? Give them a good hot wash and then strip them (follow the link above to find out more about stripping them)

  • Hemp & Bamboo nappies need to be 'prepped' before they reach optimal absorption. This usually means they need to be washed 8 - 10 times before they become really absorbent. Instead of wasting water washing them multiple times, simply start using them and keep in mind they might leak a little in the first week or so of use.

Water Saving Tips

  • Instead of pre-rinsing in machine, rinse in the old bath water or the floor of the shower while you shower (use your feet to stamp on the nappies to really give them a good rinse). You can catch grey water*from the shower by placing buckets in the shower. Alternatively you can transfer your bathwater to buckets. The easiest option is to use the bucket & plunger method (see below) to rinse nappies in grey water. When you are done rinsing your nappies, this water can be reused again to flush your toilets. Alternatively, you can pour the water into your top loader to do a rinse in the machine.

  • Catch the grey-water from the washing machine outlet and re-use it the toilet/to water your plants/to rinse your next load of nappies

  • Consider replacing your washing machine if you have an older model. Older models, especially top loaders tend to use a LOT of water to wash. Newer HE models and especially front loaders are much more water friendly. Other options to consider are a twin-tub or Sputnik. 

  • If you are using a nappy sprayer, consider hooking it up to a grey water system. Remember the rubber gloves if you are using the bucket method! Spraying one nappy uses approximately the same amount of water as flushing a toilet. 

  • Hand washing often uses a lot less water than machine washing. Hand washing doesn't have to be difficult either - the bucket and plunger method is very effective and quite straight forward to use. You can do a spin cycle in the machine afterwards to skip wringing out by hand and speed up drying time.

Handwashing - Bucket & Plunger Method

For flats & Covers

  1. Place flats and covers in a bucket of cold water Make sure the flats and covers are completely submerged in water.

  2. Using a plunger, plunge the nappies 50 times to get rid of the urine.

  3. Drain the water and remove the covers.

  4. Fill the bucket with your flats in, with warm water (just enough to cover your nappies).

  5. Add about 100ml Sunlight Gel (you can make this yourself...blog post to come) for about 12-14 flats and plunge 100 times. You can also use your regular powder/hand washing detergent.

  6. Empty the bucket and fill it again with cold water.

  7. Plunge another 50 times to ensure all the soap has been rinsed out.

  8. Drain and wring out our flats.

  9. Shake to get excess water off and hang to dry on the line.

For your covers: Give them a quick wash a little soap/detergent and water, rinse, towel dry and then hang to dry.

*There have been a few queries as to whether grey water (water coming from domestic equipment other than toilets eg washing machines, baths, sinks etc)  or black water (water from toilets ie. water that has come into contact with fecal matter) is safe for re-use in gardens. You would need to use 100% biodegradable and ph neutral detergents to make full and proper use of your grey water in your garden. But, reusing the water from your washing machine to flush your toilet would be a very good use of that water. As with most things, use your common sense and do your research if you are very concerned. The main idea here is to try and save as much water as possible, and re-use where you can.

IMG_0035.jpg

**Please note, although certain brands of liners say Flushable/Biodegradable, please don't ever actually flush them down the toilet! All they end up doing is clogging the toilets and causing lots of problems down the line. I would advice using biodegradable liners, as these are much more environmentally friendly, and you can just rest easy knowing that even though they are going into the refuse, they will break down easily. If you really want to go the extra step, rather use fleece liners (literally just pieces of fleece fabric that you can make yourself, that you just rinse off and wash along with your nappies...these dry super fast and rinse very easily!). Here is a photo of my selection of liners (fleece & biodegradable):

Poo literally slides right off the fleece, so using these when your onto solids makes SUCH a difference when doing the washing. These fleece liners also give a stay dry effect, so if your little one is sensitive to wetness (like mine) using these liners really helps keep their bums dry.


Cloth Nappy Wash Routine How to Wash Cloth Nappies South Africa by CityGirlSearching Blog (8 of 14).jpg

Although it may see like an awful load of work, you will quickly get into your own routine. Washing Everly's nappies only takes me an extra 5 minutes of time in my morning to rinse and place them in the machine, an then another few minutes to hang them up.

Do you have any other tips for washing your nappies? Does this post make you feel more confident to give cloth nappies a try? I'd love to hear from you in the comments below!

#EverlyStartsSolids - our baby weaning journey...the beginning

#EverlyStartsSolids Baby Weaning 5 months-01.png

Starting solids is scary for some, and exciting for others. I must say, I was so excited at first, and now that I am a little more experienced (i.e. I've had to deal with all the extra work that goes into it) I do wish I had hung in there and waited until she was actually 6 months old. Something else than can happen when you start introducing food too quickly (and too much of it) is that baby gets full quicker, therefore drinking less milk, and therefore there is a good chance your milk supply will start to get less and less. I plan on breastfeeding for at least a year, and so as soon as I started getting a bit too caught up in the whole 'she needs 3 meals a day' mentality, I realised I needed to take a step back and make sure that my milk is still her number one food source.

When to start Solids

I started introducing solids when Everly had just turned 5 months old. After consulting good old google, and all of the baby books collecting dust on my shelf, I thought it to be a good time. She was displaying most of the 'ready' signs (sitting up, reaching for our food, showing a lot of interest in food, the tongue thrust reflex disappearing etc), and to be honest, I was SO EXCITED to move on to the next baby chapter. If following a more traditional approach to weaning (ie making puree's and spoon feeding, most recommendations are to start somewhere between 4 & 6 months).

On that note...there are SO many different opinions on when to start solids, and just as many differing ideas on how to go about it. While I always thought I would be following the 'baby led weaning' approach, I also wanted to try my hand at making my own puree and so decided to go ahead with a bit of a mixed approach.  Also, as I started before 6 months (baby led weaning advises waiting until baby is 6 months old or even older) this meant I could really get stuck into preparing 'meals' For Everly. 

EverlyStartsSolids 5 Months Old (8 of 12).jpg

Meals is such a loose term, as most babies barely touch the food they are given for the first few days/weeks. But this is okay, after all, when starting out, all you are wanting to do is expose baby to as many different textures and tastes as possible.

Your milk/formula still makes up the bulk of their nutrition.

Farmboy and I have also followed a Banting/low carb high fat way of eating for the last couple of years (although we are far less strict with this now!) and so have chosen to avoid rice cereal as a starter food. Instead, after reading Tim Noakes' Raising Superheroes / Super Food for Super Children (thanks mom), The Nourishing Traditions Book of Baby & Child Care (again, thanks mom) and this blog post, I decided to start with egg yolk as a first food. It wasn't the only thing I gave my little girl, she also had some pre-chewed up apple and pear, as well as some raw carrot thrown into the mix. She absolutely loved the egg yolk the first two times I have it to her, and subsequently hasn't been too impressed with it. I am going to keep trying as egg yolks are jam packed with essential nutrients important for the development of the brain (the are full of choline, good cholesterol and iron!).

*NB Raising Superheroes is not a Banting cookbook; it doesn’t offer no-carb eating for kids. It does, however, advocate low-sugar, low-refined-carb, real food eating.

*NB Raising Superheroes is not a Banting cookbook; it doesn’t offer no-carb eating for kids. It does, however, advocate low-sugar, low-refined-carb, real food eating.

But, as I have learned, you really can't/shouldn't force a baby to eat something they don't want to. But, it is important to keep trying as some babies take something like 10 attempts at trying a food before they realise they actually like it.

Somewhere along the way, Evy had a few good pukes (who knows whether this had to do with the egg I had given her, a stomach bug that had been making the rounds or just from me giving her too much for her little tummy to handle), and so I decided to slow things right down, give her a break from solids, and go back to basics. This is where I found the Weaning Sense book by Meg Faure to be really useful. It's got a great guide and meal plan for starting solids, which really does help to get your mind around the whole solids thing. 

#EverlyStartsSolids Weaning Baby 5 months start solids

We are only really a month into the whole solids thing, and so I wanted to write this blog post and share with you all my mindset behind starting when I did, and to share what it's been like so far.

A few things I've learned in the past month:

  • ALWAYS have a cloth on hand as well as a bib...the food really does go EVERYWHERE

  • Use a transparent bowl/cup/container...babies like to see what they are eating

  • Experiment with temperature...it seems that my baby prefers cold food to warm food (weird, I know!)

  • Don't take your own judgement of flavour into account. Mixing avo and pear sounds really gross to me, but babies don't know any better. Also, try to expose your baby to as many different (age appropriate) foods so they don't become fussy eaters (like their parents!)

  • If you'd also like to avoid rice cereal, but aren't brave enough to attempt egg yolk, oats make a very good first food and from then on a good base food to add other things to.

  • You don't need to spend a fortune on goodies and gadgets to help you prepare meals...I very nearly spent over R600 on a couple of fancy ice-trays until my mom found these pretty pastel ones from Plastic Land. On the other hand, there are some gadgets that are amazing, and I would highly recommend purchasing (blog post to come soon). At the end of the day, if you like to have matching ice trays in a variety of co-ordinating colours, do it! If it makes the whole food prep thing more enjoyable for you, then I say go for it.

  • I do wish I had waited till she was 6 months before starting (mostly because breastfeeding is just so convenient when it comes to 'meal' time...and whipping out a boob is far easier than preparing/packing/heating up a meal. It's also less mess, less dishes and overall no worrying about whether they've eaten enough. Although I do wish I had given myself another month of convenience, I have had a lot of fun so far with experimenting with foods and seeing what her little taste buds to when exposed to a whole new world of tastes and textures


Equipment I found useful for the first few days/weeks:

Farm Afternoons spent Gardening in Creighton (1 of 6).jpg
  • Spoons (I've been using the Munchikin range which I bought at Mr Price Home). The tips change colour to white when the food is hot

  • A mesh baggy thingy (also from Munchikin and also bought at Mr Price Home) which is great for putting pieces of food in to suck on

  • Ice-trays from Plastic Land to freeze freshly prepared food in

  • Clear zip lock bags to store the food from the ice trays in (these takes up a lot less space in the freezer)

  • Avent cups (I bought these on Takealot and mainly use them for freezing breastmilk as they also fit my breastpump...but they work a charm for serving food too!)

  • Bumbo seat (I plan on buying one of those white plastic high chairs from Game when she gets too big for the bumbo...which won't be far off because, well...#thunderthighs haha)


On a side note, it's very easy to get REALLY caught up in the whole solids thing, especially when it comes to their very first taste of something other than milk. But, at the end of the day, you aren't going to 'ruin' your baby if you don't give them the most perfect/organic/made from unicorn tears meal...so take it easy on yourself and have fun with it! 

The best piece of advice I've come across so far for introducing solids is

'Food before One is just for Fun'

and that little rhyme has helped me not get too caught up in the whole thing, especially when Everly refuses to eat anything solid for 2 days and then has a bad night and I get all in a tizz thinking that it's because she's 'starving' due to not having eaten all the fancy food I prepared her. And while we are on the topic, be prepared for the disappointment when your little one isn't as taken with your freshly prepared dish, preferring to chew on the wet face cloth you've placed beside her to help keep some sort of order in the chaos.

So that's where we are right now in the journey to solids.

Do you have any advice for us? Anything that helped you or any great products (or any nice recipes) you'd like to share? I'd love to hear from you in the comments below!

#BBUndercover Hair Care Challenge with Beauty Bulletin South Africa

#BBundercover hair car challenge review with Beauty Bulletin South Africa y Roxy Hutton of CityGirlSearching Blog-01-01.png

I am a little late to the #BBundercover party as I live out in the middle of nowhere on a farm and only received this package yesterday, but I am SO excited to be taking part in this challenge!

As mentioned, living out in the middle of nowhere makes it harder to get hold of products and find new beauty products to try. Because of this, the package that arrived from BeautyBulletin couldn't have come at a better time.

Having also just had a baby, my hair has taken a bit of a backseat and is NEEDING some extra TLC.

#BBUndercover Hair Care Challenge with Beauty Bulletin South Africa


I've only used the products once so far, and I have been pleasantly surprised by how soft and shiny my hair is looking...from just one wash.

I'm not mad about the smell of these products, as they remind me of another (mid range beauty) brand that I'm not too fond of. BUT I am always up for giving products and brands a second chance, so this challenge may just change my mind about the brand I referred to, if it ends up being the brand I think it is!

Needless to say I am VERY intrigued by both products and can't wait to see if my suspicions on the brand are correct!

#BBUndercover Hair Care Challenge with Beauty Bulletin South Africa

A little background on this undercover project:


A group of 'testers' have been selected to participate in an exciting blind shampoo and conditioner project. We know NOTHING about these products apart from the fact that they contain nourishing Shea butter and top quality natural ingredients. They are also suitable for all hair types (yay!).

Here's a video where I'm sharing my first impressions on this exciting shampoo & conditioner!


Stay tuned for the big reveal, coming soon!

x

Pregnancy Essentials - A list of things I couldn't have lived without during my pregnancy

My Pregnancy Essentials List - Items that have made my pregnancy happy & comfortable CityGirlSearching_Artboard 4.png

Yesterday (19th September) was my official due date, and so I had planned to have this post up a few days ago.

However, my little girl decided to surprise us all by arriving exactly 2 weeks early.

Let's just say, life with a newborn has been a wild ride so far (a good, fun ride at that) but still a rather crazy rollercoaster of ups and downs. So far (touch wood!) she sleeps verrrrryyyyy well, and feeds like a dream. This is why I am able to pop the odd blog post up every few days or so. By the way, I share a lot more over on Instaram & Instagram Stories (click here to follow along) so head on over there if you'd like to see a bit more of the behind the scenes.

And now back to this post of my pregnancy essentials. These are all things that helped me cope with the highs and lows of 9 months of growing a teeny tiny human. If there is anything you feel deserves a mention that you found helped you in your preganncy, please leave me a comment below, I'd love to hear from you and I'm sure the rest of my readers would too!


IMG_6575.JPG

Stretchy Tops

I bought all of my Cherry Melon maternity wear online through the Spree app on my phone. Spree often have amazing discounts and specials and so I was able to buy most of my items at a discount. Throughout my pregnancy I bought a pair of their linen shorts (they have an awesome stretch waistband!), two of their capped sleeve T-shirts, 2 vests, 1 pair of leggings and a strappy tank top. The tank top and T-shirts were worn the most by me (especially the pretty coral coloured one pictured above) and as it was Winter, I wore the strappy tank top just about every day.

IMG_6569.JPG

Bath & Shower Essentials

Bio-Oil, Epimax bath oil & Epimax cream

My skin went through all kinds of different phases. My face broke at at the beginning, and then my eczema flared up (click here to read how I coped with Winter dryness and eczema) and so I used just about all of the products in the Epimax range. I loved the Epimax & Epimax Junior bath oil for showering and bathing, and then used the Epimax & Epimax Junior cream all over my body. I did also use Epizone which has a similar formulation to the Epimax but is a little bit cheaper. I bought all of those products at Dischem.

I then liberally applied Bio-Oil all over my tummy, boobs, thighs and bum every day and am happy to report that I only got two little stretch marks under one of my boobs. Not bad going considering I put on about 20kg's of weight during my pregnancy. I also drank a lot of water and tried to do as much exercise as my body allowed me to (the best being pilates). I think the Pilates helped keep not just my muscles supple, but my skin nice and flexible too.

IMG_6570.JPG

Heat Device

Hot water bottle or a Wheatie (microwave bean bag)

Towards the end of my pregnancy, I got horrible back pain (click here to read more). I did eventually go to a physio which sorted me out in two ticks, but before and after my physio session I used a wheatie bean bag and/or hot waterbottle to soothe all the aches and pains. 

IMG_6568.JPG

Craft Project

Crochet baby blanket

Ah yes, this 'little' project is probably what kept me sane during the 9 months. A friend of mine (Candice) introduced me to the wonderful world of crochet, and from the first stitch I was hooked (see what I did there hehe). And silly me thought making a baby blanket would be the best project to start with. Well, needless to say, I am STILL not finished the blanket (to be fair, I have kept changing and adding squares and borders to make it bigger) and I was still crocheting while in labor two weeks ago. I am just about done though, and I can't wait to wrap my little girl up in it (just in time for the sweltering heat of summer!).

I'll be sure to share photos with you once it's done.

IMG_6571.JPG

Caffeine Free Drink

Lemon, Ginger & Honey Tea

I drank the odd cup of tea and coffee throughout my pregnancy, but I definitely went off milk and so my 5 cups of tea a day habit went down to one. To make sure I was drinking enough fluids (and because water is so boring) I got into the wonderful habit of drinking lemon, ginger and honey tea. Simply pour hot water over a few slices of fresh lemon, a slice or two of fresh ginger and a teaspoon of honey, let steep for a few minutes and voila! It's really good for you, cleanses your system and has loads of vitamins to keep you health.

IMG_6572.JPG

Face Cloth

This was to use in the bath, to keep my huge tummy warm. We have a HUGE bath and yet my round belly would always stick out above the water and I'd get cold very quickly. I ended up having a few face cloths on hand to keep me warm.

IMG_6573.JPG

Prenatal Vitamins

PregOmega Plus

I've spoken more about prenatal vitamins in this blog post , but the PregOmega Plus is the brand I ended up liking the most and am still taking now. It's one of the pricier brands on the market, but I would wait until it went on special at Clicks or Dischem (or at the Baby Expo!) and then stock up.

IMG_6574.JPG

Comfortable Bras

Mr Price Sports Bras 

I lived in these sports bras from Mr Price since week 1 of pregnancy. They have removable padding (which I didn't ever remove because the pads are soft and I like having a little 'lift' in that area) and are very soft. 

IMG_6576.JPG

Slippers

Woolworthes

Not much more needs to be said about having your feet comfy :)

IMG_6578.JPG

Comfortable PJ's

Soft & stretchy cotton nightie from Woolworthes

These nighties from Woolies are the absolute BOMB! I wore them throughout my pregnancy, and have found them to be the most comfortable thing to wear for breastfeeding. They have enough support in the boob area to hold breast pads now, and they are so oft and comfortable. They are also very stretchy and so are not restricting on the tummy as your belly grows and grows.

the items that helped make  my pregnancy happy &  comfortable so far

So there you have it, my list of things that helped make the past 9 months as comfortable as possible.

Is there anything that you found to be essential for you during your pregnancy that I've left out? I'd love to hear from you in the comments below!

I've linked up all my pregnancy posts here. Simply click each post to read more:

Dischem Baby Bag - Freebies for the soon-to-be Mommy

Who doesn't love freebies?! The Dischem Baby Bag was one of the first freebies I found out about while being pregnant. It's filled with loads of awesome little goodies, in full sizes and travel sizes and while I don't plan on using a lot of the brands given, it's always nice to have them on hand for those 'just in case' moments.

To receive the baby bag, you need to register for the Dischem Baby Programme.

How do you Join the Baby Programme?

You can do this in one of two ways:

  • Register in store at the Customer Service Desk
  • Call the Dischem Careline on 0860 347 243.

How do you qualify for the baby bag?

It's a really simple process. All you have to do is: 

  • register your pregnancy and due date with Dischem (either in-store or using the number posted above)
  • Earn 975 or more Benefit Points (or spend R950 or more) on your Dischem card
  • Book a consultation with our Clinic Sister for sometime between 20 - 26 weeks of your pregnancy (this date range is subject to change...call the careline to make sure of the date exclusions)

The consult includes the following;

  • Blood Pressure Check
  • Evaluation of Pregnancy
  • Information on Immunisation and Dischem Baby Services

Once you have met the above conditions and are in your 28th week or more of pregnancy, a baby bag will be ordered for you. The bag will only be available for collection two weeks after meeting the qualifying conditions. My bag was somehow sent to Balito instead of Pietermaritzburg, and so I had a family member pick it up for you. If you have someone collect it on your behalf, they need a copy of your ID (I sent along my old ID book as I have a new ID card) and they will also need to present your Dischem card.

A notification will be sent to inform you that you have qualified for a bag. Once the bag is available for collection in store you will receive a further notification.

Easy Peasy!

While I at first turned my nose up at the design/pattern of the bag, I have since found it to be an incredibly useful bag for traveling. I packed all of our little one's hospital things in it for labor, and even though I thought I might just give the bag away once I got it, I've used it for often.

I also love that the bag comes with a changing mat...super useful!

Here's a look at what was inside my bag (I have a feeling contents may vary):


Do you know of any other freebies for expecting moms? I'd love to hear from you in the comments below!

Momentum Multiply Baby Bag & Freebies

Momentum Multiple Baby Bag Freebies for members CityGirlSearching Blog-01.png

Who doesn't love a bag full of freebies?! Especially when the world of baby & pregnancy related products can end up costing you a pretty penny, it's always wonderful getting goodies for nada.

When choosing which medical aid to join last year, we eventually settled on Momentum Health basically due to their wonderful Maternity Program. Another bonus of the programme is of course the baby bag hamper they send out to you around week 28 of your pregnancy.

Here is a little more about the programme:

Members who register on the maternity programme when they are between 8 and 12 weeks pregnant, qualify for up to 12 antenatal visits at either a GP, gynaecologist or a registered midwife, as well as 2 pregnancy or growth scans - one before the 24th week and one after.
The Scheme's Health Platform benefit even covers 2 paediatrician visits in the child's first year on all but the Ingwe and Access Options.
It is worthwhile to note that one needs to be a member of the Scheme prior to falling pregnant, in order to enjoy the full value and benefits of the maternity programme, and actual benefits will differ depending on a member's choice of option.

Here is an in-depth look at the Momentous Baby Hamper for qualifying Momentum Health mommies-to-be.

What you get

*As advertised on their website...I'm sure the bags differ from time to time*

  • Caboodle backpack (I also found a changing mat & clear plastic pouch inside)
  • Toiletries & other goodies from Pigeon (I got a digital thermometer, wipes, breast pads & dummy)
  • a 'Baby on Board' decal sticker from BabyCity (not pictured)
  • a Tiny Love development toy
  • a one-year subscription to Living and Loving magazine
  • discount vouchers from Baby City (I didn't find any vouchers in my goodie bag but I did get a copy of the 'One + One = Three' baby book by Melodie de Jager)
  • I also got a sample pack of BabyJoy pants (we are planning on doing cloth nappies so not sure if we will get to trying these out)

How to get your bag

  • To qualify for this benefit, you must be a member of Multiply Premium at your 24th week of pregnancy. 
  • To get your bag, you need to register with the Momentum contact centre after your twelfth week of pregnancy.
  • They will contact you to confirm the delivery address for your hamper around the 24th week of your pregnancy. Your hamper will be sent to you via registered mail.
  • Expecting multiples? Ask about Multiply's special arrangements for multiple births when you register for the programme.

Some important info

  • This benefit is only available to members on Premier Multiply who register their pregnancy between 12 & 18 weeks
  • This benefit is only available for the main member and partner.
  • You can claim this benefit for one pregnancy each year.

Click here to read more details on the Momentum website.


Do you know of any other places to offer freebies for baby & mommy-to-be's?


Apart from Dischem and their baby bag, Momentum is the only other one I've come across so far. If you know if any other places that offer freebies/samples for expecting moms, please do leave me a comment below and let me know!

For moms, by moms - a list of newborn, baby & nursery essentials

A few months ago I reached out to my friends on Facebook and asked them the following question:

"Mommy friends, I'm wanting to write a blog post on newborn/baby/nursery items you couldn't live without. Please pop me a comment below with those things you loved/found so useful/couldn't live without <3

Please include the brand names you liked!"

Here is a list of items/tips/recommendations & advice that my wonderful (and experienced!) mommy friends shared with me. I hope you find their thoughts as helpful as I did, and if there is anything else you'd like to add please feel free to leave a comment below: 

list of newborn, baby  and nursery essentials

I am so thankful to all my friends who took the time to leave their thoughts. If there is anything you feel is missing, or you have some more items you think are MUST HAVE's to add to the above, then please feel free to leave me a comment! As a first time mommy-to-be, I'd love to hear from you.

Prenatal Vitamins - the low down on what to take as well as some South African brand names I recommend

prenatal vitamins, what to take south africa, pregnany vitamins

One of the first things you will start reading about once you are pregnant (or perhaps you were very prepared before hand and had already started taking these) is the advice to take a good prenatal vitamin.

If you have been trying to have a baby, you will probably have already been taking one for a while, but if you are pregnant already and haven't been taking one yet, don't worry too much but start taking one as soon as you can. Not only is your body going to need lots more nutrients in the coming months, but your little bundle is going to need all the help he/she can get to start growing.

There is  lot of great info out there on the quantities you need of each vitamin, but as I am not really a label reader and was very relaxed in my first few weeks of pregnancy, here are the basics:

prenatal vitamins, what to take vitamins for pregnancy, pregnant vitamins folic acid

1. Folic Acid (good for BEFORE, DURING & AFTER pregnancy)

Neural tube defects occur at a very early stage of development, before many women even know they're pregnant – which is why it's recommended to start taking folic acid before you start trying to conceive.

Recommended Dosage: 500 micrograms or (5 milligrams) per day

You don't need to buy a fancy folic acid, you can get a bottle of them (little yellow pills) over the counter at Clicks or Dischem. Just make sure you do check the labels properly...I nearly walked out with what I though was a really great deal on Folic Acid at Clicks, only to look closer and see that the R22 bottle was for 0.5 micrograms per tablet.

Folic Acid is a teeny tiny yellow pill that is taken once a day. If you take nothing else for the duration of your pregnancy, at least ensure you take Folic Acid.

Price: +-R80 for 100 tablets (which is just over 3 months supply)


2. Prenatal Multivitamin

Pregnavit M ~ (BEFORE, DURING & AFTER pregnancy)

Pregnavit prenatal vitamin south africa, what vitamins to take when pregnant, pregnant mulitvitmain

For the first 3 months I took Pregnavit M (pictured above) which I bought from Clicks and Dischem for about R70 for 30 capsules. I had NO idea what was considered a 'good' prenatal multivitamin, and so picked something that was middle of the range in terms of price. After going to my Gynae for our first check up, she mentioned that most of them are much of a muchness, and so I finished all of the capsules I had before going on to a fancier brand.

Pregnavit M contains folic acid (but not as much as is recommended) so I took both this as well as a Folic Acid tablet once a day for the first 3 months.

I wasn't great about taking either of these vitamins  and as much as the internet and some mommies out there will frighten you into thinking, baby and I seem to be doing okay ;)

Bear in mind that no multivitamin can take the place of (or should ever take the place of) a good balanced diet.

I'm not talking about the occasional hot cross bun or packet of chips you may have guzzled in bed last night.

I'm referring to a diet that consists of mostly fruit and vegetables, low GI or complex carbs (for those of us not able to stick completely to the Banting/Low Carb High Fat eating plan) like rice cakes, oats and whole grains as well as a good amount of dairy. I have been a bit all over the place with my eating habits over the last 4 months of pregnancy, but I do make sure to eat clean/healthily about 75% of the time. I'm planning on doing a blog post on my pregnancy eating habits soon, so bear with me on that one!

Recommended Dosage: 1 capsule per day

Price: +-R70 for 30 capsules (1 months supply)

Pregomega prenatal vitamin, pregnancy vitamin, what to take when pregnant, multivitamin south africa pregnancy

Preg Omega Plus~ (BEFORE, DURING & AFTER pregnancy)

PregOmega Plus is seen as the Gucci of the prenatal vitamin world, and as such carries with it a hefty price tag (+-R250 per box). Luckily my sister-in-law gave me the heads up that you can often buy it on special at Clicks for about R190 - R220 and so I waited until I saw it was on special before stocking up. I've been taking it for the past 2 weeks.

It's more of a pain to take because each 1 month supply box comes with 3 separate tablets (30 vitamin and mineral tablets, 30 Omega-3 Fish Oil vegicaps and 30 Calcium, Vitamin D and Magnesium combination tablets). It also contains folic acid (a whole lot more than the recommended dosage) and extra calcium to promote good bone and teeth health. This means you don't need to take Folic Acid alongside this multi-vitamin so at least there's that.

**I was told by a friend that her Medical Aid covers one box of pre-natal vitamins a month, and she is able to claim back for the full cost of the Pregomega Plus. So make sure to read the fine print on your medical aid policy to check whether you can claim back for prenatal vitamins**

Recommended Dosage: 1 capsule from each foil pack per day (3 in total) after meals

Price: +-R250 for 90 capsules (1 months supply)

There is a Pregomega version (without the Plus) which is a bit cheaper than the Plus version, but it doesn't contain the calcuim, magnesium or Vitamin D tablets.


Are there any great prenatal vitamin brands that I'm missing in this post? I'd love to hear from you!

Please leave me a comment below letting me know what you took while pregnant, and if there's anything else that us mommy-to-be's need to know about prenatal vitamins!

The Ultimate South African Christmas Gift Guide - everything you need to know about keeping it local this festive season

The Ultimate South African Christmas Gift Guide - everything you need to know about keeping it local this festive season

Christmas is right around the corner (6 weeks away to be exact!) and to help you beat the stress and overwhelm that often takes over when it comes to buying gifts, I've put together the following gift guide.

All of these wonderful gifts are from local South Africans and buying them means you are supporting the small business trade. I love the idea of supporting small business owners, because with each gift bought for your loved ones, you are enabling that business owner do the same for their family...it's a win-win situation.

I've started the guide with gift ideas for the special ladies in your life, followed by a selection of ideas for men, and ending off with loads and loads of inspiration for the little ones.

Please do feel free to share this post with all your friends and family, and anyone else you can think of who may need a little help finding the perfect Christmas present this year.

This is a VERY image heavy post, so you might want to go put the kettle on and make yourself a warm cup of something while you wait for all the images to load. In the mean time, make sure you bookmark this post so you can come back to it if you need to.

Happy Shopping!

x

Read More

Why you need to build an email list: Email Marketing for Beginners

Why you need to build an email list: Email Marketing for Beginners

If you've been blogging for some time and especially if you've been looking into how you can make money from blogging, I'm sure you will have come across the term 'email list'. I'm sure you have heard loads of other bloggers and business owners talking about 'list building' and how 'the money is in the list' but perhaps you've been wondering not just why on earth you need a list for your blog but also what on earth you'd be sending those people. Can't your readers just follow you through Bloglovin' or Feedburner? Why do you need to invest your time into another form of marketing?

If you're anything like me, you've been pondering those questions. It's time to stop wondering and start doing & so today I'm going to tell why you definitely DO need an email list for your blog or business, plus I'm going to show you how you can start building yours today.

Read More

What is Brand Photography and why you need it to grow your business

What is Brand Photography and why you need it to grow your business

Brand Photography: What is it and why do you need it to grow your business?

As a blogger and photographer I am so excited to create this post for you and to explain how powerful brand photography is for your business. When I first started my own blogging journey over 6 years ago, I was grabbing random images from Google and sites like WeHeartIt and just throwing together blog graphics without paying much attention to my brand image. Since picking up my first fancy camera 4 years ago, I have seen first hand how much beautiful & purposeful images can really propel your brand and give it an edge that sets it apart from every body else. This is what I want for you, fellow creative! I want to show you how custom brand photography can really help you to grow your business.

Read More

Innisfree Cafe Seoul, South Korea

Innisfree Cafe Seoul, South Korea

If you've been following this blog for any time at all, I'm sure you'll know have come across a post or two sharing my love for the Innisfree brand.

Innisfree is known as the first, original South Korean all-natural brand, and is one of the few Korean brands that use organic ingredients certified by France's ECOCERT organisation. All of it's packaging is recyclable, and the ingredients in it's products are natural and not filled with a million and one chemicals.

What I love most about Innisfree is the fact that their products are reasonably priced, and they WORK! There are so many amazing Korean skincare and makeup brands, but a lot of them look a lot better than they work. Korean packaging is incredibly cute and will have you buying all sorts of products just because they will look pretty on your dresser. 

You can imagine my delight when I found out that Innisfree has it's own cafe! There are two locations, one on Jeju Island (the home of Innisfree) and on in Seoul.

During the last weekend we spent in Korea (in case you're new around here, my husband and I spent 3 years living in South Korea and have only just returned home to South Africa) I was able to pop into the cafe and experience the beauty of Innisfreein it's 'cafe' form.

Read More

The Best Places to eat in Korea: Burger Bridge, Gwangju, South Korea

The Best Places to eat in Korea: Burger Bridge, Gwangju, South Korea

After a second visit to this delightful burger place in Gwangju, I am 100% convinced that this will be one of the best you'll eat while in Korea. I'm talking real, homemade, grilled patties with plenty of extra toppings that will leave you with a very full stomach and a happy heart.

Burger Bridge is a small restaurant located on the other end of downtown Gwangju, near Mudeung Mountain 무등산. It's in the Chosun University area, a place filed with the trendiest cafes, bars and restaurants. It's quite nearby to Florida Cafe and Hertz Guesthouse (one of our favorite dog-friendly places to stay).

The best part about this place (apart from how good their burgers are and what good value for money they are) is their opening times! Most restaurants open closer to midday in Gwangju, which is a real pain if you wake up early like us. Burger Bridge is open from 10 am! The restaurant itself is small, but oh-so-charming, and the guys who run it are super friendly. You can tell they are proud of their burger joint!

Read More