The Best Places to eat in Korea: Burger Bridge, Gwangju, South Korea

The Best Places to eat in Korea: Burger Bridge, Gwangju, South Korea

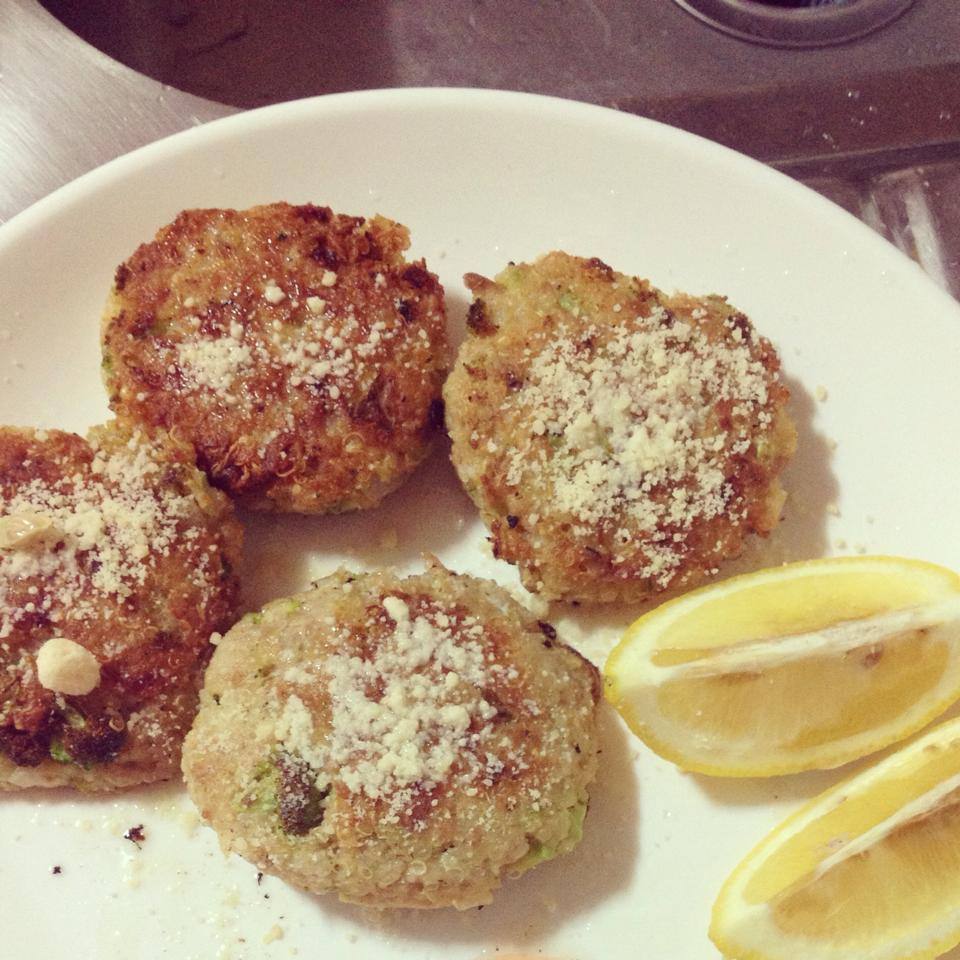
After a second visit to this delightful burger place in Gwangju, I am 100% convinced that this will be one of the best you'll eat while in Korea. I'm talking real, homemade, grilled patties with plenty of extra toppings that will leave you with a very full stomach and a happy heart.

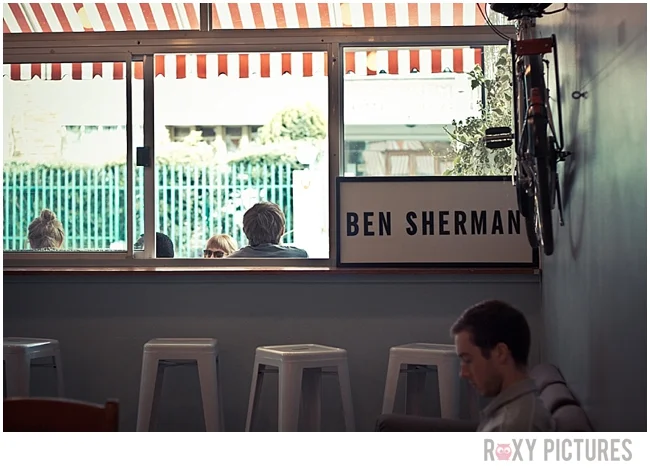
Burger Bridge is a small restaurant located on the other end of downtown Gwangju, near Mudeung Mountain 무등산. It's in the Chosun University area, a place filed with the trendiest cafes, bars and restaurants. It's quite nearby to Florida Cafe and Hertz Guesthouse (one of our favorite dog-friendly places to stay).

The best part about this place (apart from how good their burgers are and what good value for money they are) is their opening times! Most restaurants open closer to midday in Gwangju, which is a real pain if you wake up early like us. Burger Bridge is open from 10 am! The restaurant itself is small, but oh-so-charming, and the guys who run it are super friendly. You can tell they are proud of their burger joint!

Read More

How to Make your own Dried Apples

How to make dried apples

Apples are currently in season here in Korea, which means we are able to buy them without the usual $10 a pop price tag that that comes with them at any other time of the year. The apples used in this blog post were bought from a little farm stall near Naejangsan National Park.  

These dried apples were made with a dehydrator we were given by Farmboy's school, (here is a link to buying them on Gmarket) but you can easily do the same thing using your oven. 

It takes a while for the apples to get really soft and chewy (anything from 12 - 24 hours) but it's definitely worth the wait, and using a dehydrator instead of an oven will make your life easier. If you want them to be crunchy instead of chewy, then leave them in for even longer.

So far we have dried apples, pears (these have been the best so far!) and persimmons (another fruit that is also currently in season) and I plan on trying to make doggy snacks out of chicken breasts for our pup #ShadowTheJindo. I am also going to try my hand at making Biltong (the South African equivalent of Beef Jerkey) so let me know in the comments below if you can recommend any great recipes for Biltong!

If you have a dehydrator, the process is very simple.

1. Peel your fruit.

2. Chop/Cut/Core your fruit into small pieces. If you want to make apple rings then you will need to get hold of an apple corer. I was only able to find an apple corer than also slices (the green thing pictured below).

3. Place your fruit pieces as close together as possible, without actually having any of the pieces touch each other.

4. Turn on and adjust the temperature if your dehydrator has a temperature control switch. Turn up your dehydrator the the highest temperature (the higher the temperature the faster the fruit will dry out).

5. Leave for 24 - 48 hours. The first batch of fruit (pictured in this post) was only dehydrated over nights (about 15 hours) and so the apples were still quite soft and squidgy. We made another batch using persimmons and left those over night and the following day and they came out crunchy and delicious. I definitely recommend leaving them as long as possible.

6. Place the dried fruit in airtight container. You can use an ordinary ziplock bag and a straw to suck out all the air. Store in a cool, dark place. Your fruit will keep for a good couple of months (although ours doesn't last longer than a few days as we eat it all!).

Thanks to a friends suggestion, we just finished a batch of dried apples covered in cinnamon. Out whole house smells like Christmas and those apple pieces were absolutely amazing! Experiment with different spices, you can't really go too wrong.

If you don't have a dehydrator you can theoretically use your oven, but I'm not sure whether you'd actually want to leave your oven on overnight while you're sleeping? It is possible with the oven, but using a dehydrator is much easier. You can buy a dehydrator like ours on Gmarket (click here) for about W30 000.

Low Carb Coconut Flour Chocolate Chip Banana Cranberry Cookies {Recipe}

low carb coconut flour chocolate chip cranberry cookie banting cookie recipe

Another thing I have really missed while following the Banting eating plan (Banting is a form of Low Carb, High Fat lifestyle which you can find out more about by clicking here) is cookies. So many of the low card cookie variations are bland, leaving me feeling unsatisfied and still craving a soft cookie! These on the other hand have been a wonderful new addition to the sweet dessert section of my recipe collection. I have had success with two batches of these cookies, and I have enjoyed not just the softer, more crumbly version but also the more crunchy/a little burnt version which resulted when I forgot about them in my oven over night. 

If you've never baked anything Banting/Low Carb before, you need to keep in mind that you aren't baking traditional sweet treats. As you're not using regular wheat flour and processed sugar, what you make isn't going to taste like what you are used to. I've gotten used to the taste of Banting baked goods and have been just happy to be able to eat treats while still maintaining my figure. I just wanted to mention that as some people get all antsy about Banting baked good because they don't taste like the real thing. Of course they don't silly, but they also have none of the carbs that regular baked goods have and they still taste great and will satisfy your cravings! What's not to like?!

Chocolate isn't exactly Banting approved unless you are using dark chocolate (the darker the better so anything over 70% cocoa is best). I only had the Kirkland brand of chocolate chips which I bought from Costco and these are only 51% cocoa. But it's what I had on hand, so depending on how strict you want to be try and find very dark chocolate or omit completely. Again, with cranberries, these aren't actually on the 'allowed' eating list (which you can find here) but blueberries, cherries & strawberries are in small amounts. As I only had cranberries on hand, that's what went into these cookies. So please do feel free to adjust these cookies, adding/taking away any extra yummy things you like. I can imagine these would be really good with chopped up almonds & cherries!

Coconut flour is an incredible dense flour to work with and is very absorbent! Much more than you would think just by looking at it. Because of this, start slowly when adding the coconut flour and judge by your mixture how much you need to add in. I substituted a few things as I didn't have cream of tarter on hand and I think they still came out just fine. I substituted baking powder for both the tarter & baking soda (see measurements below).

Ingredients (makes about 20 cookies)

  • 2 fresh ripe large banana, (400 grams)
  • 2 large egg
  • 4 tbsp extra virgin coconut oil, (slightly warmed for easier mixing. Room temperature)
  • 5-6 tbsp coconut flour
  • 2 tbsp vanilla extract
  • 1 tsp cream of tartar (this is what the original recipe called for but as I didn't have these on hand I substituted 1 tsp Baking Powder for the tarter & baking soda) 
  • 1/4 tsp baking soda
  • 1/4 tsp sea salt
  • 1/2 cup of chocolate chips
  • 1/4 cup cranberries

Directions

  • Preheat the oven to 180C. Line a baking pan with greaseproof paper or make sure to grease your pan well.
  • Using a mixer, combine the banana and the egg. Slowly add the coconut oil (coconut oil must not be hot or it will cook the egg. You just need to the warm the coconut oil slightly warmed enough to mix in smoothly). Add the coconut flour, vanilla, cream of tartar, baking soda (or baking powder) and sea salt. Mix until smooth. Lastly add the chocolate chips & any other things you want to add.
  • Using a spoon, drop 1 your desired size balls of batter onto the baking tray leaving space between each cookie. Use the back of the spoon or your fingers to smooth the cookies to a flat cookie shape. The cookies will not naturally flatten, you must do this yourself unless you want to eat balls of cookies
  • Bake for 20 - 40 minutes depending on the heat of your oven. I have a very small convection oven which heats up incredible fast and is very hard to gauge the temperature with the temperature controller. I set the timer for 20 minutes and then keep checking on them to make sure they don't burn. Leave in longer for more of a crispier cookie, or take out before they go brown for a softer, more crumbly cookie.

Do you have any low carb cookie recipes that you love to make? I'd love to hear from you in the comments below as I'm always on the look out for new cookie recipes!

Carb Free Banting Breakfast Muffins {#BantingInKorea}

CarbFreeBantingBreakfastMuffinsBantingInKorea

Are you looking for an easy alternative to fried eggs when following a Low Carb, High Fat diet? These breakfast muffins are simple to make and can be spiced up in so many ways. They are filling, while still being super easy to whip together. If you have been Banting and have been enjoying my Cream Cheese pancake recipe, these muffins will be another great addition to your breakfast menu. 

FullSizeRender-1.jpg

Ingredients

These ingredients made enough to fill one muffin tray (6 large muffins)

-4 large eggs

-dash of milk (this depends on the size of your eggs and how 'eggy' you like your muffins to be. I have made these muffins using milk and not using milk and they have tasted the best with just a dash of milk)

-Your choice of filling:

  • 1/3 cup chopped/grated cheese (I usually just chop my cheddar cheese into small blocks)
  • handful of chopped baby tomatoes/sun-dried tomatoes
  • handful of chopped raw zucchini 
  • dash of smoked paprika
  • pinch of salt & pepper
CarbFreeBantingBreakfastMuffinsBantingInKorea

Directions

1. Pre-heat your oven to 180C

2. Grease a muffin tin (I always use coconut oil)

3. Beat eggs and milk together, then adding your filling ingredients. Finish off with your seasoning of choice and pop in the oven for 15 minutes or until cooked through. Don't get be alarmed, your muffins will puff up while cooking but once removed from the oven they will sink, this is completely normal and doesn't mean you have flopped the recipe. They taste amazing either way.

4. Eat alone or with your choice of sugar free tomato sauce/pesto.

Yum!

    CarbFreeBantingBreakfastMuffinsBantingInKorea

    How To Make Garam Masala Spice for curries

    HowToMakeGaramMasalaSpice

    Garam Masala is a blend of ground spices used to add flavor to Indian curries. I made a delicious butter curry recently, and the main ingredient was Garam Masala. Living here in South Korea means limited access to foreign food stores, so I had to make my own version of the spice using what I had on hand in my grocery cupboard. All I can say is the aromas given off from this mixture is heavenly and will make your home smell incredible. 

    There are many varaiations of this spice, but this is my version using what I had on hand in my grocery cupboard.

    HowToMakeGaramMasalaSpice_0006.jpg

    Ingredients:

    1/2 cup whole coriander seeds

    1/4 cup whole cumin seeds

    5 cloves

    2 star anissed

    4 bay leaves

    8 green cardamom pods

    2 sticks of cinnamon

    2 dried red chiles (use more if you prefer more of a kick)

    HowToMakeGaramMasalaSpice

    Method

    1. Dry roast the larger seeds separately to the smaller ingredients to avoid burning.

    2. Once cooled combine in grinder until a fine powder is formed.

    3. Store in an airtight container (click here to see how to make this gold animal glass jars)

    HowToMakeGaramMasalaSpice

    And now you have your very own Garam Masala to add to curries. I will be posting a delicious recipe for Butter Chicken Curry soon.

    Happy cooking!

    Low Carb Chocolate Coconut Brownies {#BantingInKorea}

    LowCarbCoconutBrownies

    I'm mad about chocolate brownies, as I'm sure you are too if you're reading this post, and so I have been on a mission to make brownies in a way that lines up with the Banting diet I am currently on. I'm sure you're wondering what bulks up these brownies if they are Banting (click here to read more about this low carb/high fat lifestyle). These brownies contain no wheat or gluten as the secret bulking ingredient is SWEET POTATOES!.

    I was pretty shocked when I found out that sweet potatoes (much better than regular potatoes as they have more fibre and less carbohydrates) can be used to bake sweet tasting treats. Sweet potatoes are a fantastic bulking agent to use in cakes and brownies BUT they do still contain quite a few carbohydrates and so they are 'allowed' on the Banting Diet, but in moderation. The recommended allowance of sweet potatoes per day is 1/2 cup, so that would be about 3 of these brownies. So you can still have your cake (or brownie!) and eat it.

    I adapted the recipe slightly from one of my favourite South African food bloggers, Lexi from Whisking It and changed up a few small things to suit my grocery cupboard here in Korea.

    I also really like what Lexi says about the fact that we should forget about following a diet like it's a religion. There are so many branches of Banting/Paleo/LowCarb HighFat diets (some allow this and not that etc) and so you need to rather listen to your body when it comes to following an eating plan. Following the Banting Diet strictly has REALLY worked for me, but I know people that have struggled with it and found they aren't losing any weight. You just need to find something that works for you (including drinking plenty of water and of course exercising).

    IMG_1629.jpg

    Ingredients

    2 cups of grated sweet potato (Thanks to Lexi for the tip to use the SMALL holes of the grater - not the normal ones - to get a finer batter)

    2 eggs

    1 tsp vanilla essence

    1/2 cup of raw honey (I can only find very syrupy honey here in Korea so mine was already a very thin consistency, you can just heat in microwave to thin it a bit if yours is very thick)

    1 tsp stevia ( I used Xylitol)

    1/2 cup olive oil (I used coconut oil)

    1 tbsp baking powder

    ½ tbsp of bicarbonate of soda

    1 cup cocoa powder

    2 tbsp coconut flour

    1/2 cup desiccated coconut

    *not entirely Banting but I added a few crumbs of dark baking chocolate to the mix 

    Directions

    Preheat your oven to 180 °C

    Mix the grated sweet potato, eggs, vanilla, honey and olive oil/coconut oil in a large mixing bow. It will be a sticky mess, keep going. 

    Add baking powder and baking soda.

    Add cocoa powder, and finally add the coconut flour, coconut and stevia/xylitol and any chocolate chips you may want to add.

    Finally pour the mixture into a baking tray. Make sure to grease your pan tray well (I used coconut oil, and didn't quite use enough and so lost quite a bit of brownie to the bottom of the pan!).

    Bake for 25-30 minutes. If you're here in Korea and have a small, fiery hot oven like we do, watch your brownies like a hawk! I burned to bottom of mine when I got distracted by something or other in Instagram (note to self...when baking, stop trying to do a million other things at once!)

    Allow to cool for 5-10 minutes before carefully removing the brownie cake from the tin. 

    These brownies freeze very well! I found mine were very crumbly, but they firmed up well after freezing. Freezing also ensure you don't eat the whole lot in one go!

    LowCarbChocolateCoconutBrownies

    DIY Chai Spice

    DIY Chai Spice

    An easy recipe for making the perfect Chai Spice! I mainly use Chai to brighten up my hot chocolate (recipe to come soon!) as it adds a wonderful flavour to an already delicious drink. Pictured below are all the ingredients in their natural form. You can of course use all of these things in powdered form (available at most grocery stores), but I used a mixture. Using the ground form of these ingredients also creates a finer powder at the end, but its up to you which you prefer, or which you have available. You can grind each ingredient yourself too by blitzing in a blender.

    Read More

    DIY How to make Fig Jam

    How To Make Fig Jam

    Even though this jam is not banting friendly (if you haven't heard of the Banting diet make sure to read this post) but because it's fig season here in Korea, one has to improvise. Storm and I decided not to experiment with Xylitol just yet and made it with good old fashioned sugar. This recipe is incredibly easy to follow and will have your home smelling festive in no time at all. And of course, the jam itself tastes heavenly too.

    HowToMakeFigJamEasyRecipe

    What you need

    Saucepan

    Figs (we had about 8 figs)

    1/4 cup brown sugar (adjust for the amount of figs...more sugar for more figs)

    1 teaspoon cinnamon

    a small piece of ginger, finely chopped

    Directions

    Quarter your figs. Add the figs to a pan and simmer on low heat while adding the sugar and ginger. Keep stirring until the sugar has completely dissolved. You can use a hand held blender to puree your jam, but it's not really necessary. 

    When the sugar has completely dissolved add the cinnamon. Keep stirring on a low heat, making sure not to let the mixture burn.

    Once everything has dissolved remove from the heat and allow to cool. 

    Place in sterilised glass jars. There is an actual method to sterilizing glass jars properly, but we were on a tight schedule and so just soaked the jars in boiling water before use.

    Best kept in the fridge and served with cheese!

    You can store your jam in these cute gold animal glass jars (DIY coming to the blog soon) or in any glass jar you may have at home.

    Roasted Chickpeas {recipe}

    RoastedChickpeasRecipe

    A friend introduced me to this hearty & healthy snack a few weeks ago, and since then I have been trying to perfect my own version. Chickpeas, also called Garbanzo beans, are high in protein as well as being low GI, as a snack they keep you feeling fuller for longer, helping to keep hunger pangs at bay. They are also said to lower cholesterol, so all in all a very good addition to your diet. As with most legumes they are higher in carbs, so don't eat a whole bowl by yourself, sharing is caring!

    I have only ever used chickpeas to make hummus, and even then I would cheat by using the can variety, which saves the hours of soaking that goes into the dry ones. Here in Korea it can be rather difficult getting your hands on anything that is not a staple of the Korean diet, and as far as I can tell, my Korean co workers have never heard of chickpeas. I did however find a 1kg bag of them at the Asia Mart, opposite the Jeonju Bus Terminal for W6 000. 

    You need to preferably soak chickpeas overnight to soften. If you don't have time to leave them overnight, they can be boiled on the stove too. Boiling on the stove will still take about 2 hours to soften. Click here for more ways to cook them without soaking overnight. 

    After soaking, discard the water (you will notice it has a brownish tinge to it) and place the beans in a large bowl. Now you add your choice of seasoning. 

    RoastedChickepeasRecipe

    To roast the chickpeas you need oil and your choice of seasoning spices. I used Grapeseed oil as we didn't have any olive oil. I then used salt & blackpepper, Ina Paarmans Chicken spice (we stocked up on Ina Paarmans and other seasonings when we came over from South Africa), Robertsons Salt & Vinegar and celery salt. Combine the oil and spices with the chickpeas, rolling them around until coated.

    Roastedchickpeasrecipe

    Then pop them on a roasting pan, and roast on a high heat for about 30 minutes. Make sure to keep checking on the oven so they don't burn. I used a sheet of tin foil to cover my baking tray to avoid the clean up that usually follows roasting.

    Remove from the oven and enjoy. They are best enjoyed straight out of the oven while still warm.

    RoastedChickPeasRecipe

    Tuna & Broccoli Quinoa Burgers {recipe}

    quinoatunabroccoliburgers

    I don't do very much cooking at home, I much prefer baking. But on the odd occasion when I do whip out the frying pan, I'm not scared to try new recipes. Especially at 10 o'clock at night. This meal was one of them and this time I got it right. So right in fact that Farmboy ate 9 of the 12 patties.

    I adapted the original recipe from here to my kitchen and ingredients here in South Korea. The two pictures I have of them don't do them any justice so you'll have to take my word for it when I say these little patties are tasty beyond measure and so easy to make.

    Ingredients

    • 1/2 cup uncooked quinoa
    • 1 cup diced broccoli
    • 1/2 cup minced onion
    • 1 cup drained & flaked tuna or salmon (I used a big tin of tuna)
    • 1/2 cup rolled oats, mixed in a blender to create a fine powder (the original recipe calls for almond flower or gluten free bread crumbs)
    • 2 garlic cloves, minced
    • Sea salt & fresh ground black pepper
    • 2 eggs
    • 1-3 tablespoons coconut oil for frying

    Method

    1. Cook your quinoa (I boiled it as per this great recipe) and leave to cool.

    2. In a medium sized skillet, sauté the broccoli and onions in 1-2 teaspoons of coconut oil over medium heat until they are begin to turn soft, about 5 minutes. Remove from heat and cool.

    3. In a large mixing bowl, combine the quinoa, broccoli and onions, tuna, oats and garlic. Season with lots of sea salt and fresh ground black pepper to taste.

    4. Stir in the eggs.

    5. Warm a tablespoon of coconut oil in a skillet.

    6. Measure out a 1/4 cup of the mixture and press into a patty shape. Gently ease onto the skillet. 

    7. Reduce temperature to medium low, and fry the patties for 3-5 minutes on each side, or until they are golden brown. Keep adding more coconut oil to the pan as needed. Serve warm or at room temperature with slices of lemon and sweet chile sauce.

    TunaBrolccoliQuinoaBurgers

    How to make your own cottage cheese {recipe}

    HomemadeCottageCheeseRecipe

    This is one of the easiest things I have ever made, and I was able to do it right here in South Korea with only 2 ingredients! It's super easy to do and so yummy, we won't ever be buying store bought cottage cheese again.

    HomemadeCottageCheeseRecipeSouthKorea2

    Ingredients

    2 liters of milk (I used whatever milk I could find in the stores here as I can't understand the Korean labels, but you could try it with full cream, half fat and fat free milk)

    1/3 cup vinegar (you can use either white vinegar or apple cider vinegar. I've made it with both and haven't noticed a difference).

    HomemadeCottageCheeseRecipeSouthKorea1

    Directions

    Heat up the milk to 120F or 45C in a large pot or pan. I didn't have a thermometer and so heated up the milk until it was a hot, shower temperature. You can add salt/pepper/rosemary/herbs to the milk to flavour your cheese. You should be able to touch the milk without scalding yourself. Turn off the heat and add the vinegar, stirring slowly so as not to break the curds. It will start to curdle right away.

    Cover and leave to sit for about half and hour.

    Drain the curds and whey using a muslin cloth, or any other piece of cotton fabric. Drain completely. What will be left is your cottage cheese. Store in an air tight container. If it's a little on the dry side, you can add cream or more milk to your mixture. You will also need to add salt as the taste will be a little bland. It should keep for about 10 days, but ours has never lasted more than a day, it's just so good!

    Serve with sweet chile sauce and fresh coriander for maximum yumminess. 

    HomemadeCottageCheeseRecipeSouthKorea3.jpg

    {Baking Pinspiration}

    Some pinspiration to get you back into your kitchen, and to the oven! 

    Aren't these images just so beautiful too?! For more like these, pop on over to my Pinterest boards  and feast your eyes.

    Happy Baking!

    xxx

    Korean Samgyupsal...South African Style

    A few pangs for Korean food left us with a slight longing to return to Korean soil...to combat that for the time being, Farmboy and I set about recreating one of our favourite meals, Samgyupsal. Samgyupsal is traditionally thick, fatty slices of pork belly meat, usually neither marinated nor seasoned. It's cooked on a grill by each person and eaten directly from the grill. It is often dipped into a spicy pepper paste.

    Here is a photo of the real deal in South Korea (taken when my mommy came to visit!), followed by our attempt a few days ago...

    A lunch date at Wolves Cafe, Illovo

    This past weekend I had a very quick trip up to Joburg (Farmboy is away in Zambia so I thought a very quick visit home was in order). I met up with my dear friend and recent maid of honour at my wedding, Louise. Here are some snaps from our lunch date at one of our favourite hang out places, Wolves Cafe in Illovo. By the by, their red-velvet cake is to die for!

    The lovely lady behind the cafe, Angie has an awesome blog called Luck Pony. Go and pay her a visit, you won't be disappointed as her blog is filled to the brim with goodies that will have you scrolling for hours.