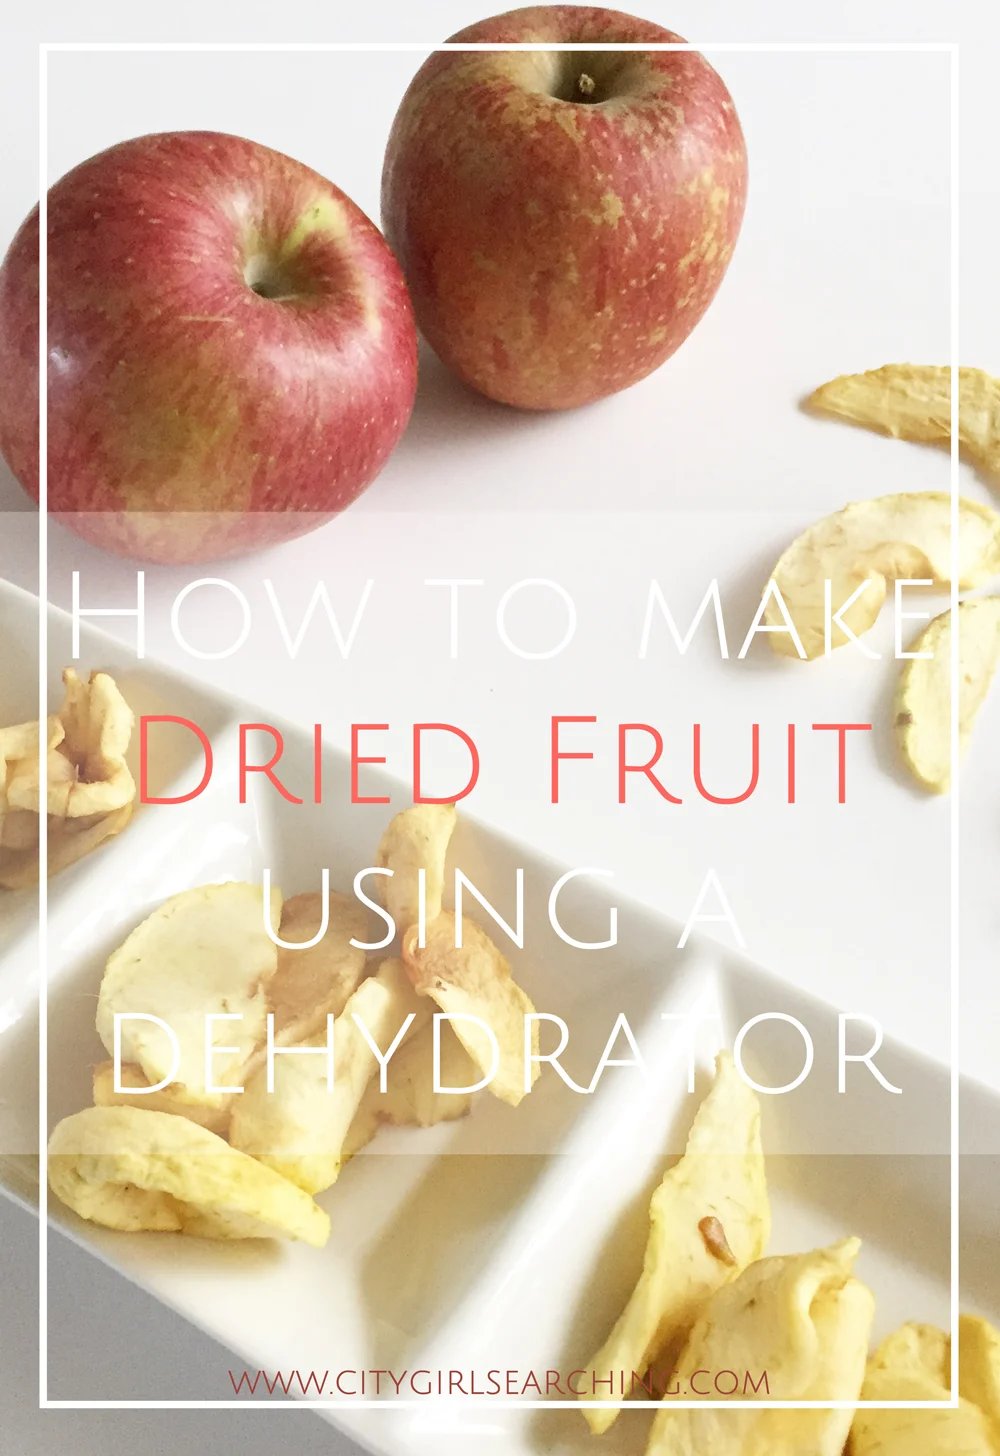
How to Make your own Dried Apples

How to make dried apples

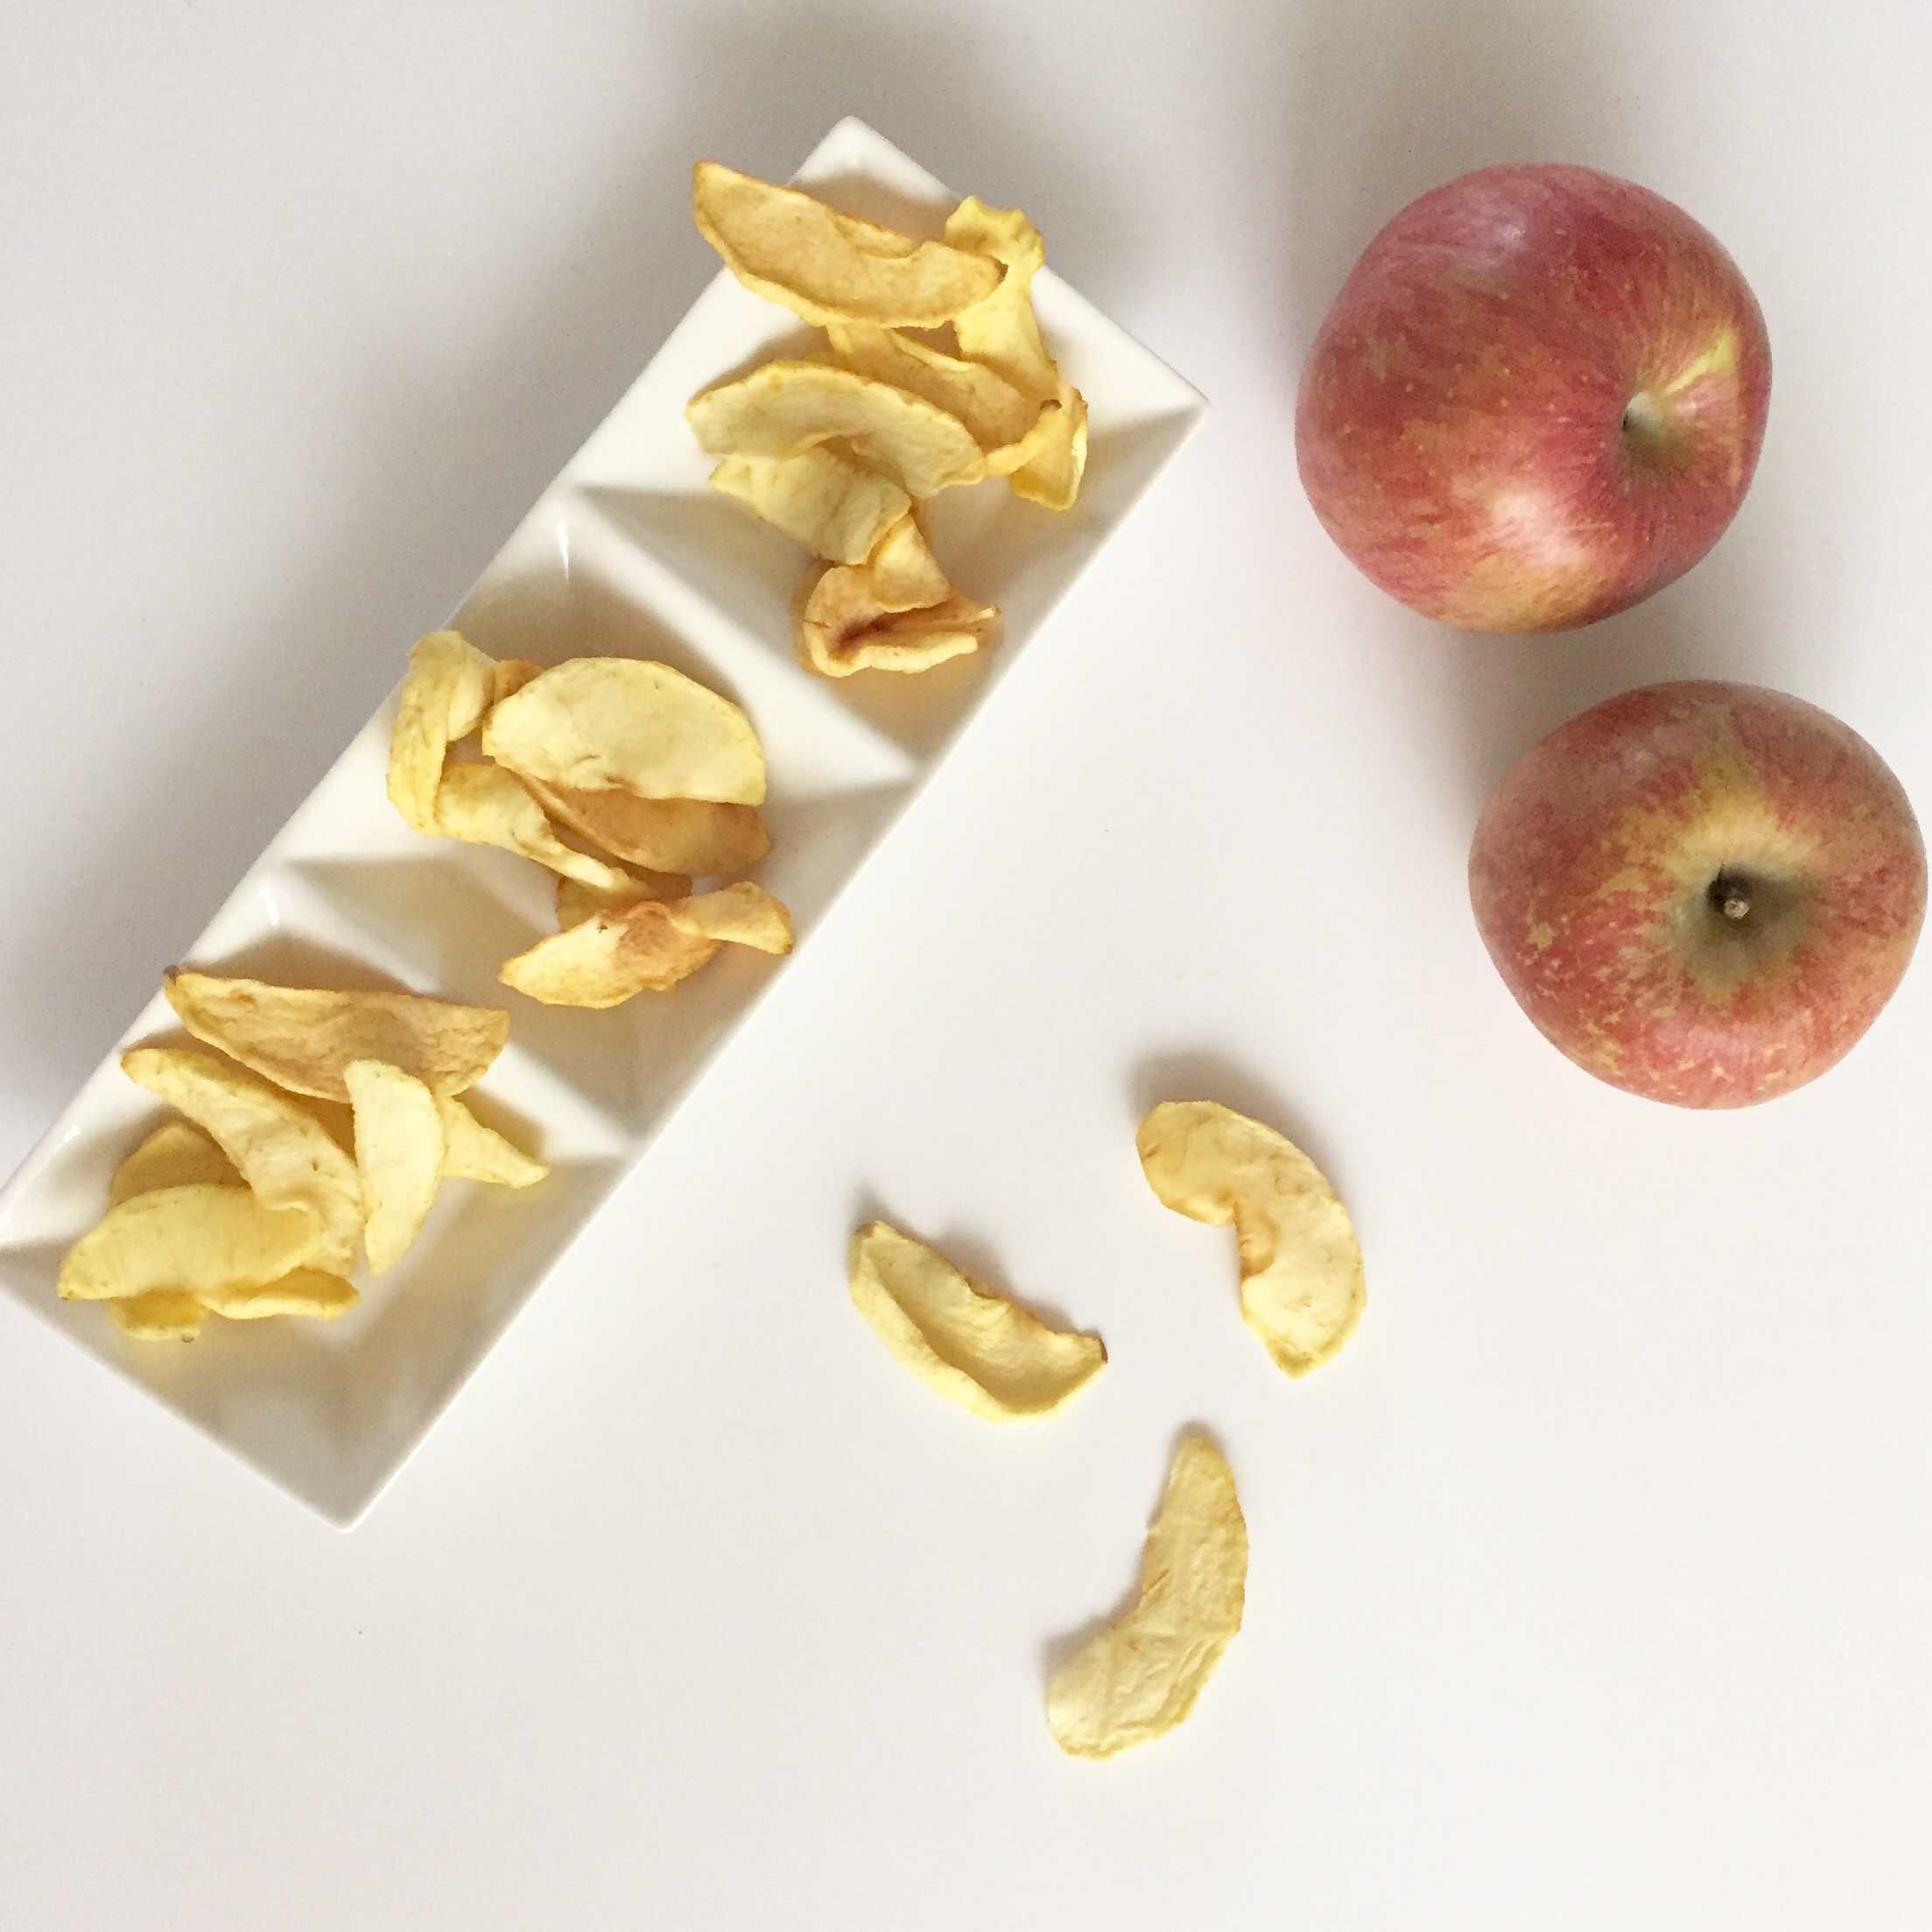
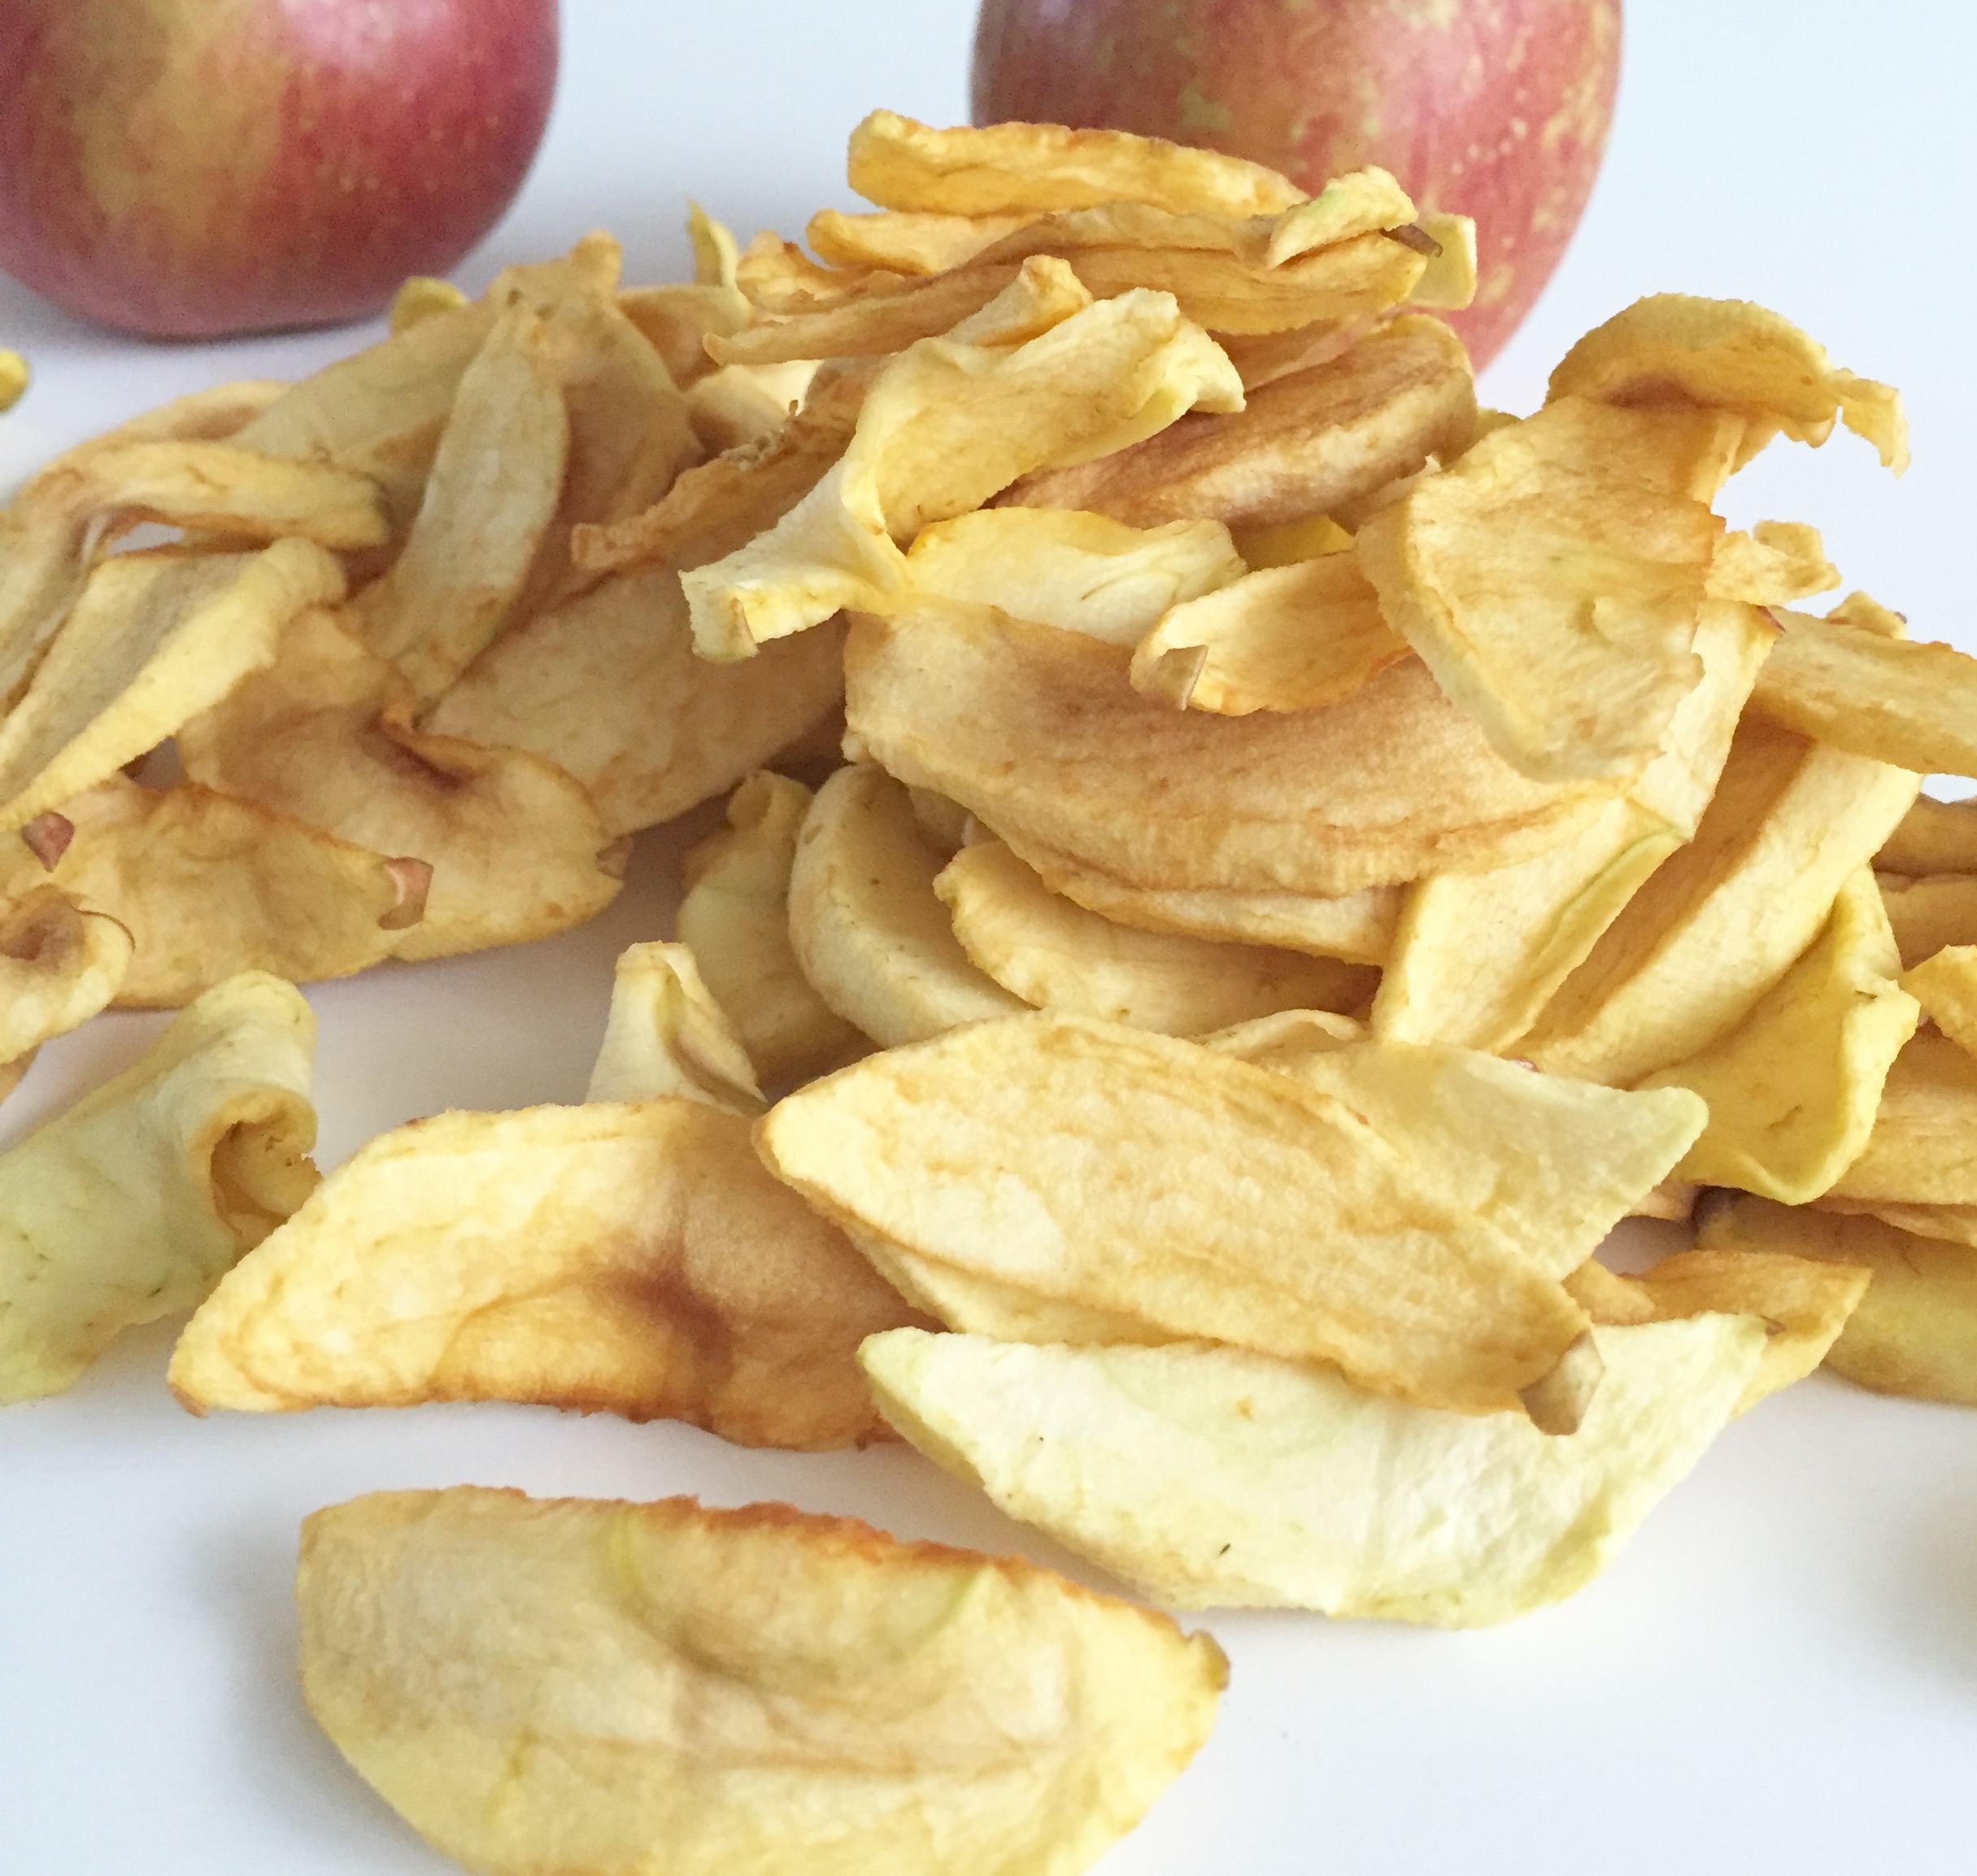
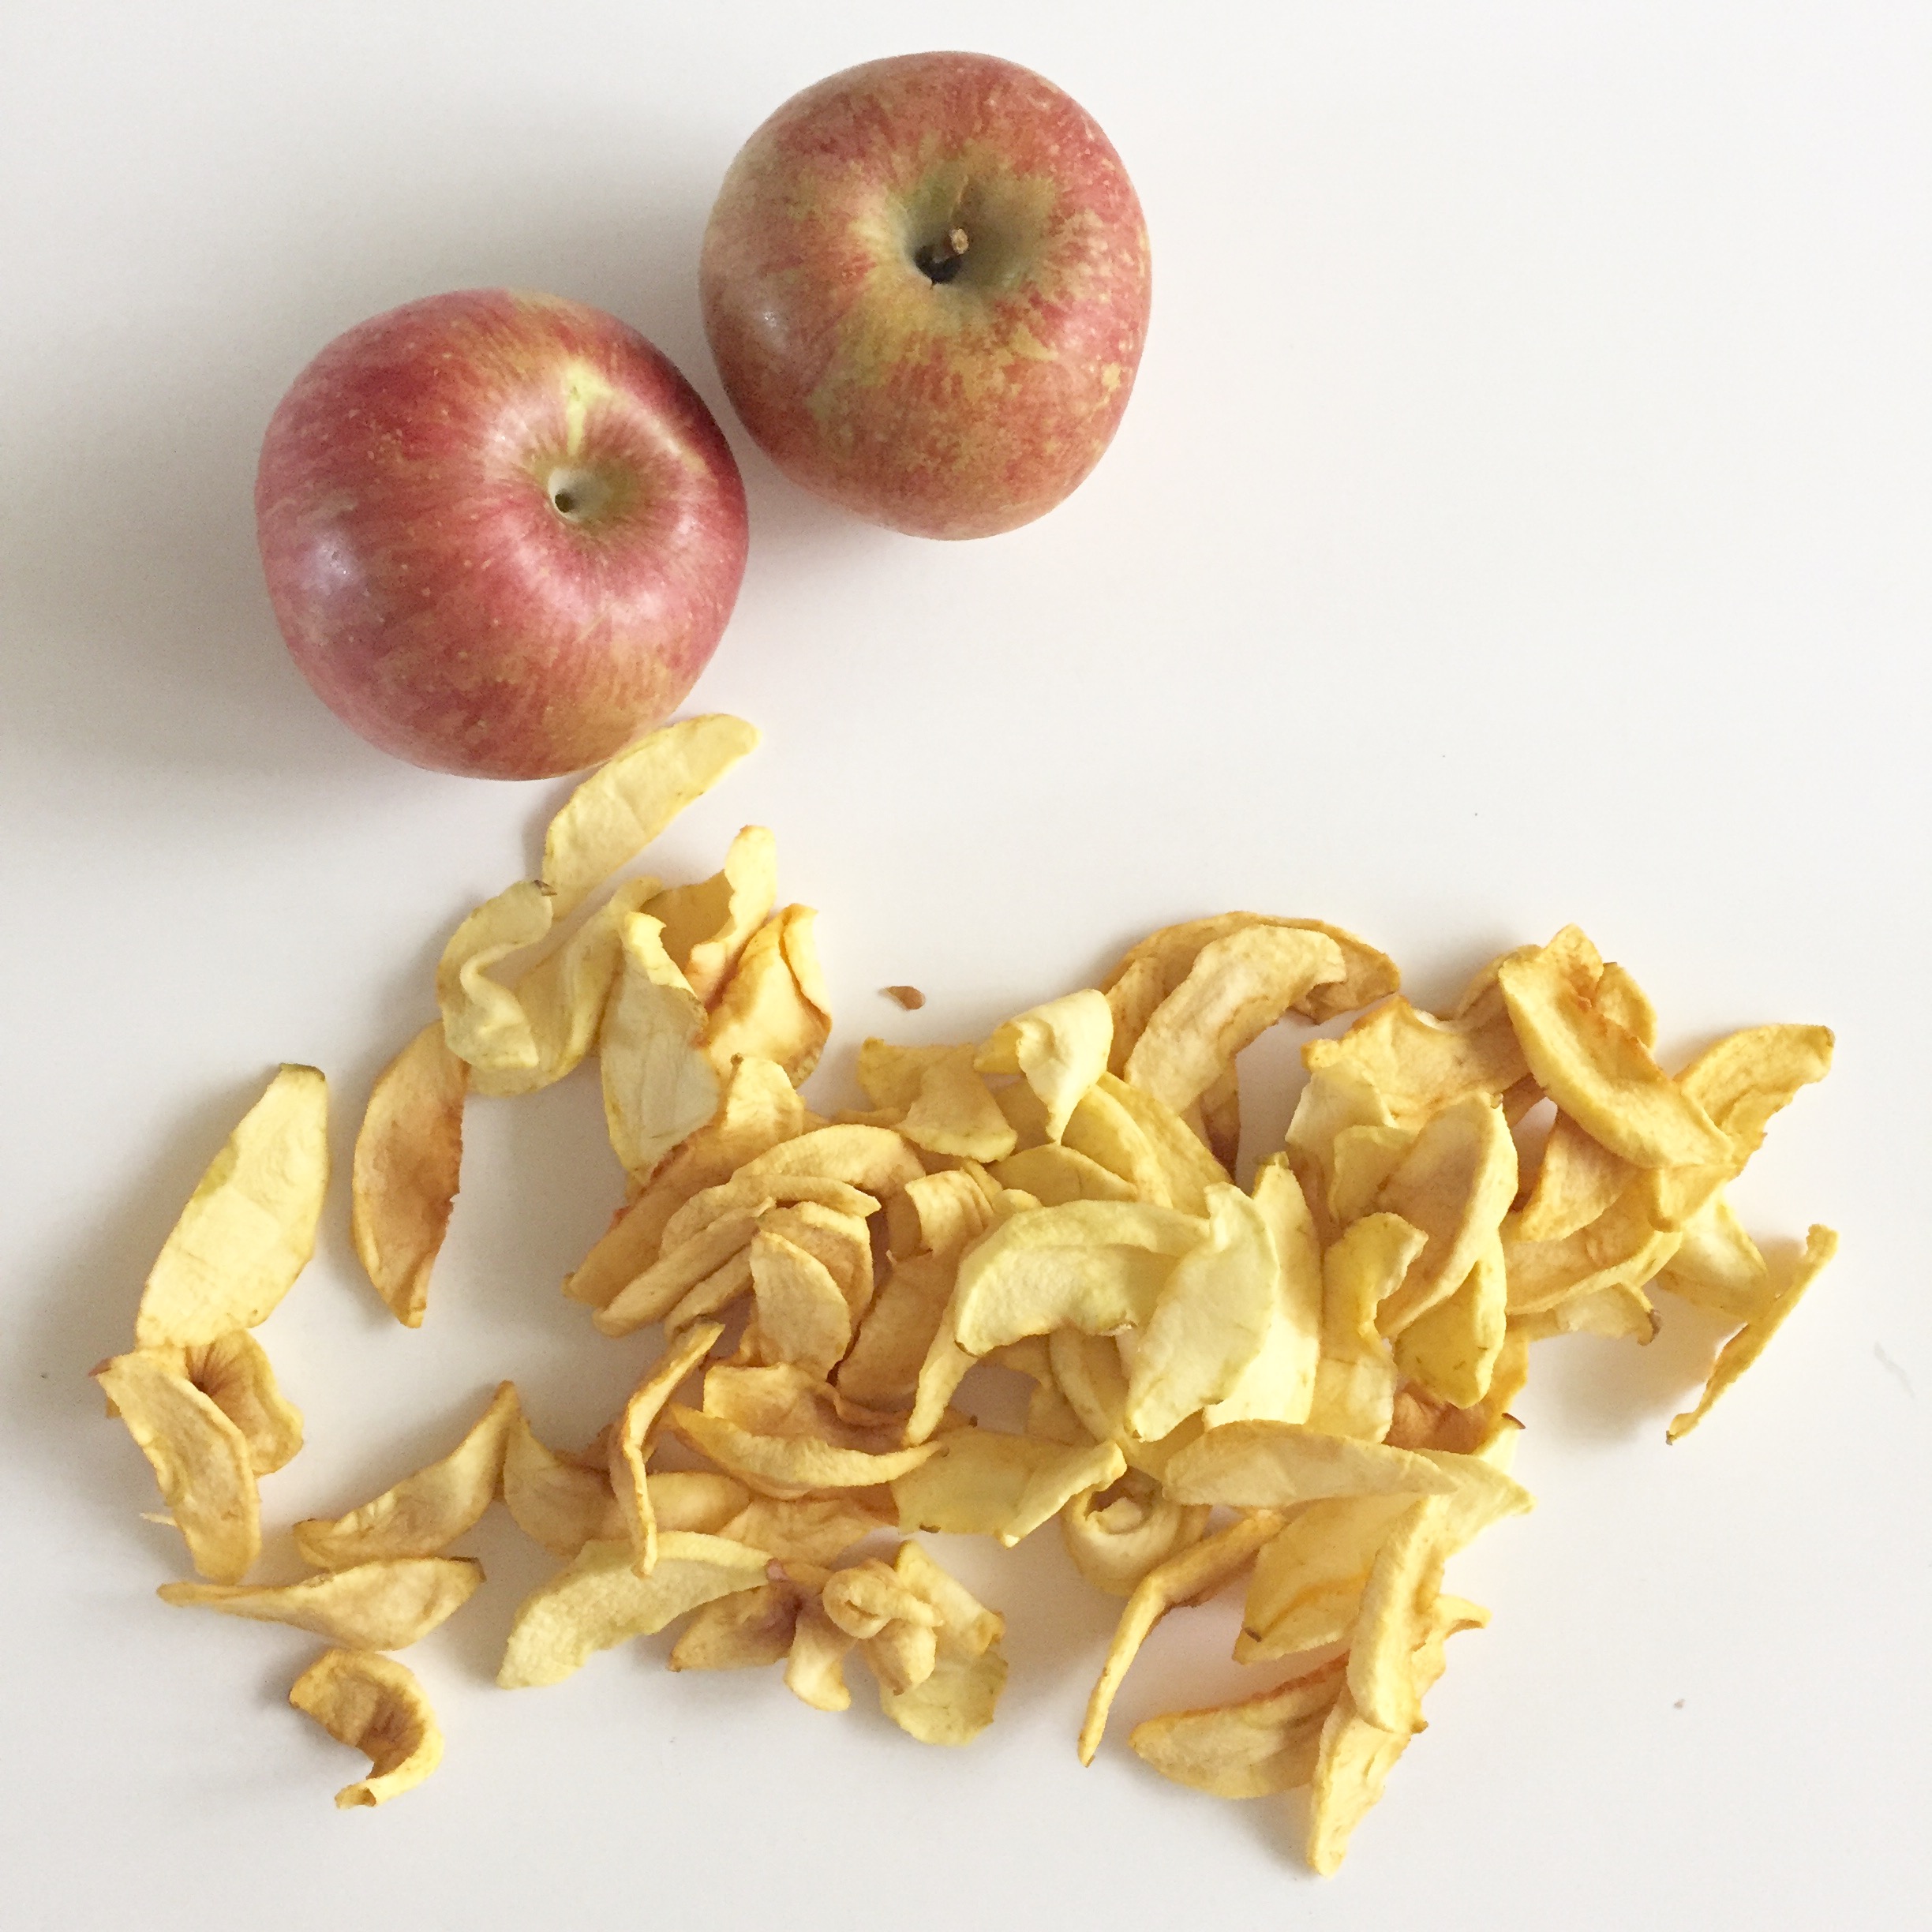
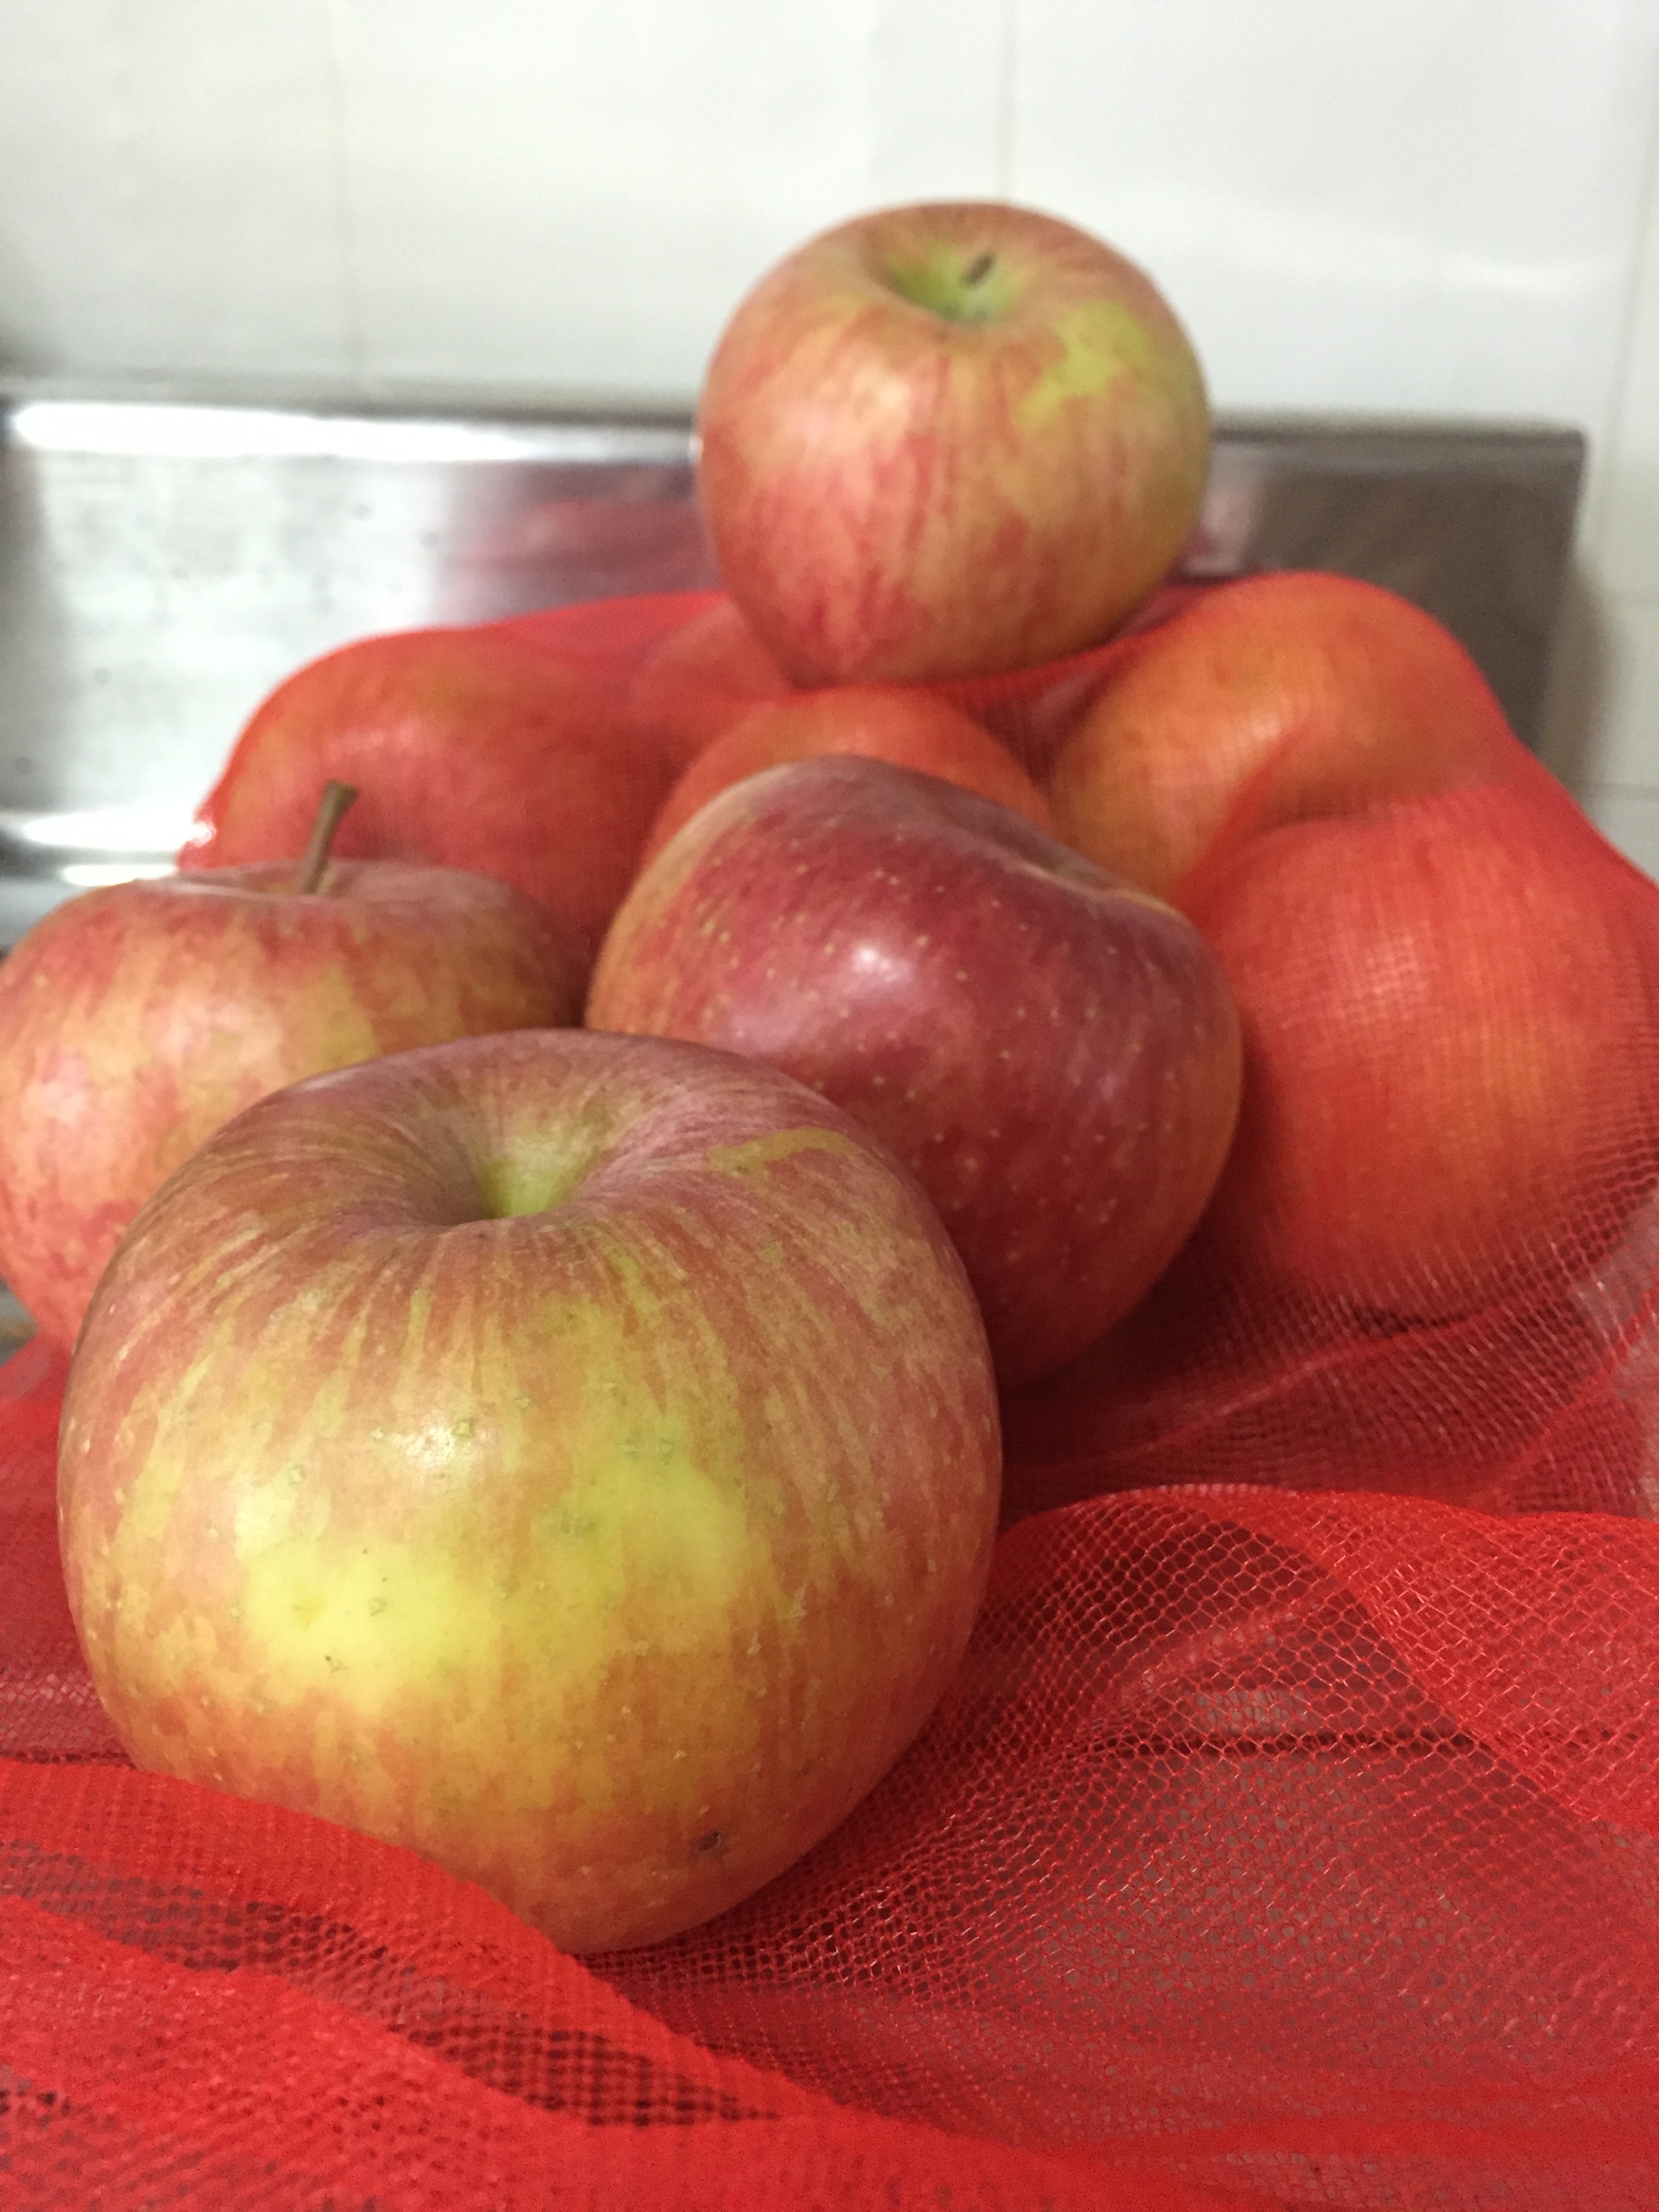
Apples are currently in season here in Korea, which means we are able to buy them without the usual $10 a pop price tag that that comes with them at any other time of the year. The apples used in this blog post were bought from a little farm stall near Naejangsan National Park.  

These dried apples were made with a dehydrator we were given by Farmboy's school, (here is a link to buying them on Gmarket) but you can easily do the same thing using your oven. 

It takes a while for the apples to get really soft and chewy (anything from 12 - 24 hours) but it's definitely worth the wait, and using a dehydrator instead of an oven will make your life easier. If you want them to be crunchy instead of chewy, then leave them in for even longer.

So far we have dried apples, pears (these have been the best so far!) and persimmons (another fruit that is also currently in season) and I plan on trying to make doggy snacks out of chicken breasts for our pup #ShadowTheJindo. I am also going to try my hand at making Biltong (the South African equivalent of Beef Jerkey) so let me know in the comments below if you can recommend any great recipes for Biltong!

If you have a dehydrator, the process is very simple.
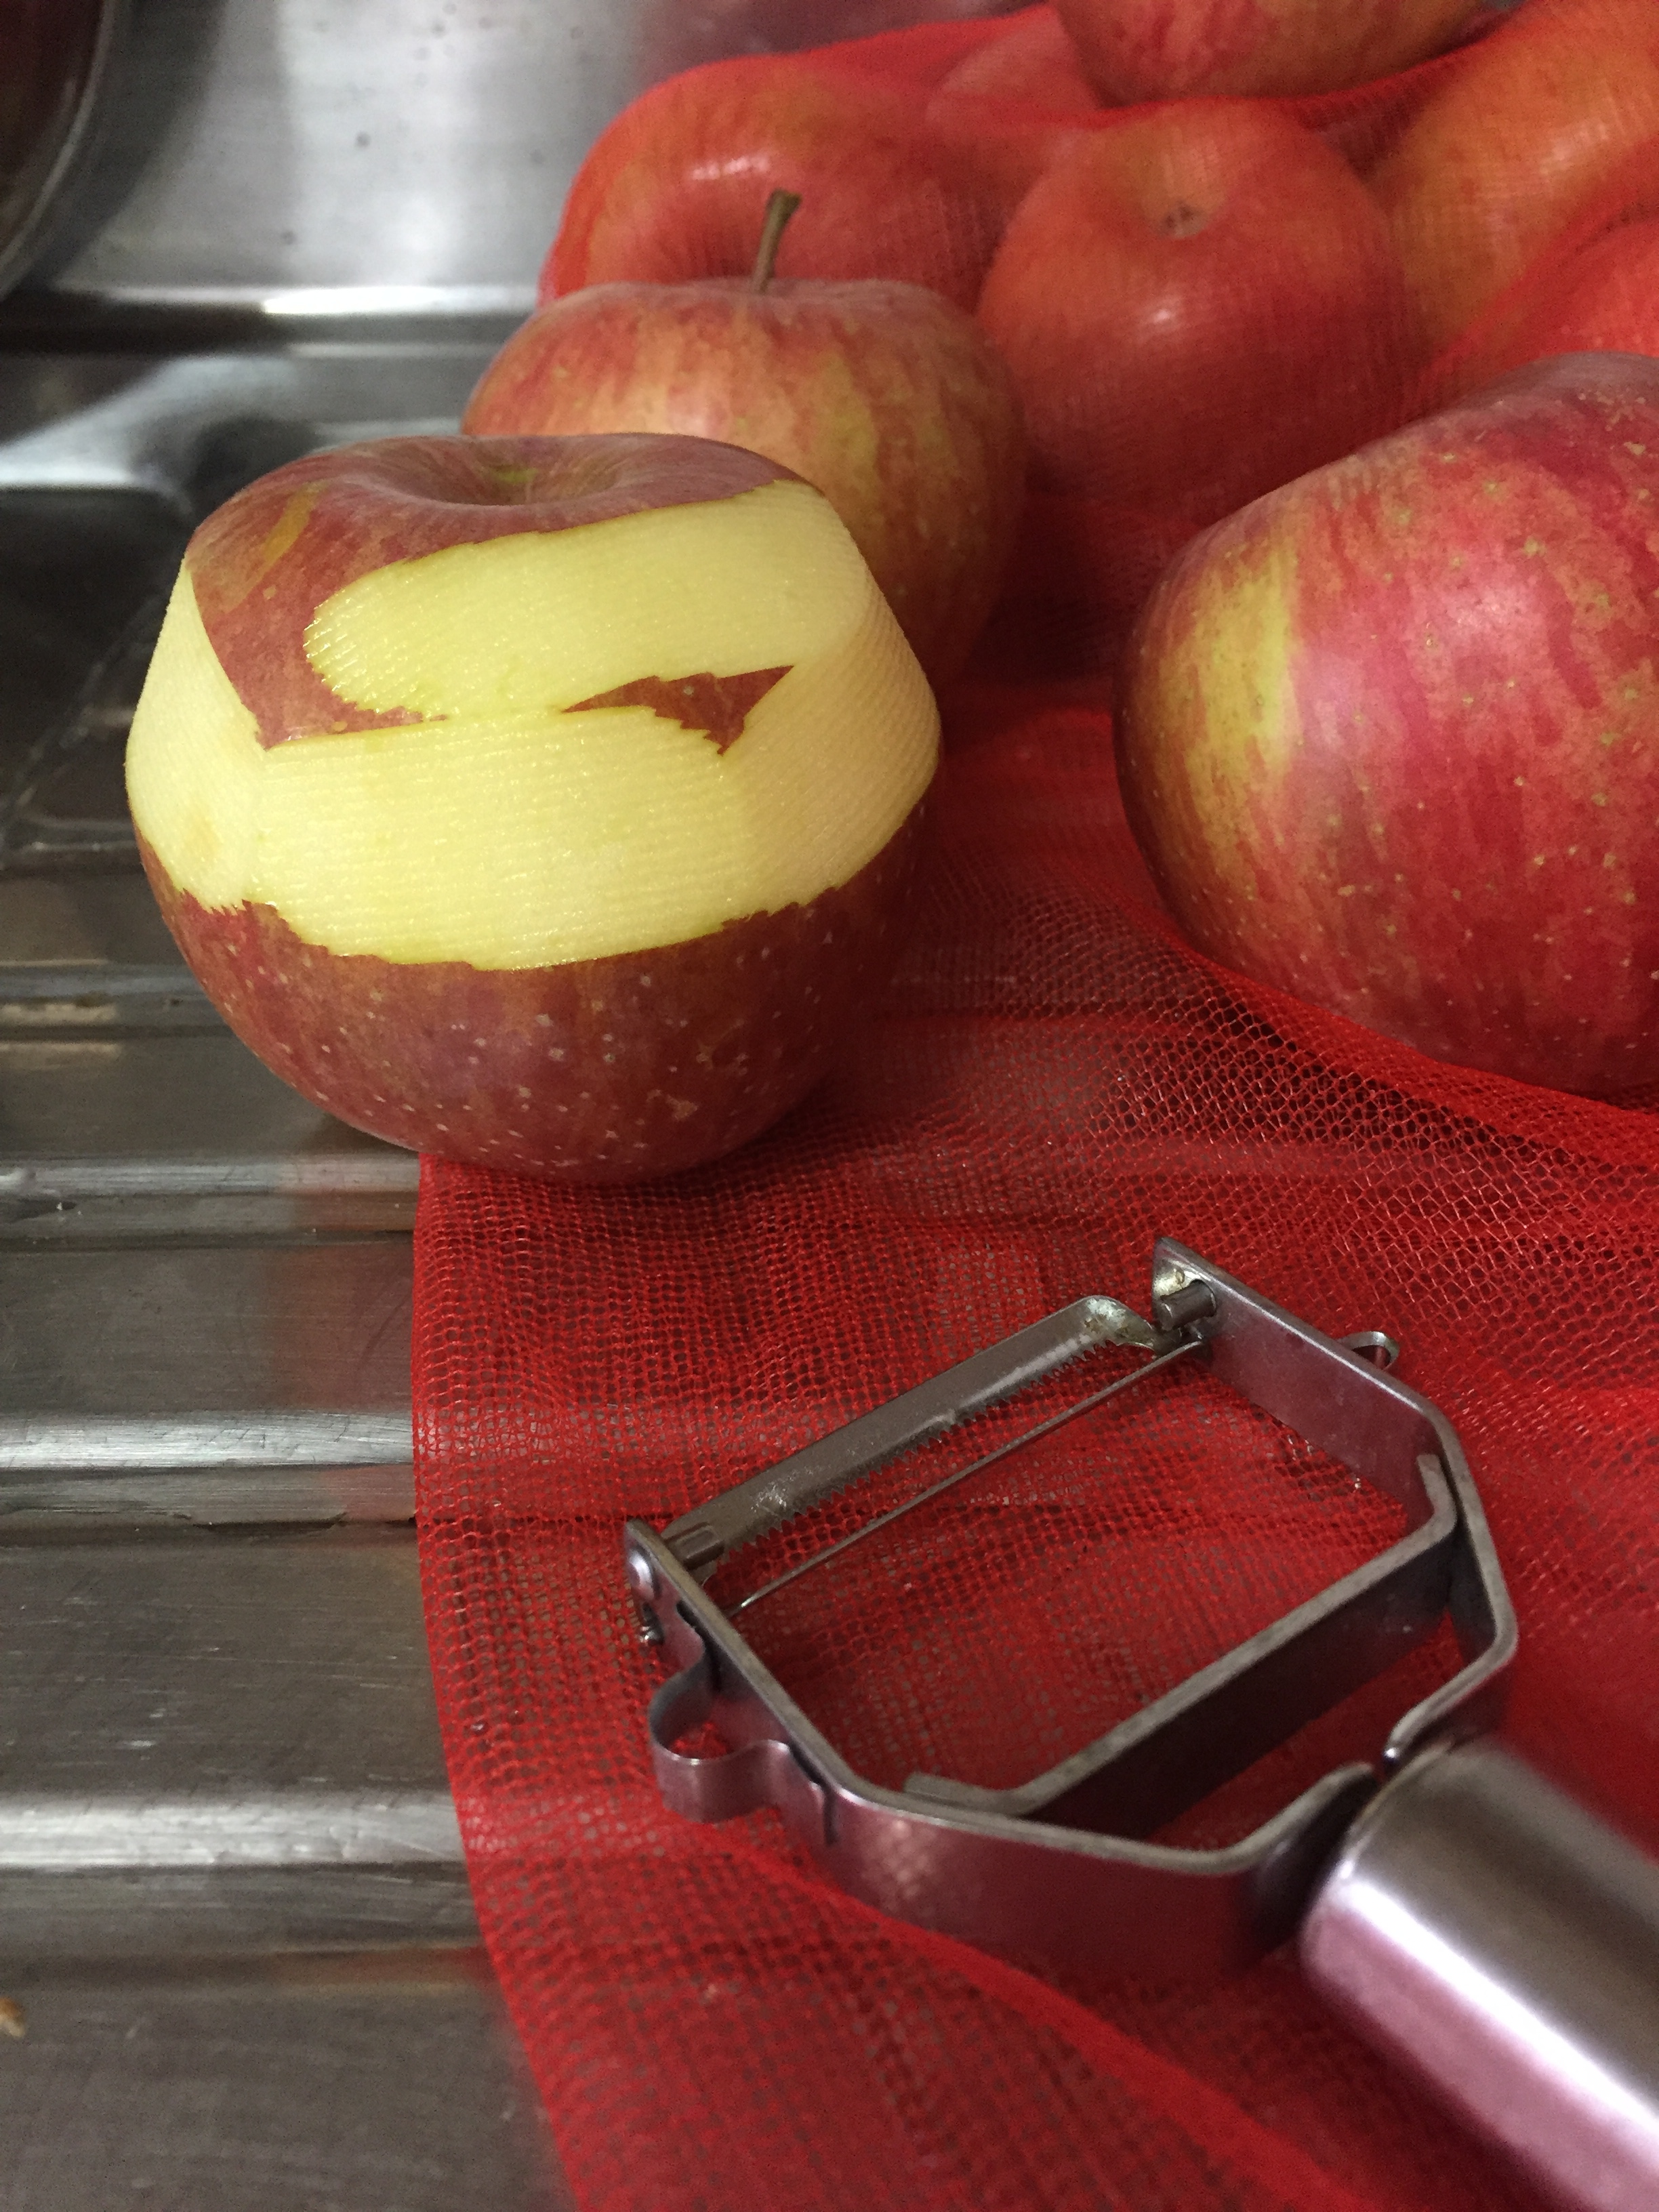
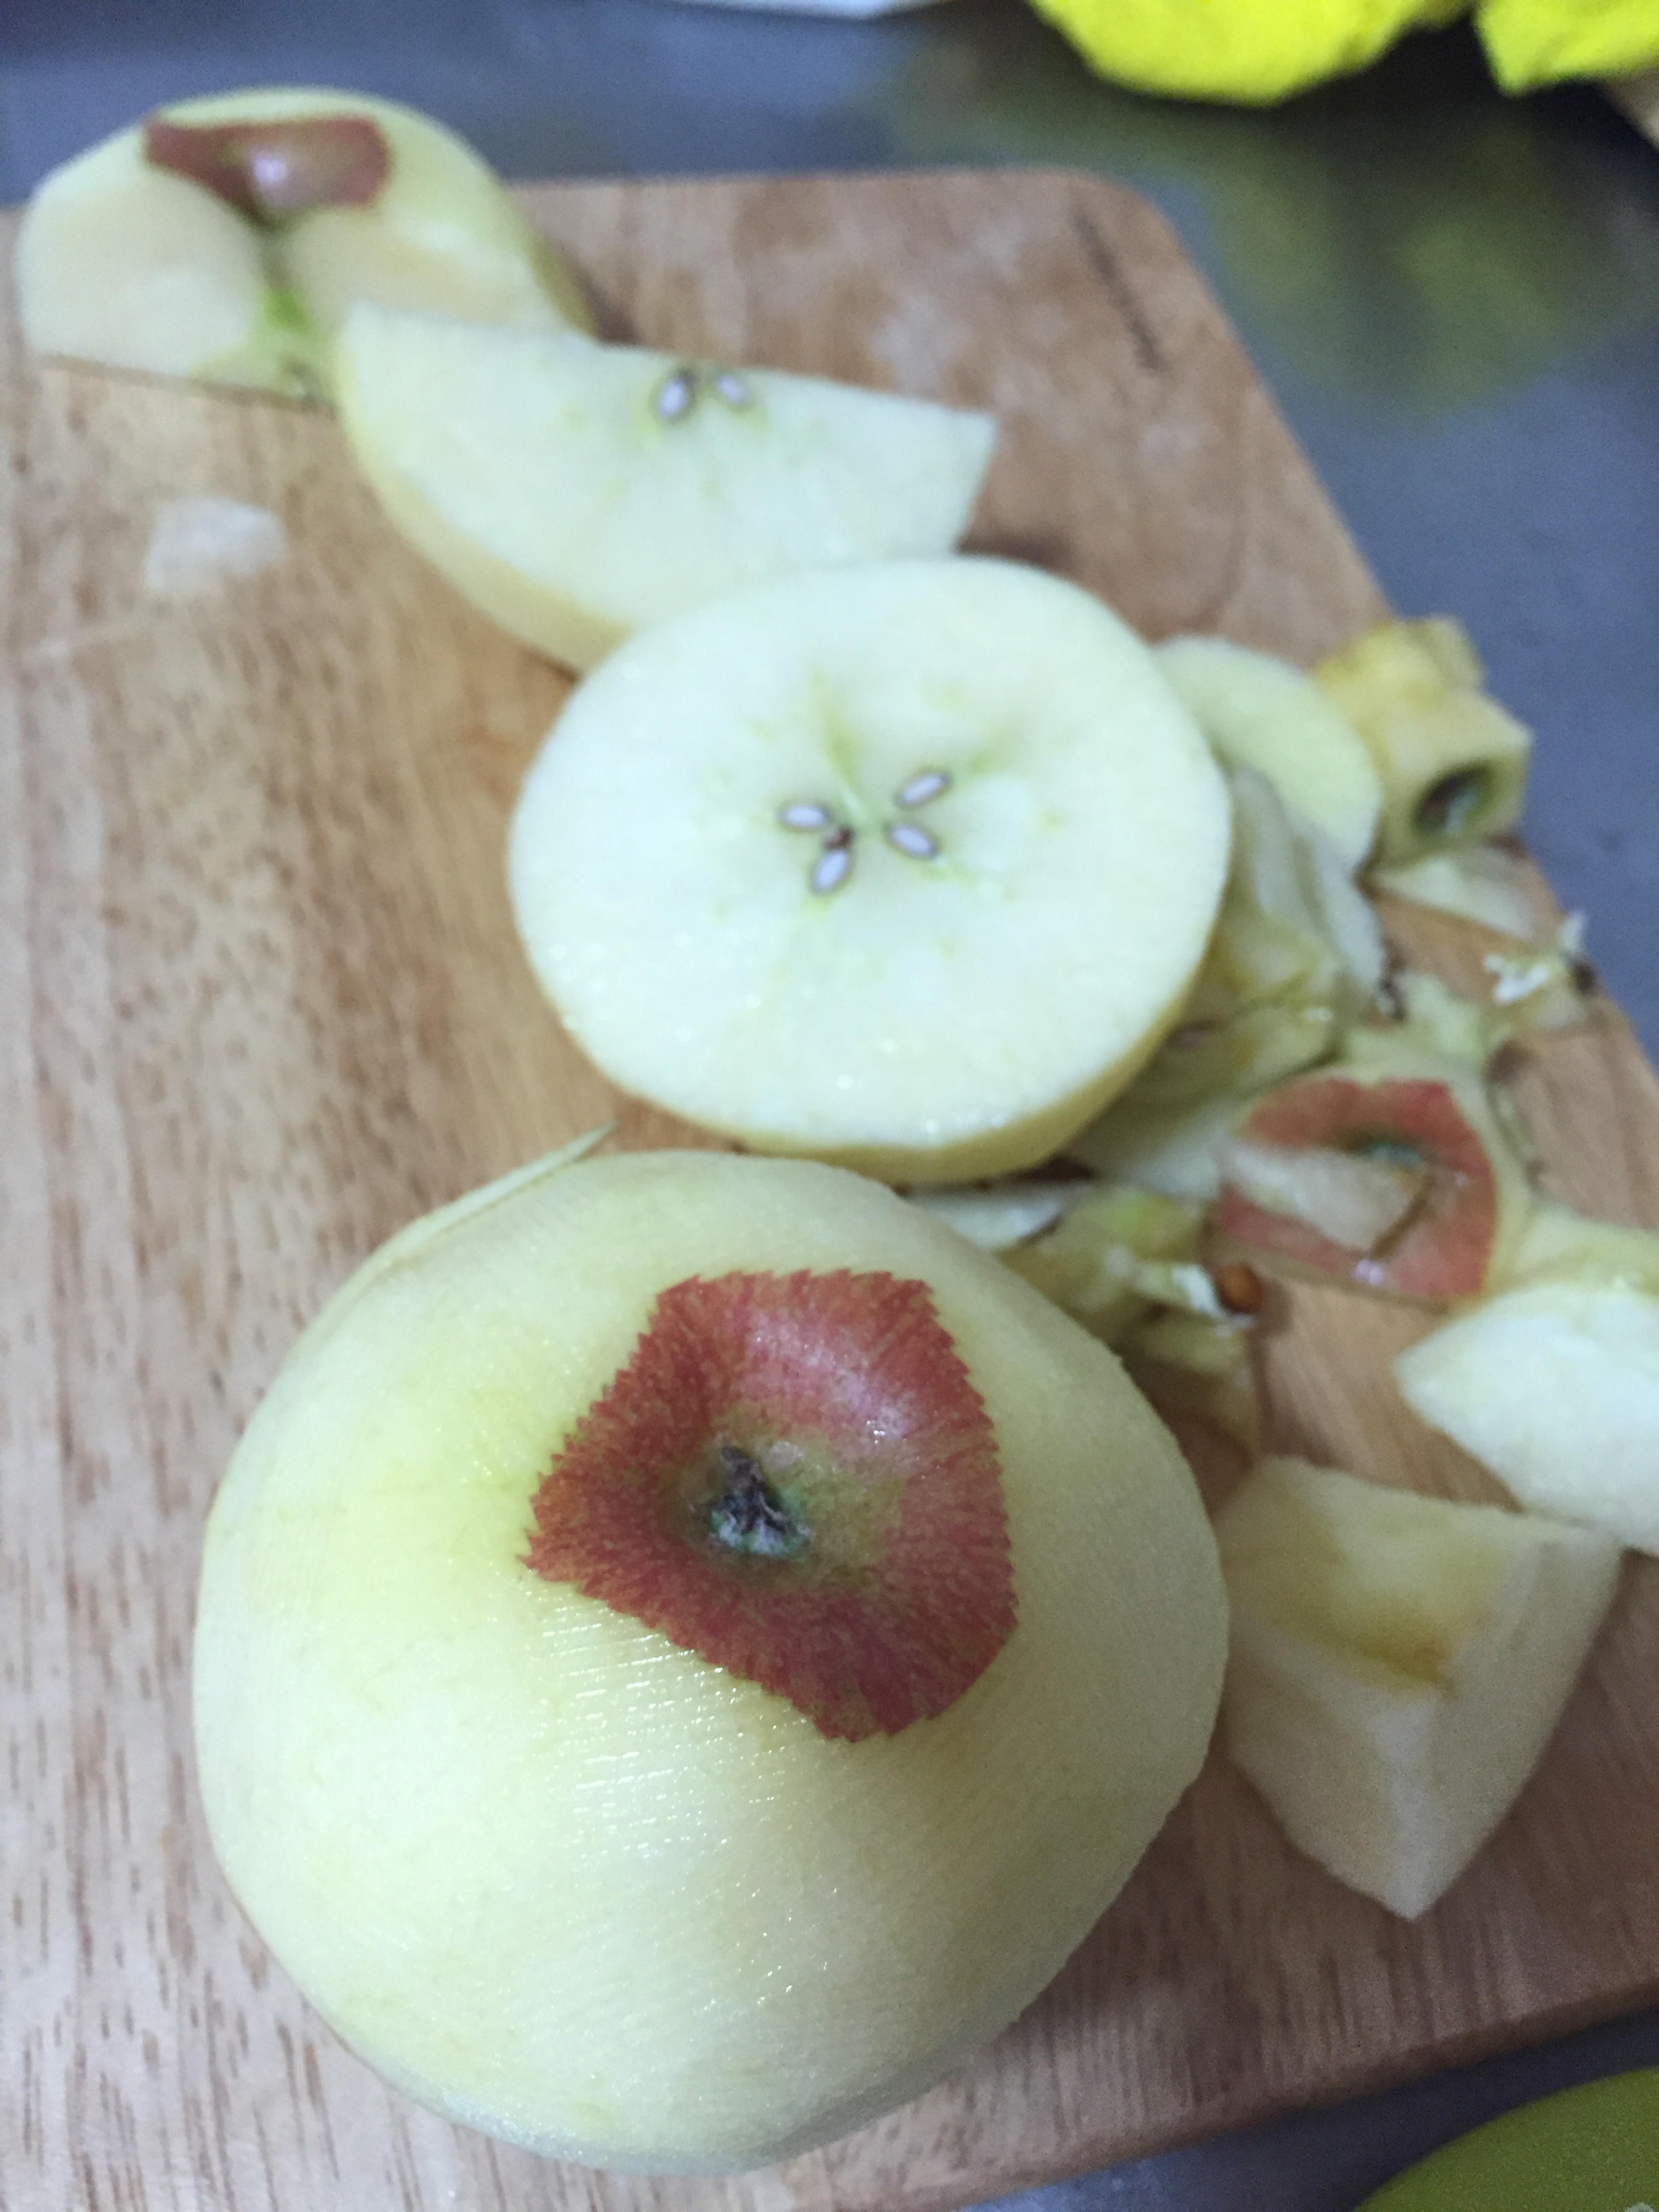
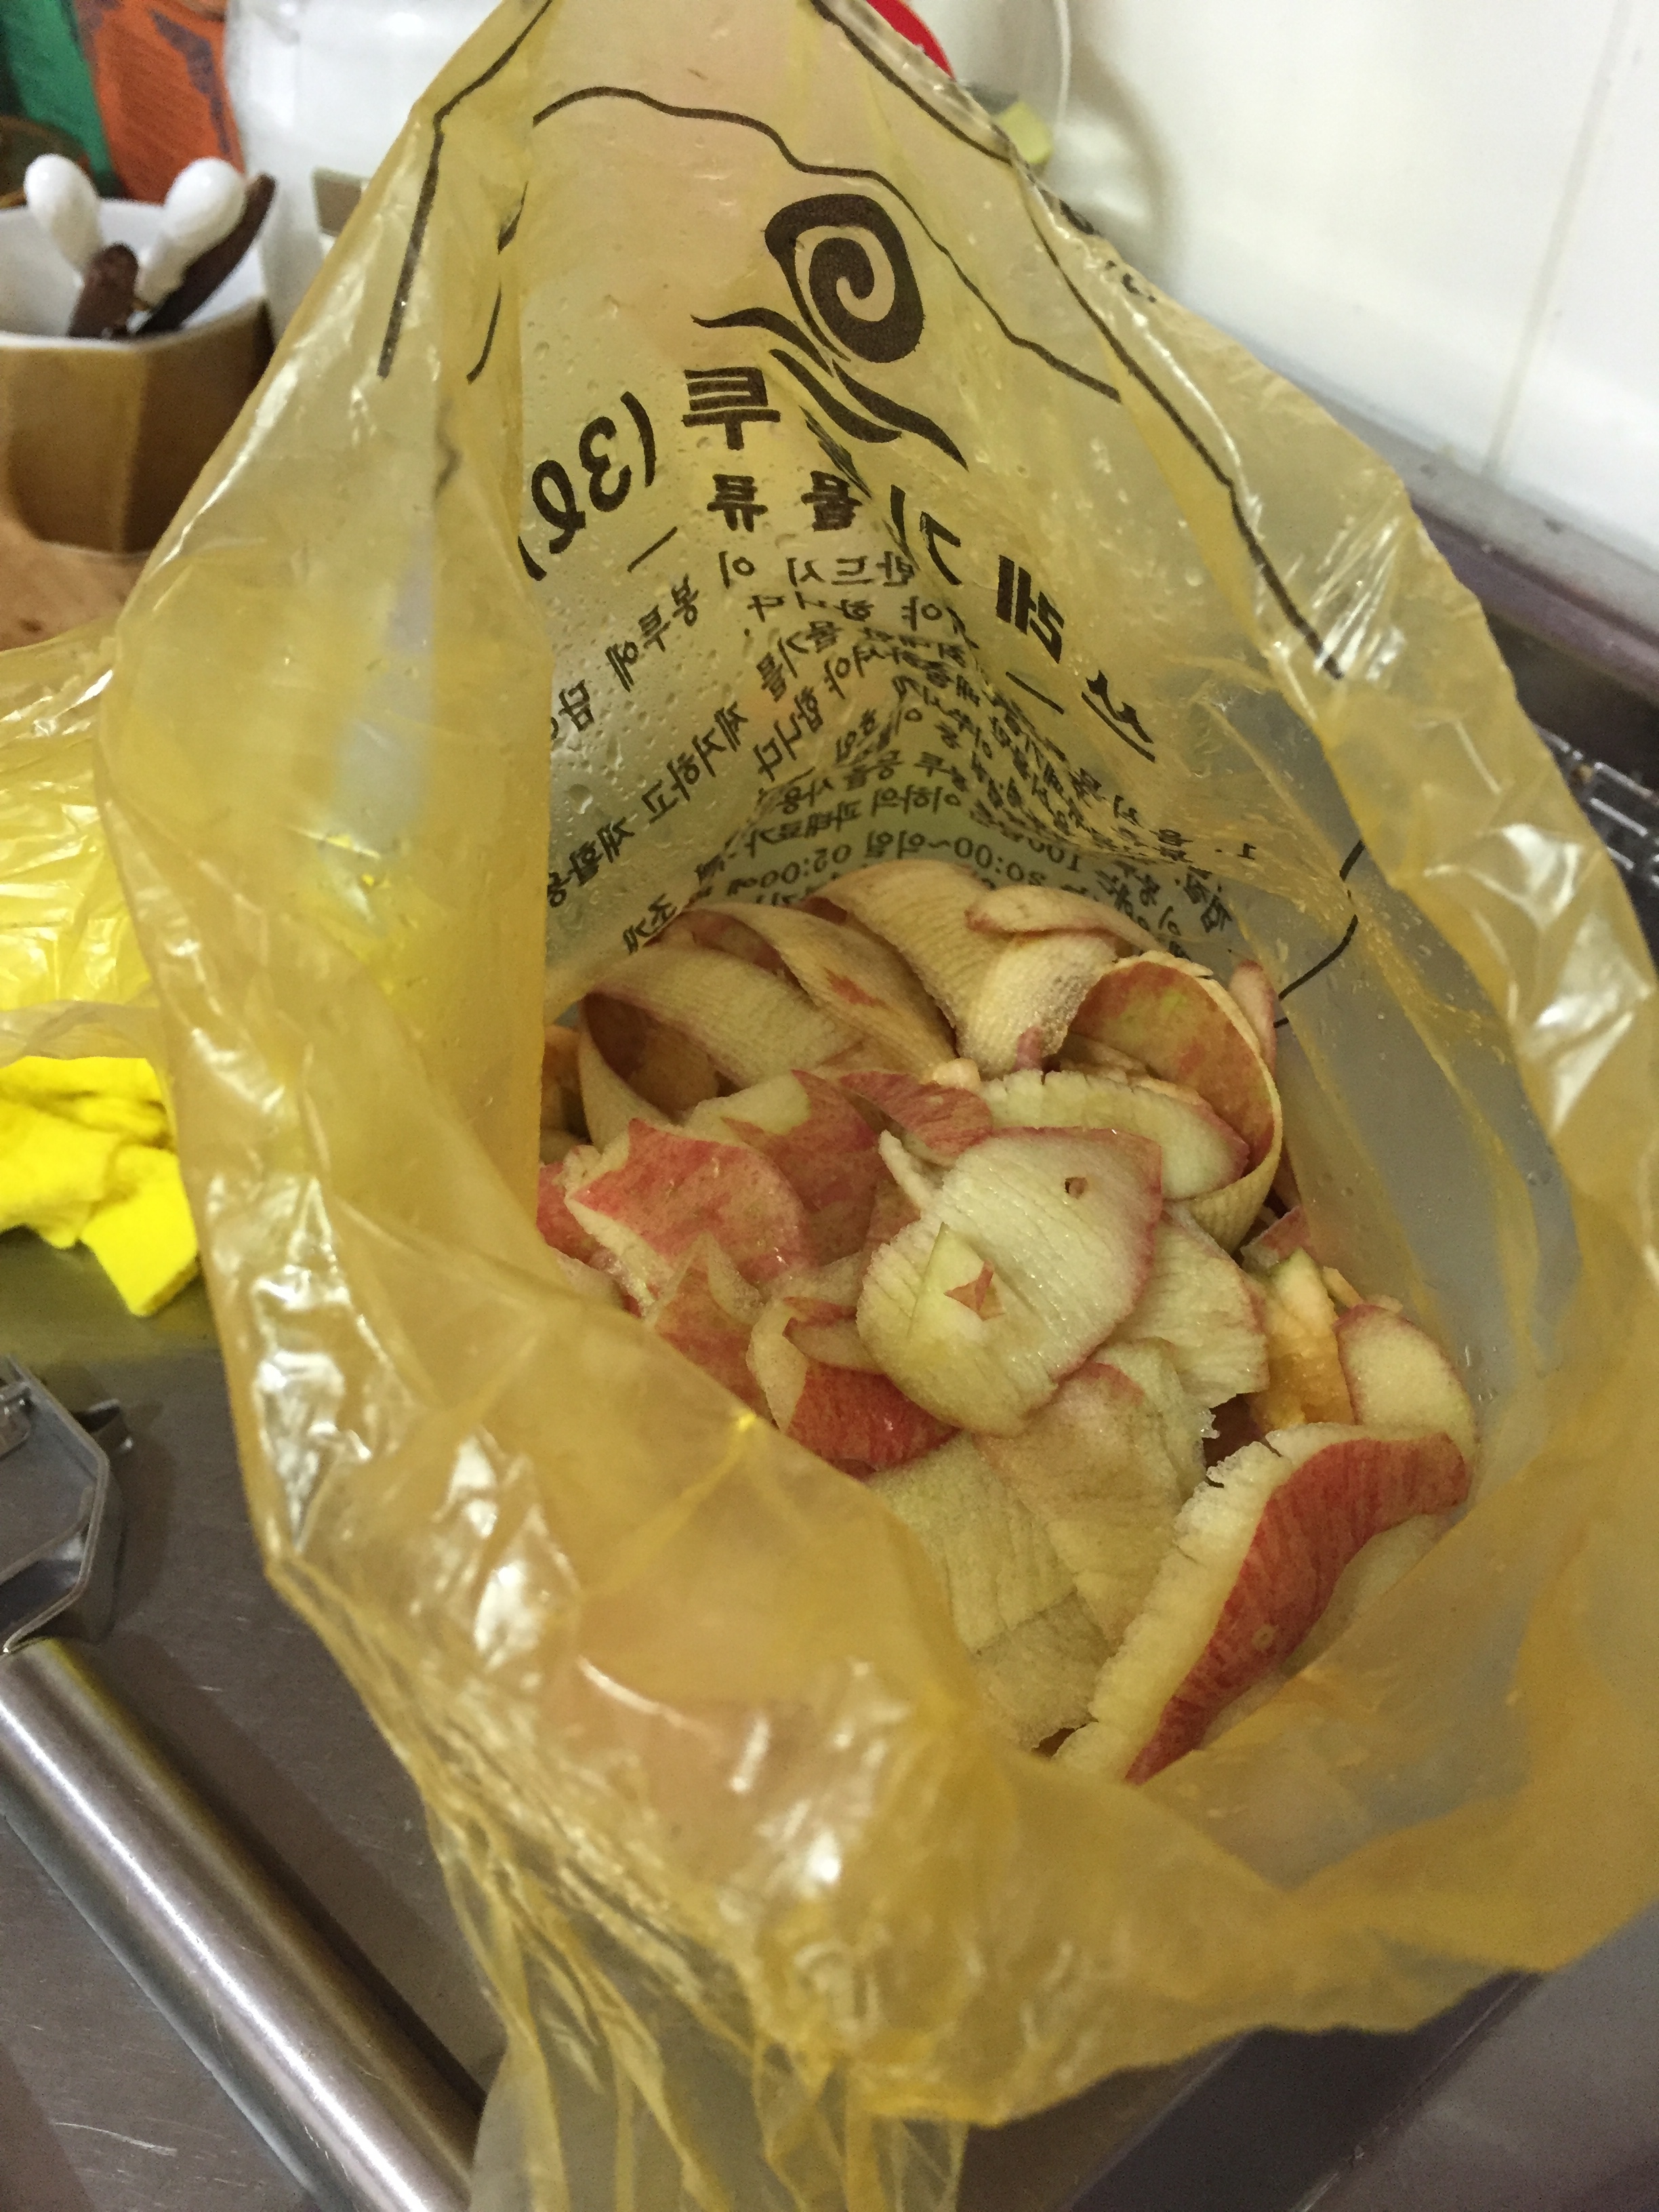
1. Peel your fruit.

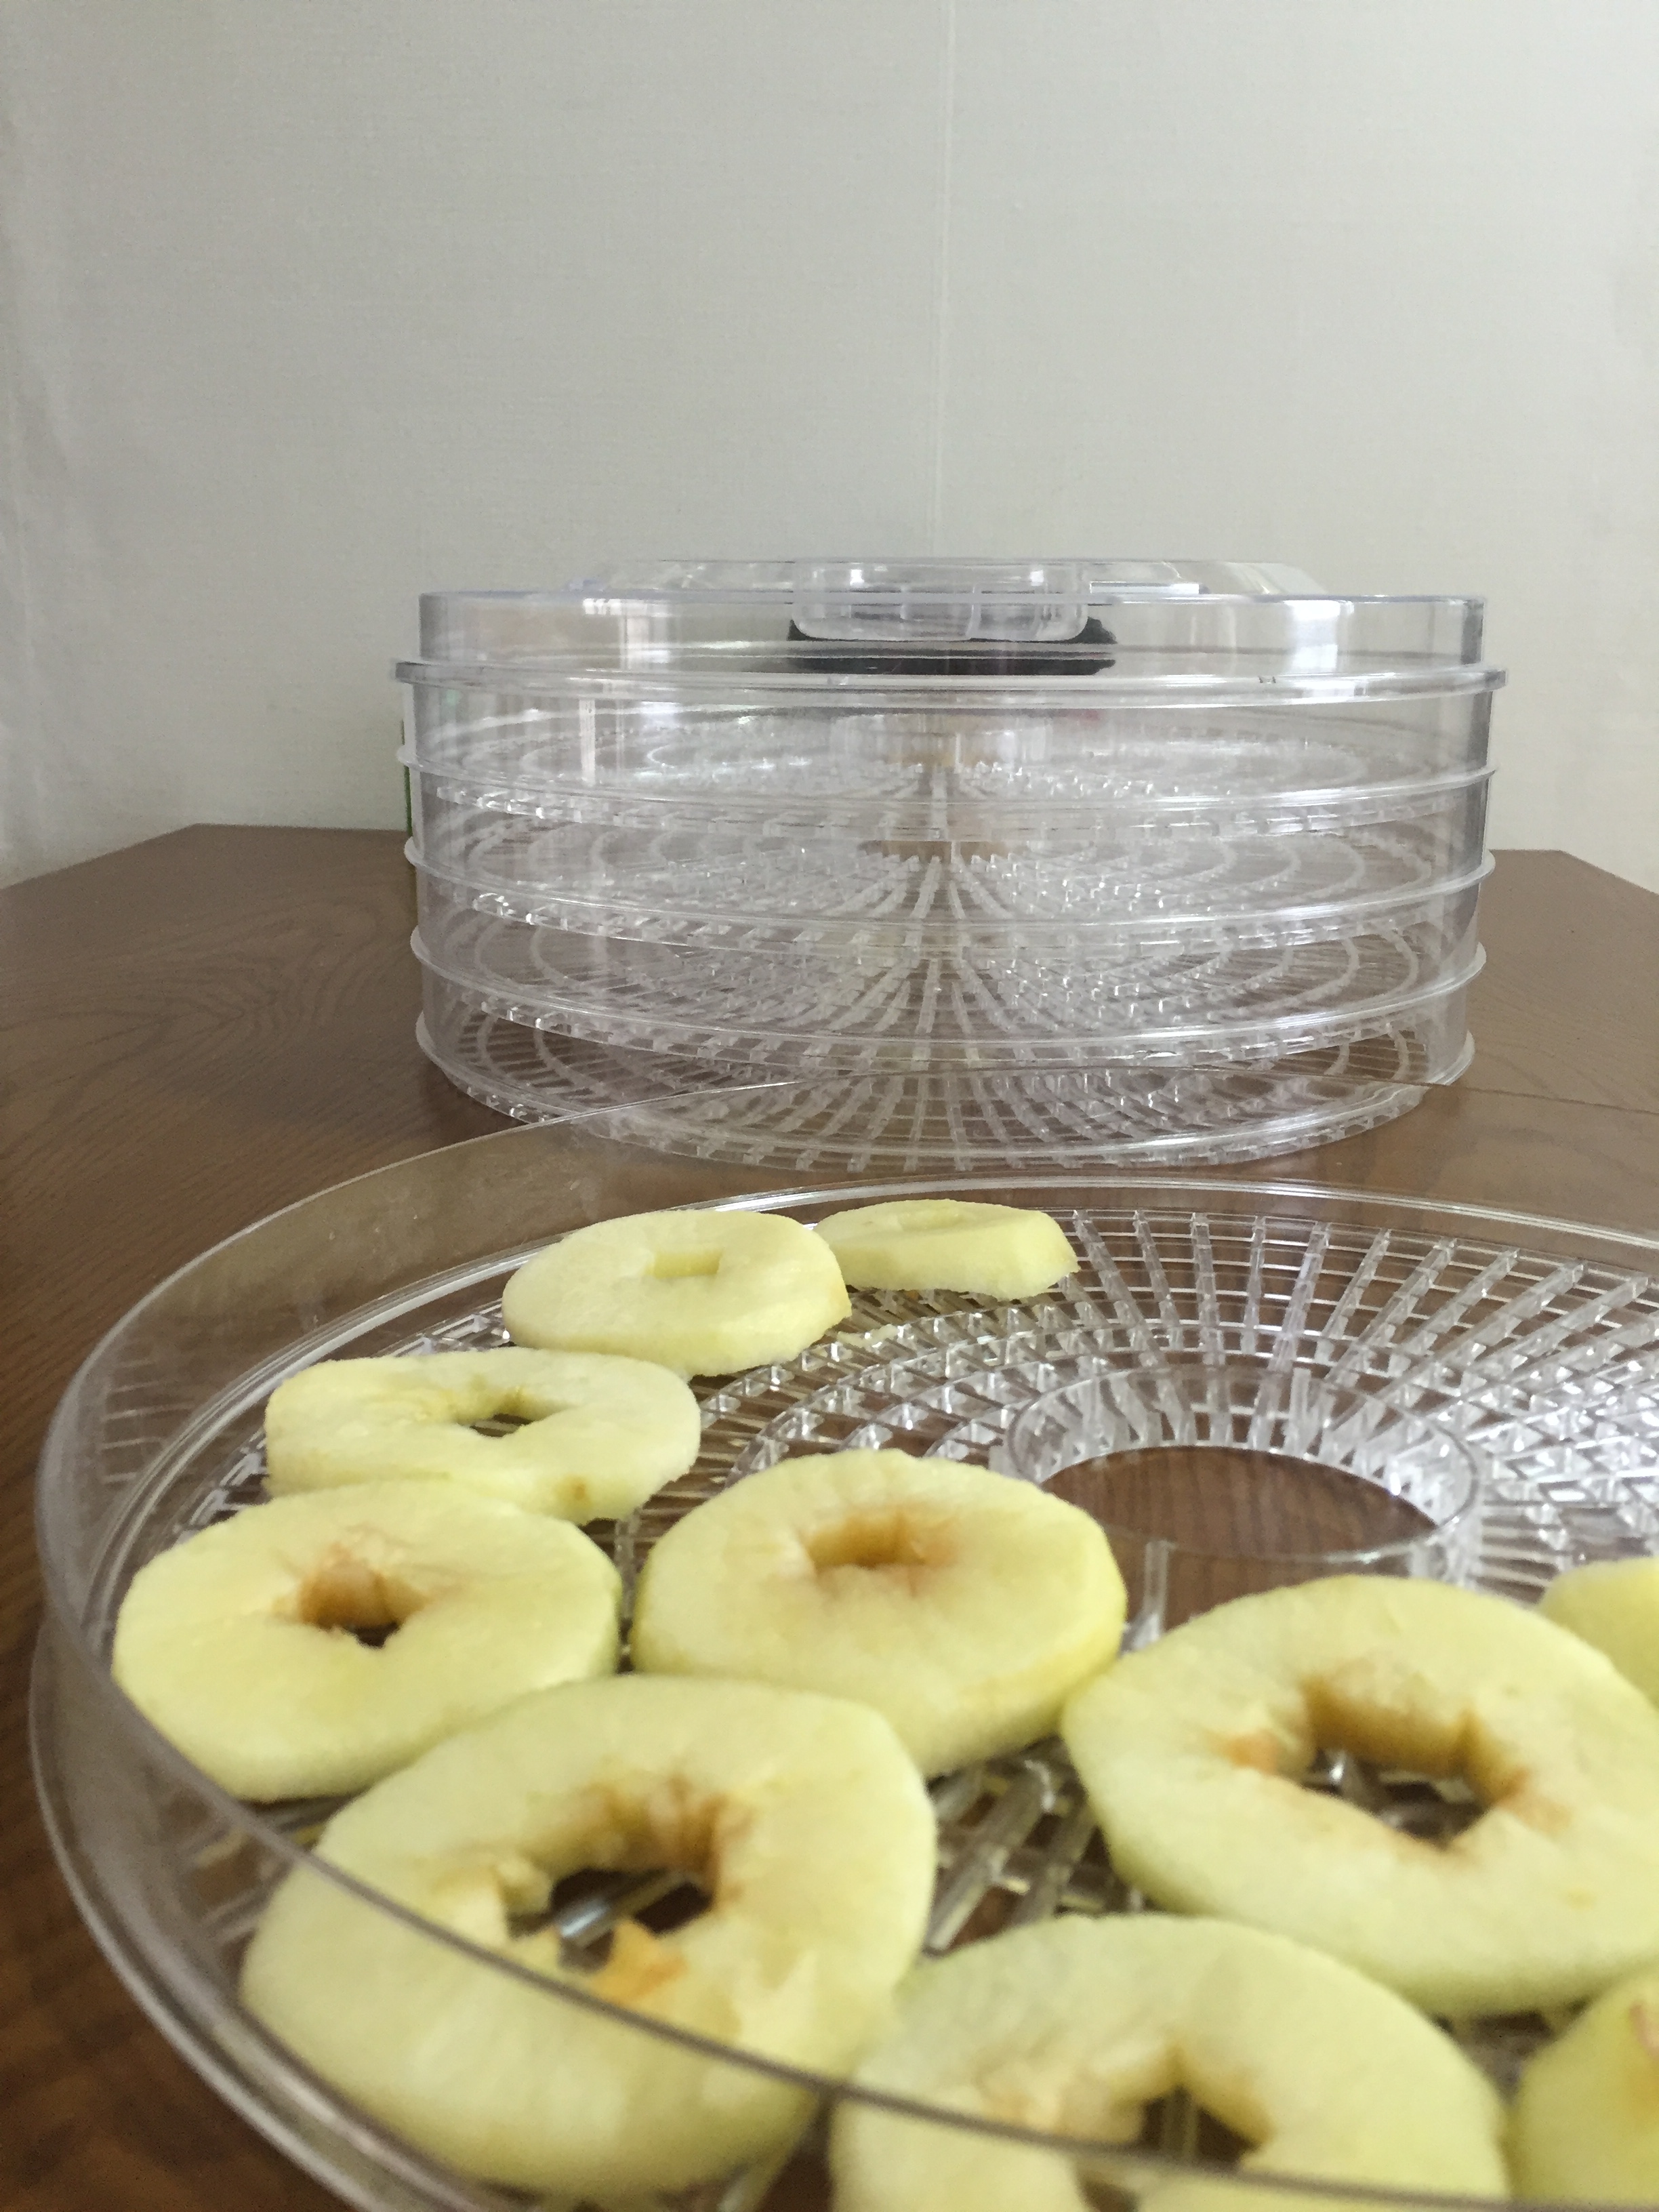
2. Chop/Cut/Core your fruit into small pieces. If you want to make apple rings then you will need to get hold of an apple corer. I was only able to find an apple corer than also slices (the green thing pictured below).

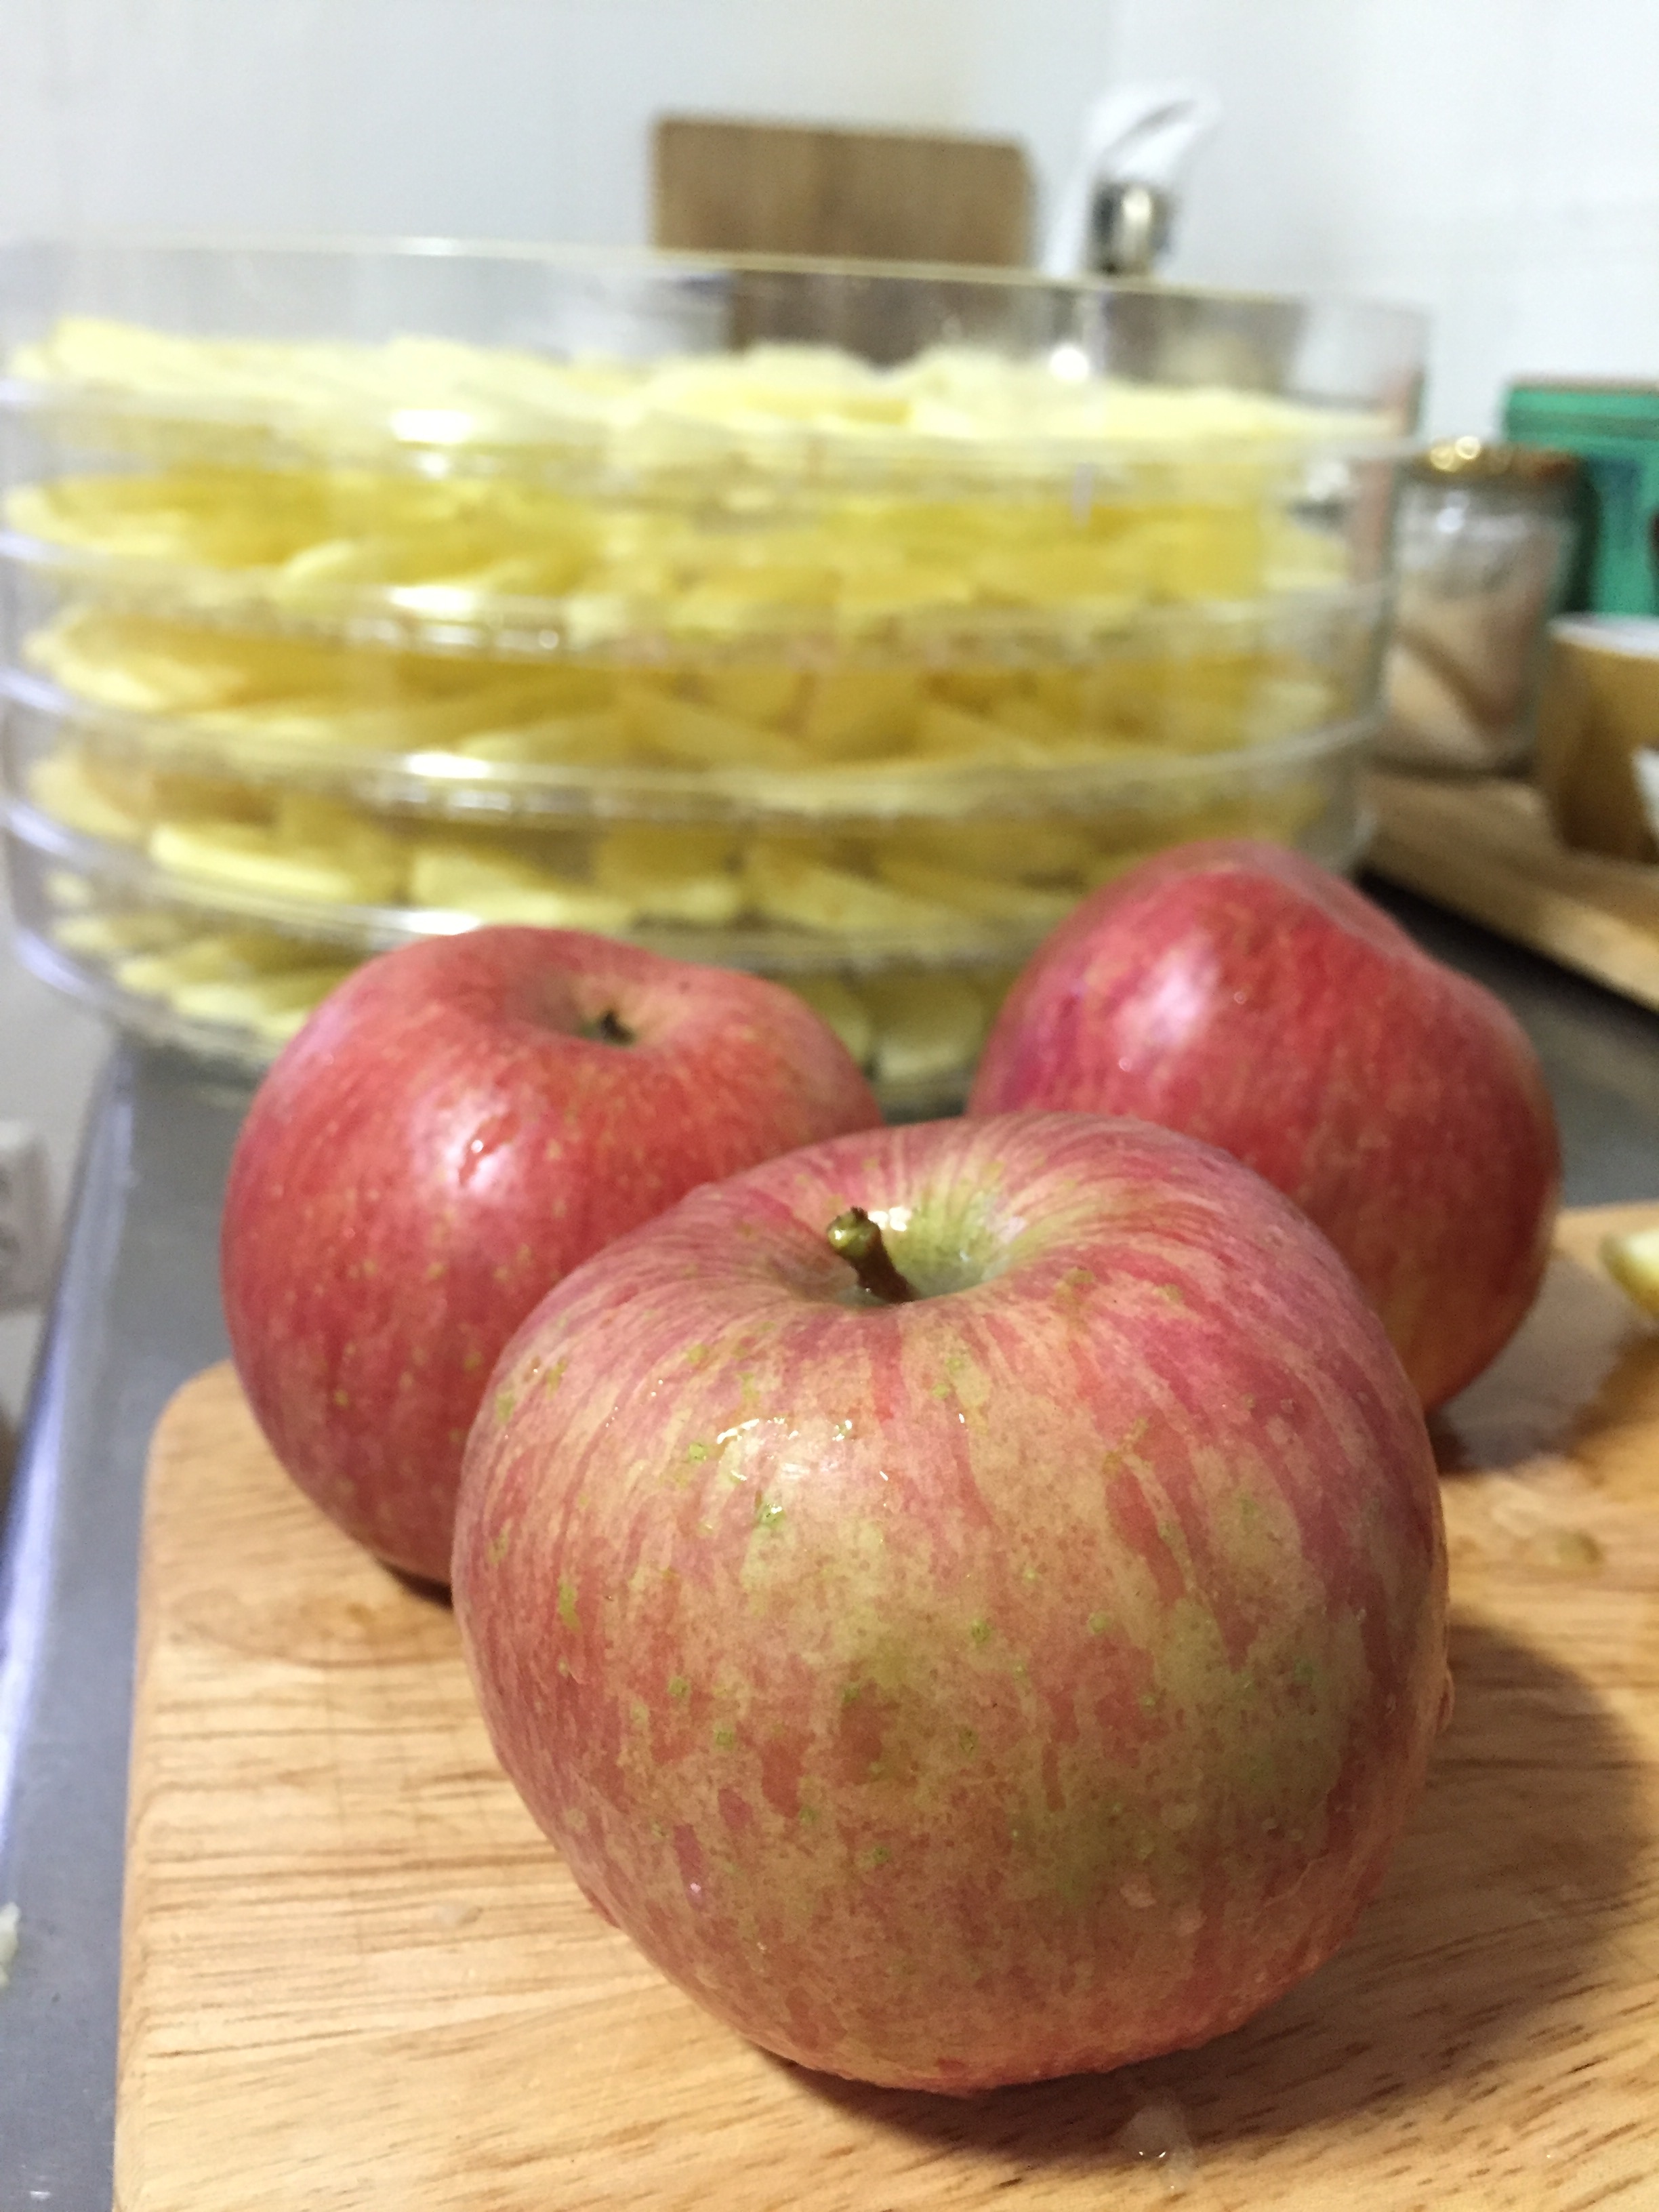
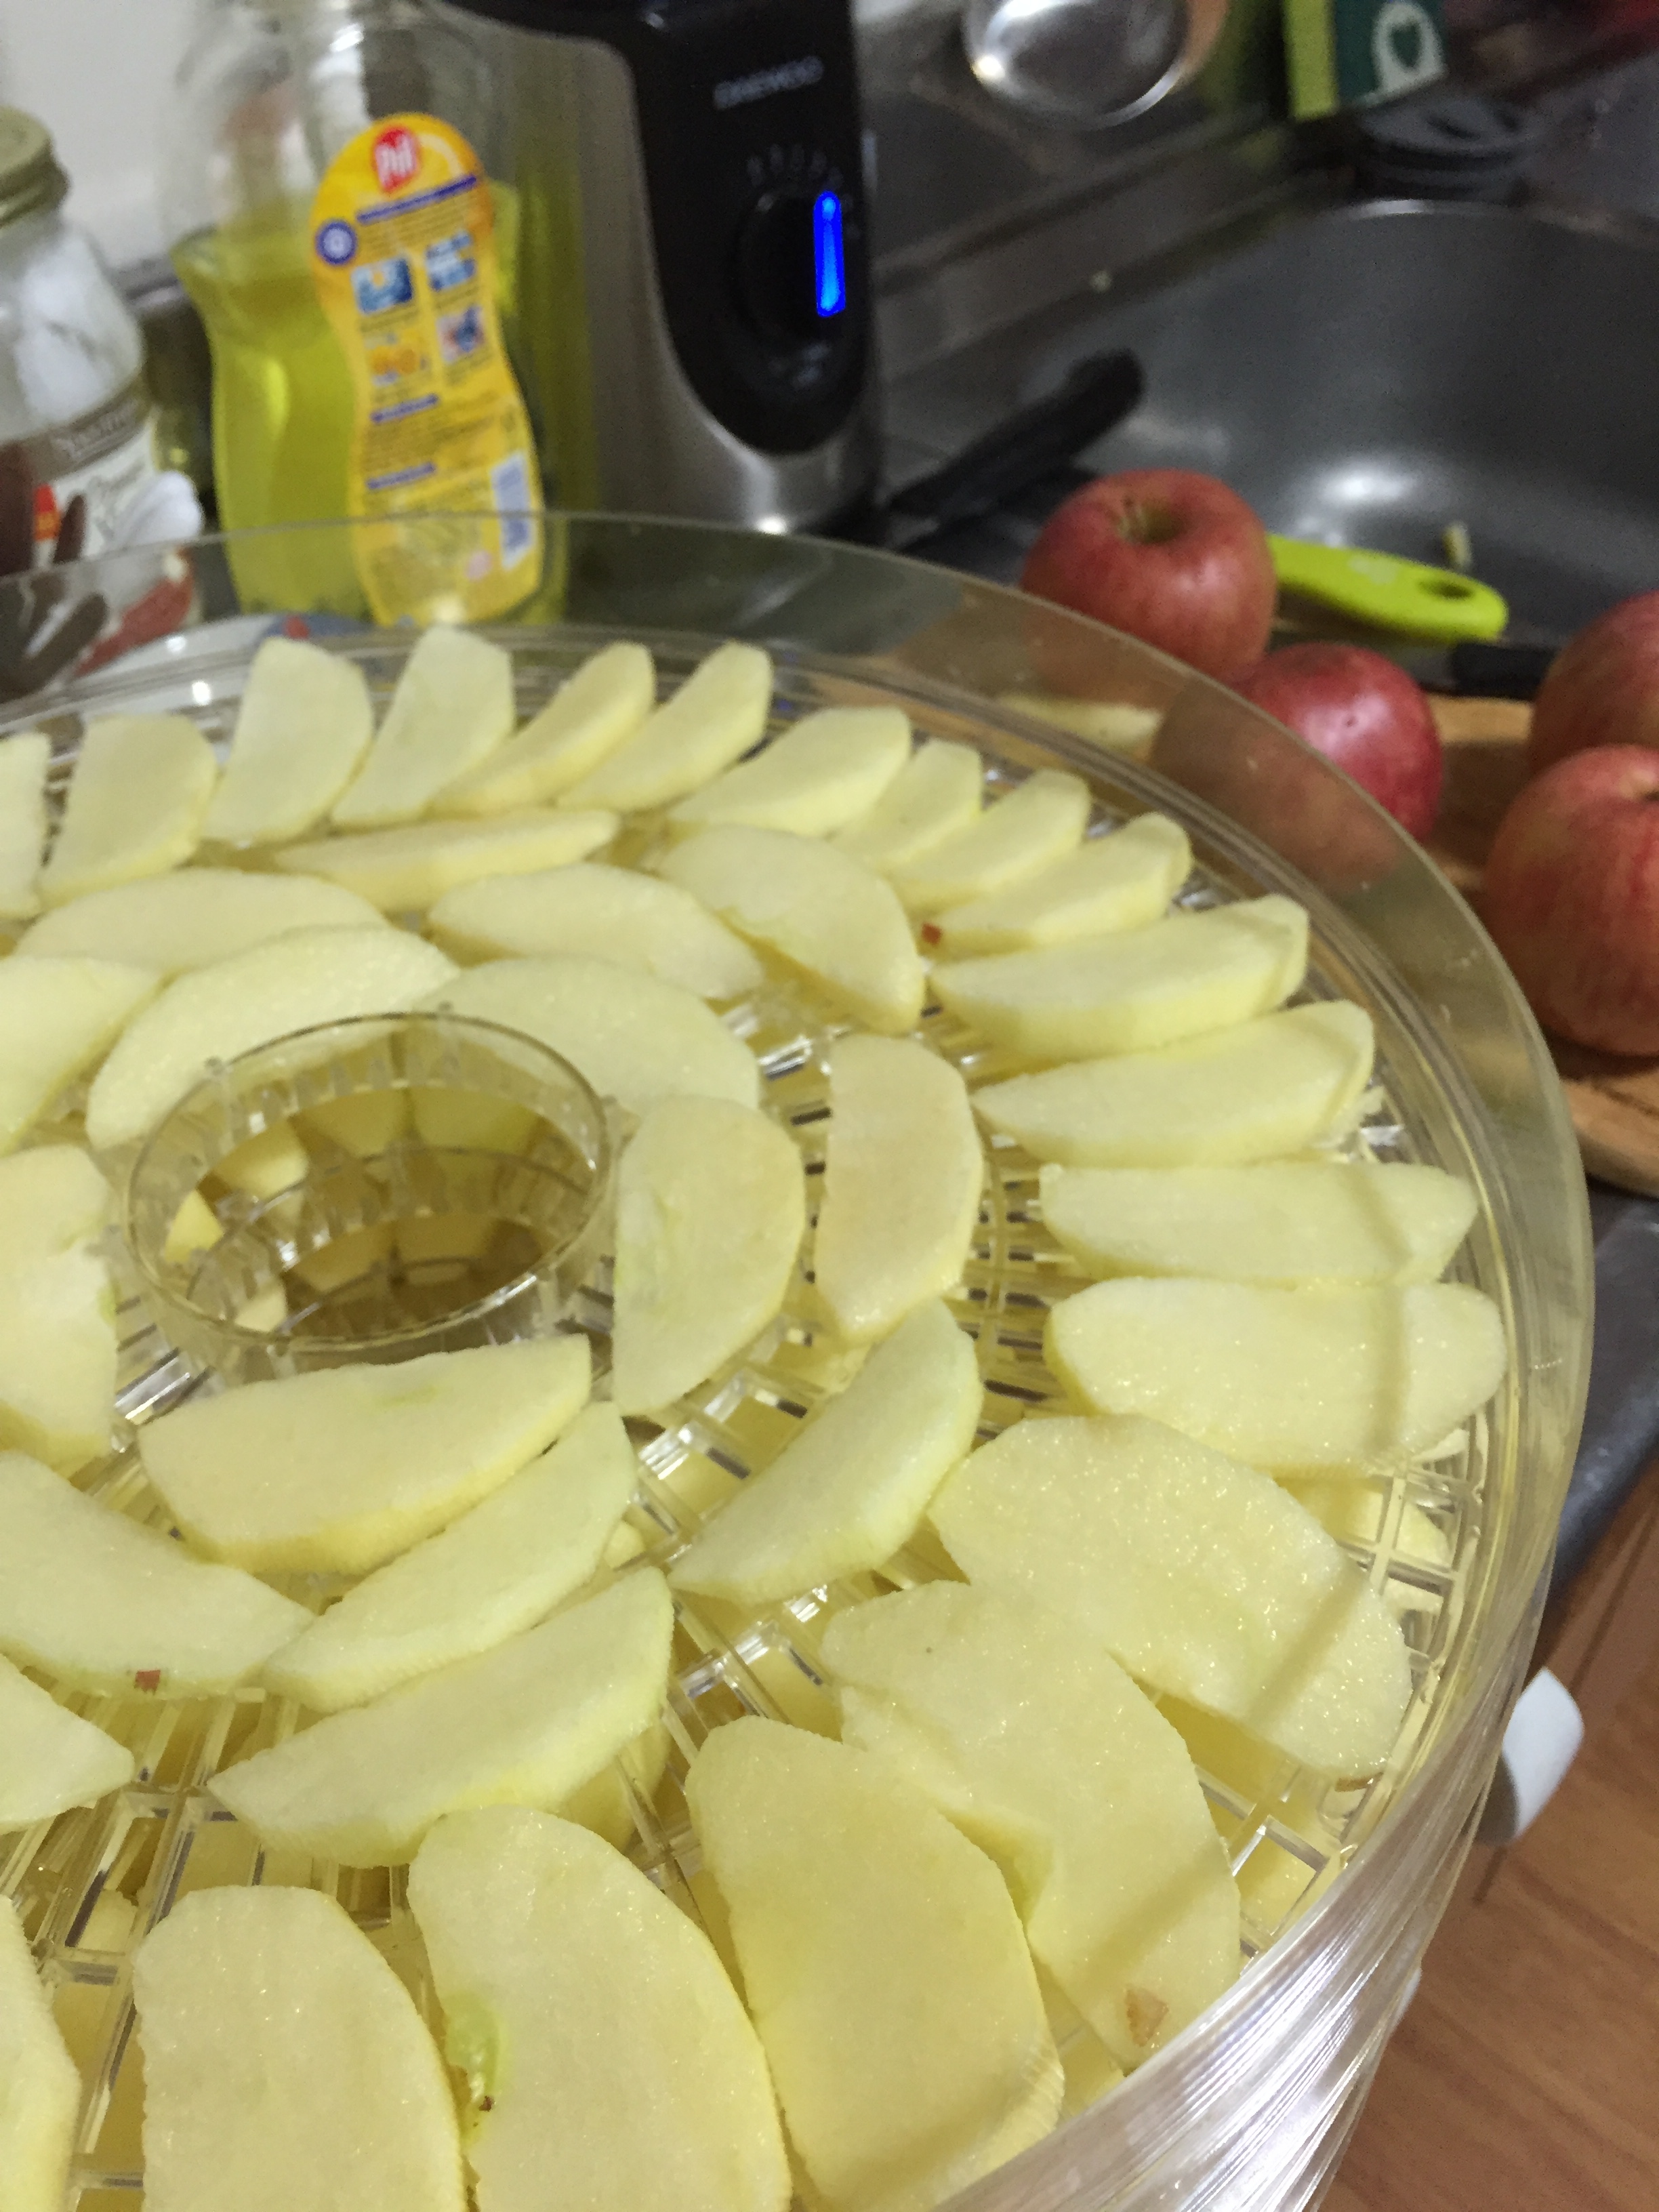
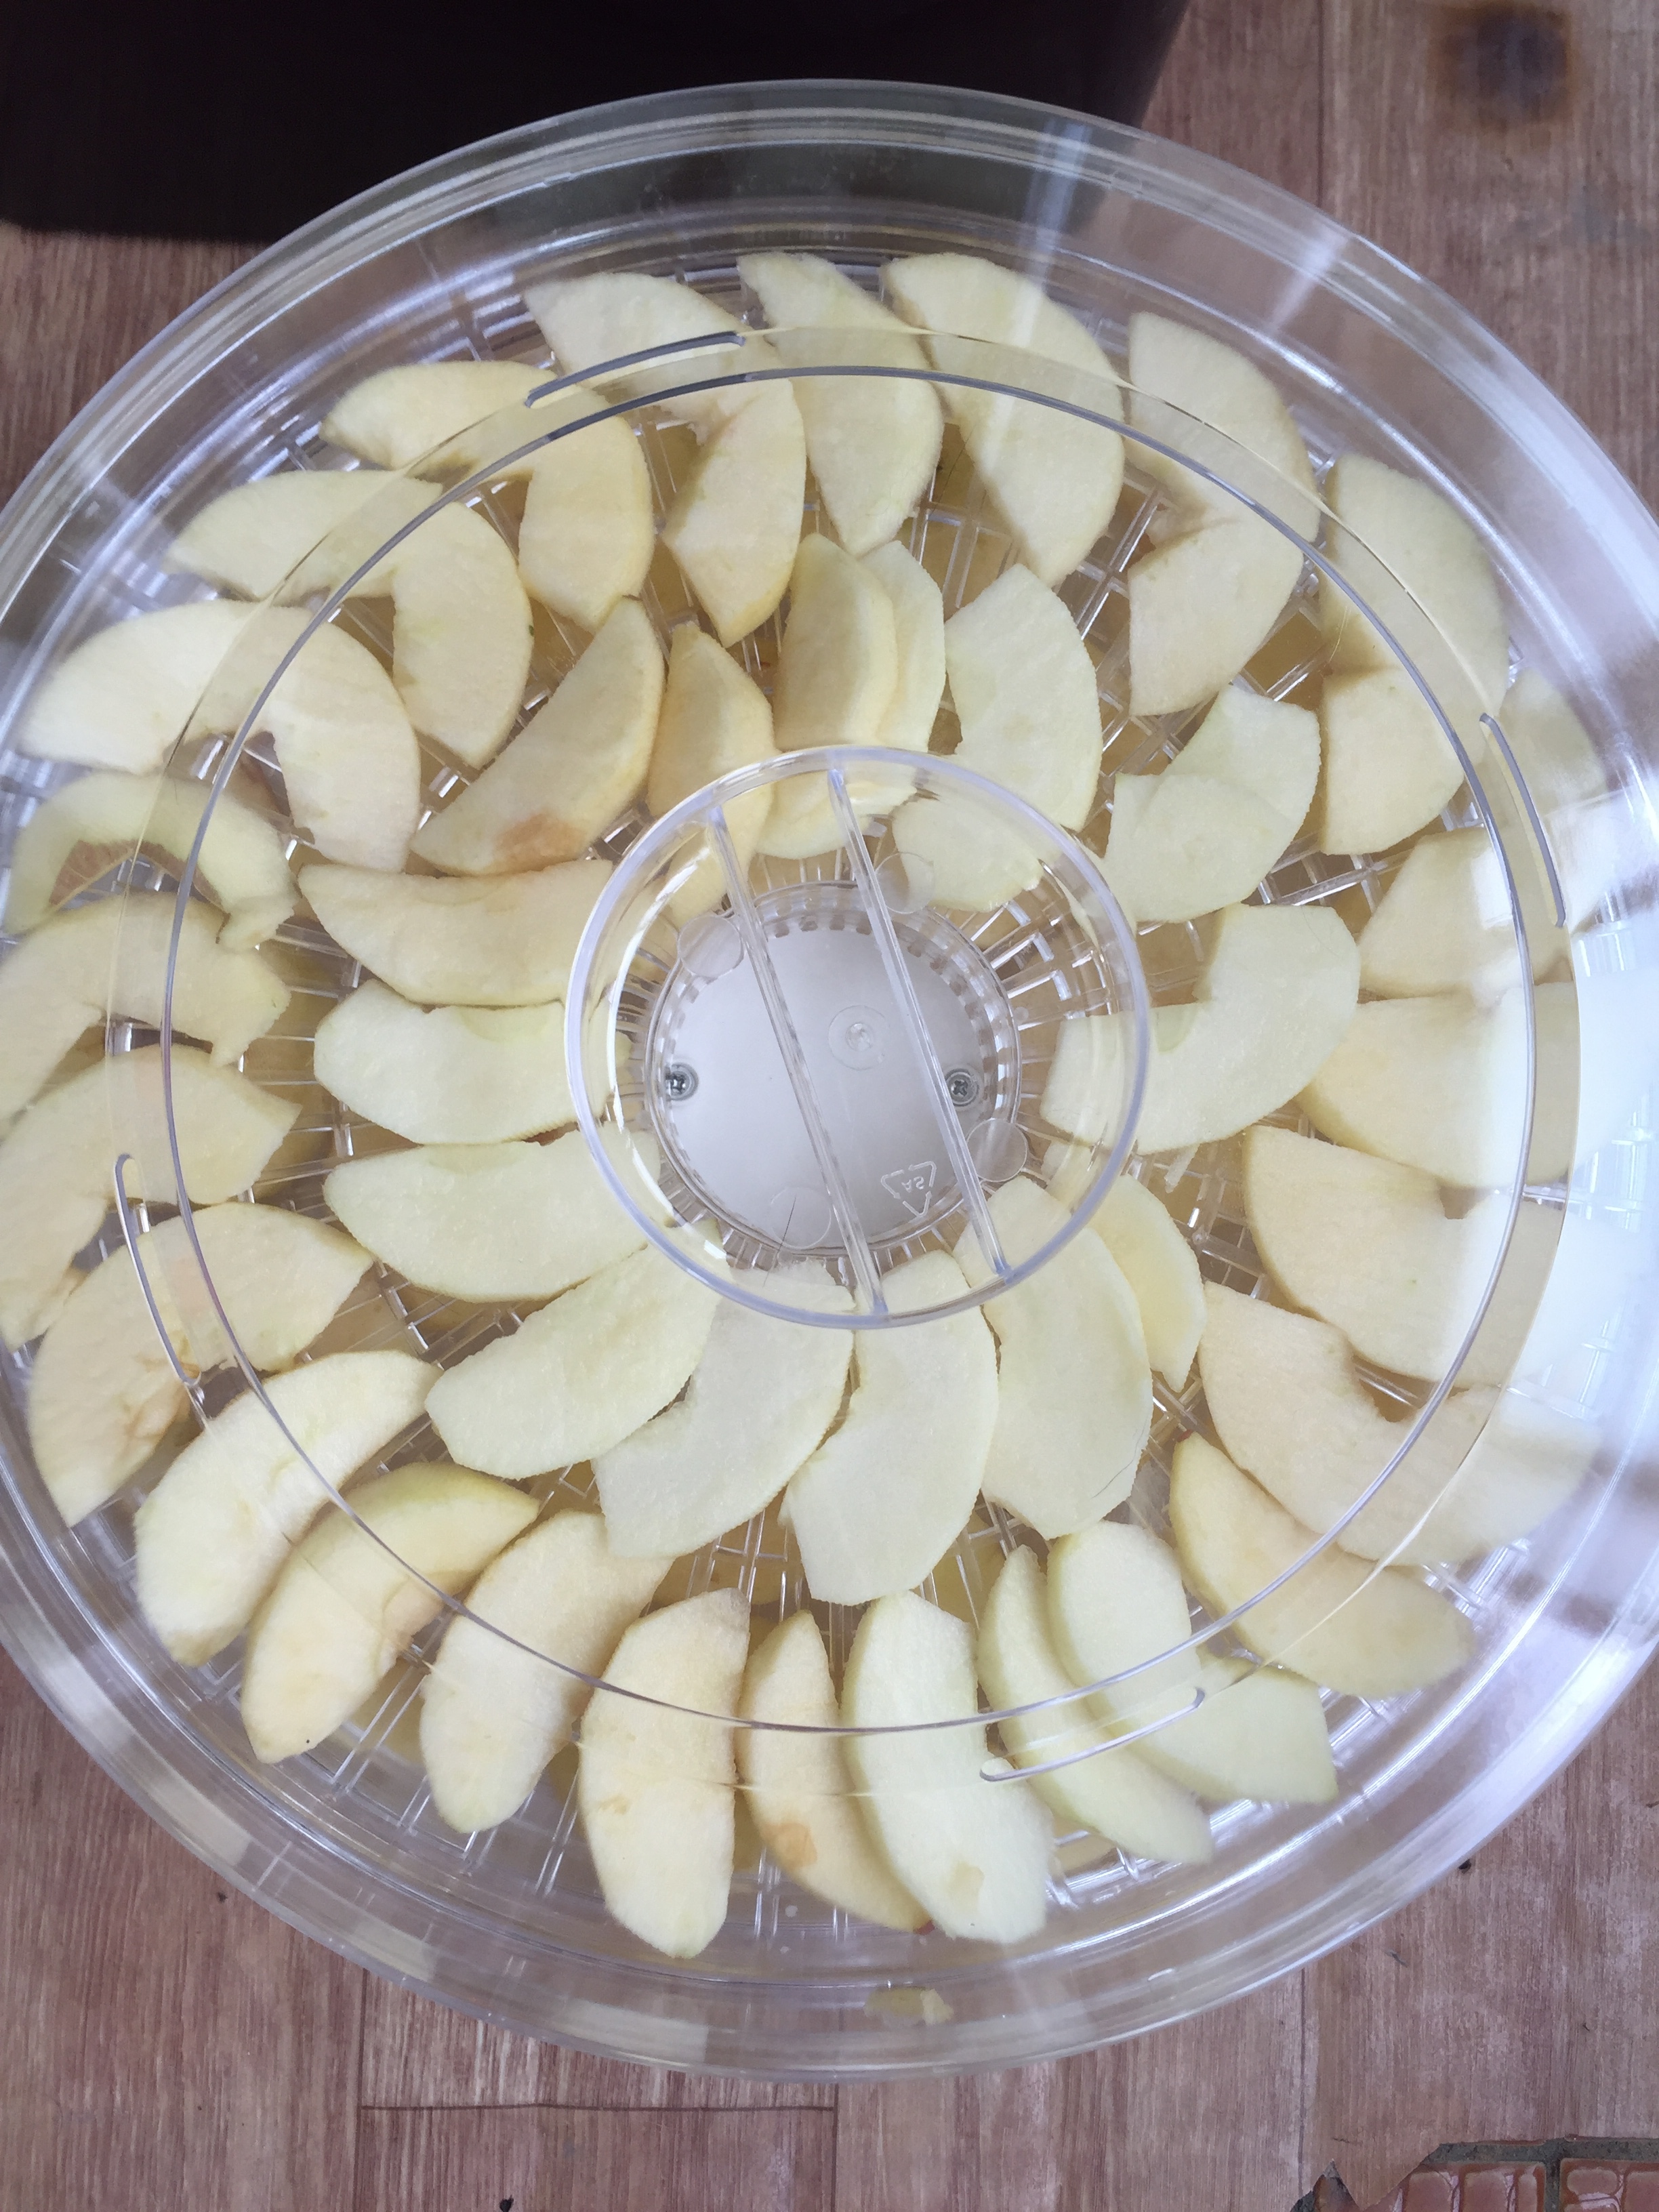
3. Place your fruit pieces as close together as possible, without actually having any of the pieces touch each other.

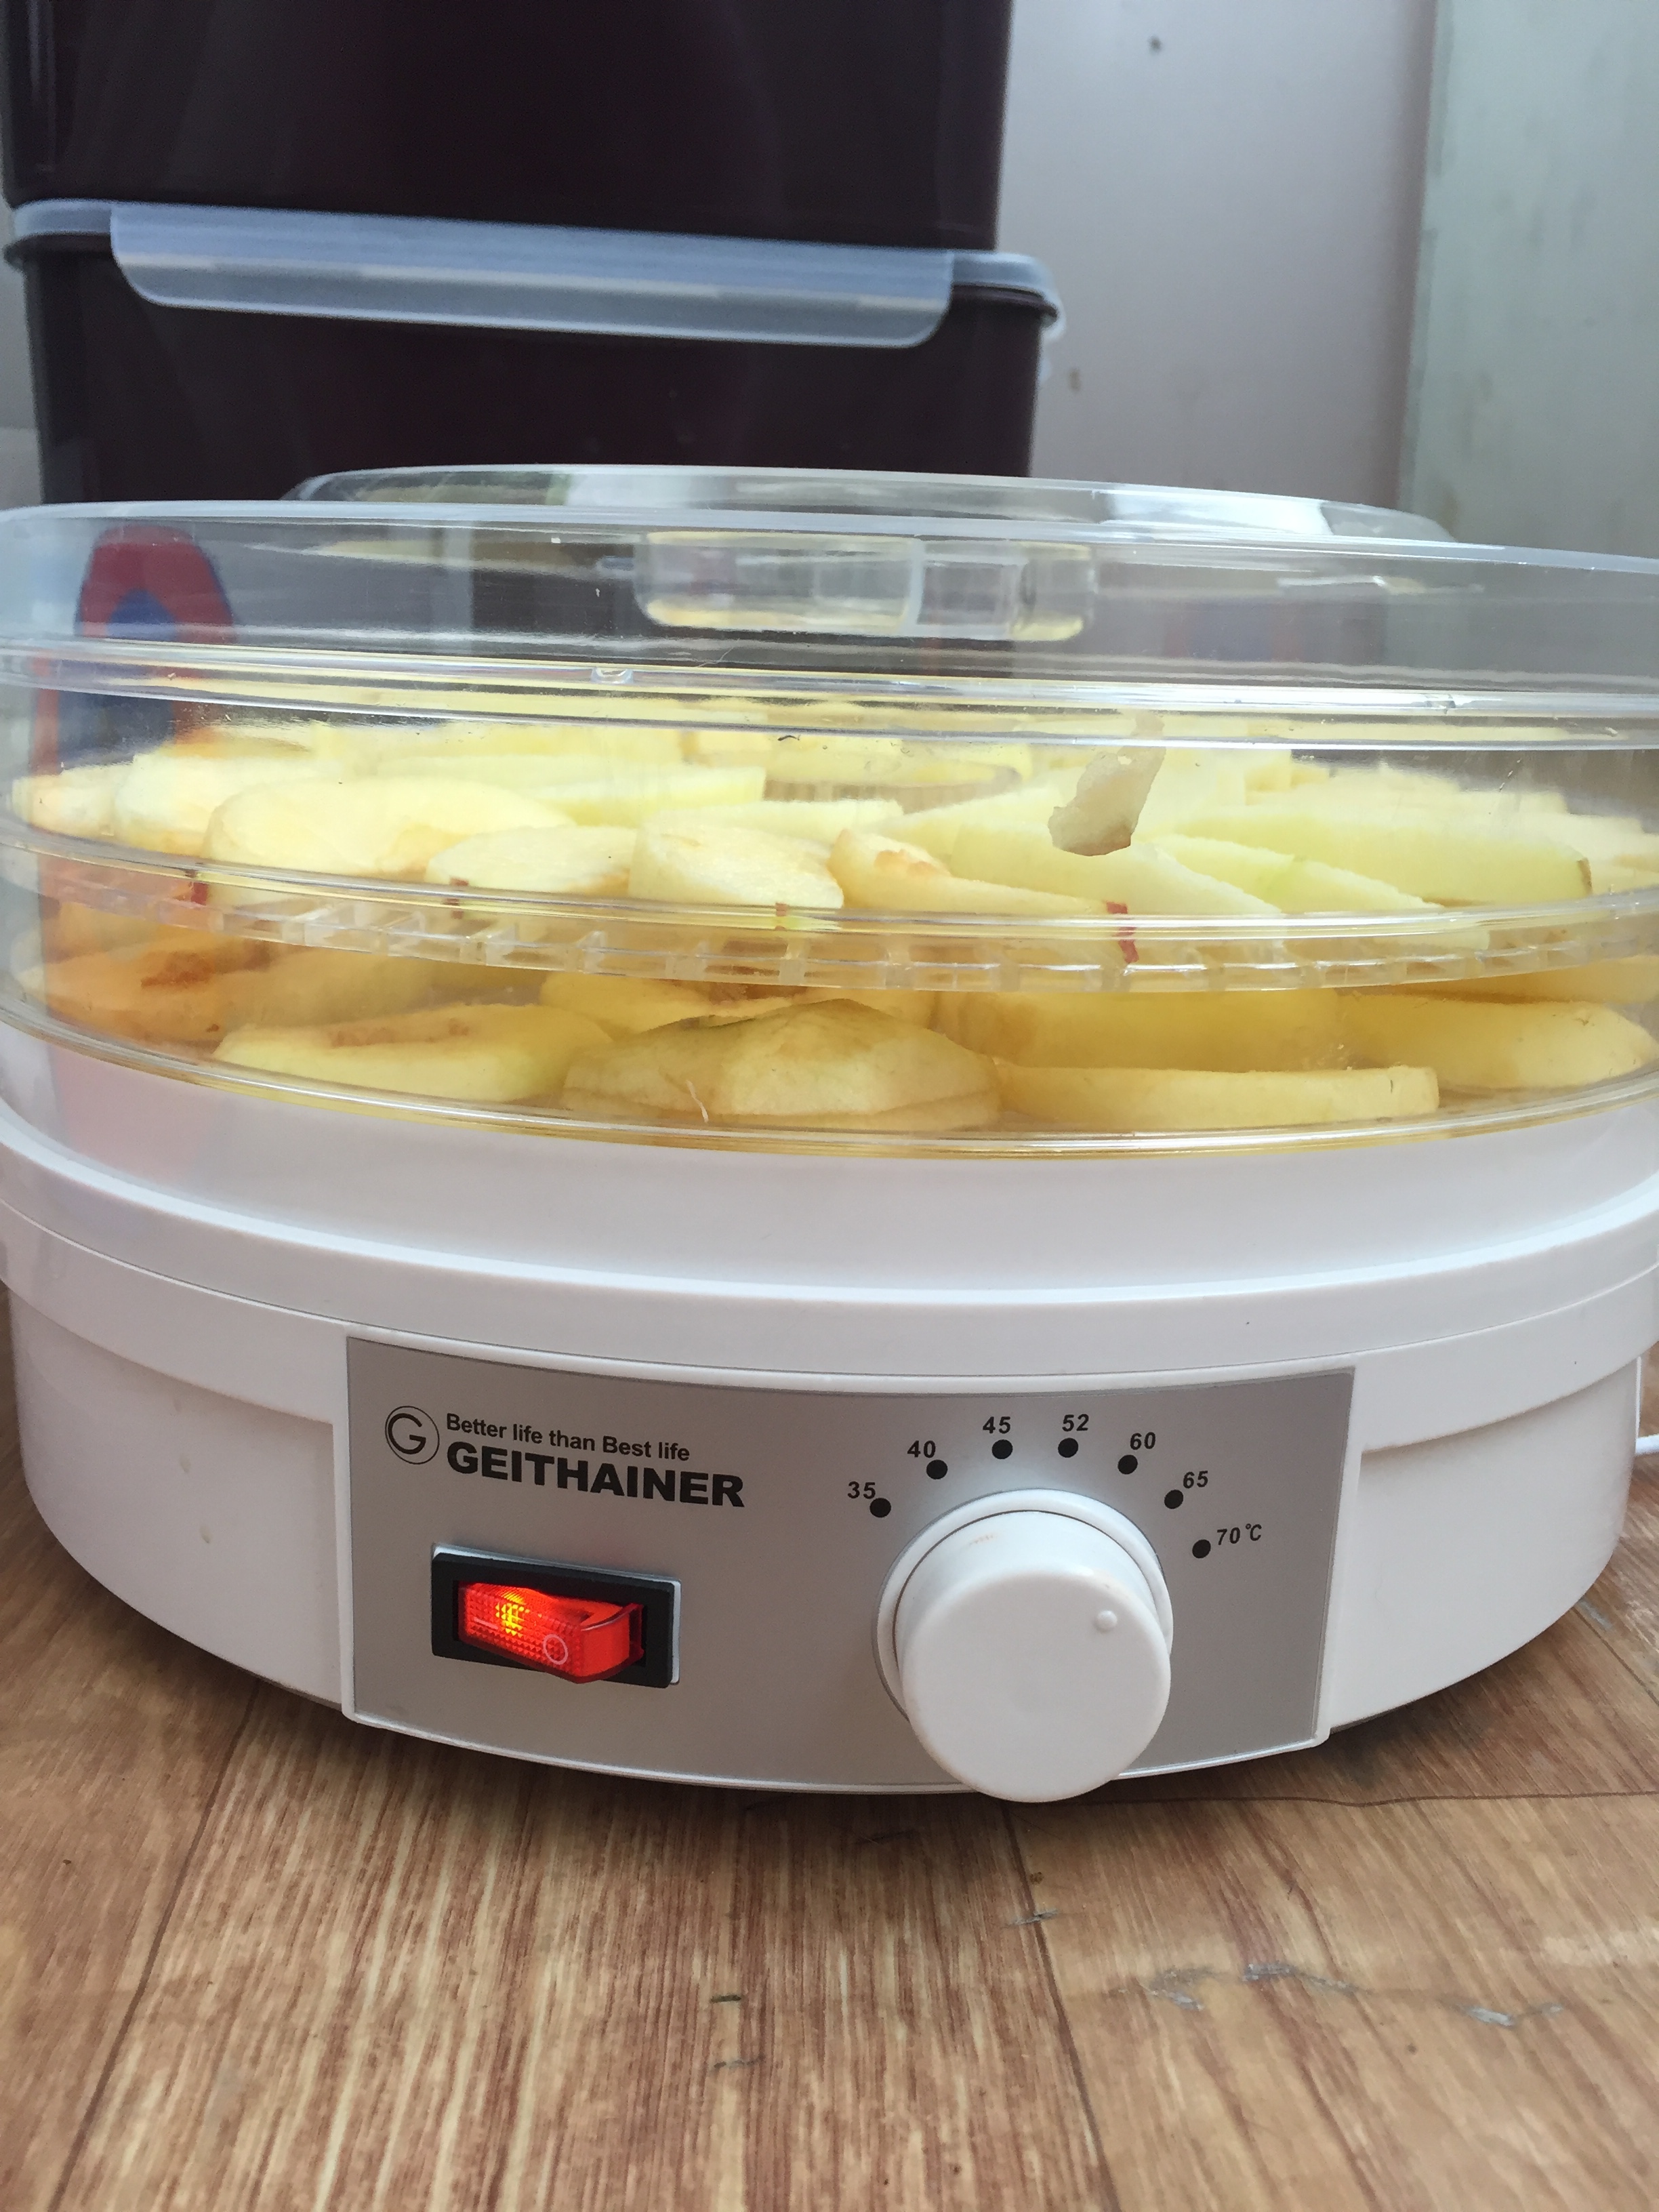
4. Turn on and adjust the temperature if your dehydrator has a temperature control switch. Turn up your dehydrator the the highest temperature (the higher the temperature the faster the fruit will dry out).

5. Leave for 24 - 48 hours. The first batch of fruit (pictured in this post) was only dehydrated over nights (about 15 hours) and so the apples were still quite soft and squidgy. We made another batch using persimmons and left those over night and the following day and they came out crunchy and delicious. I definitely recommend leaving them as long as possible.

6. Place the dried fruit in airtight container. You can use an ordinary ziplock bag and a straw to suck out all the air. Store in a cool, dark place. Your fruit will keep for a good couple of months (although ours doesn't last longer than a few days as we eat it all!).

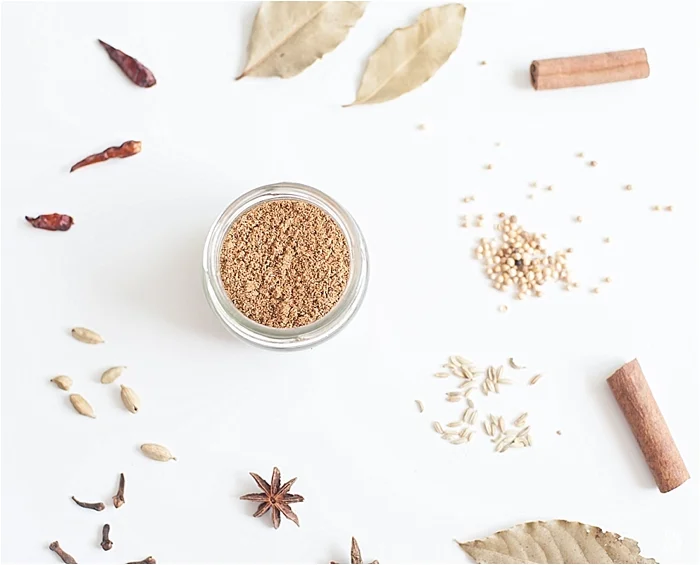
Thanks to a friends suggestion, we just finished a batch of dried apples covered in cinnamon. Out whole house smells like Christmas and those apple pieces were absolutely amazing! Experiment with different spices, you can't really go too wrong.

If you don't have a dehydrator you can theoretically use your oven, but I'm not sure whether you'd actually want to leave your oven on overnight while you're sleeping? It is possible with the oven, but using a dehydrator is much easier. You can buy a dehydrator like ours on Gmarket (click here) for about W30 000.

5 ways Buffer will change the way you blog forever!

How Buffer Will Change The Way You Blog Blogging Tips

I've been using Buffer for about a year now, but it's only been in the last few months that I have come realise just how powerful it can be when fully utilised to grow your blog. For those who have never heard of Buffer, let me break down what exactly it is.

"Buffer is the best way to drive traffic, increase fan engagement and save time on social media" Buffer

Basically, Buffer is a platform for you to schedule twitter statuses & Facebook posts (LinkedIn & Google plus too and Pinterest for their paid upgrade) ahead of time. For those of you who wonder how it is that I am able to post things on all my social media platforms while living in a different time zone to the majority of my readers this is how I do it. Once I publish a post on my blog, I head straight to buffer to make sure it gets posted to my social media platforms at times that are optimised for my chosen time zone.

If you are just diving into the world of social media marketing for your blog, you may have noticed that some of your posts are getting more attention on different days or at particular times of the day. According to research, weekdays at lunchtime are said to be the best time to post content on Facebook ('best time' meaning your posts are more likely to get the most likes, shares & comments).  This is quite a simple thing to understand if you think about your own personal use of Facebook. When do you spend the most amount of time on Facebook? Most people are asleep/busy in the early morning and so it makes sense that the lowest engagement on Facebook posts is before 6am right? Buffer has all sorts of fancy tools to do all the hard work for you, suggesting optimal posting times for your social media platforms based on your timezone and your past reader engagement.

Here are 5 ways that Buffer has changed the way I blog. Buffer itself is free and I think if you're serious about your blog, this tool can really help you take it to the next level. 

Blogging Tips CityGirlSearching

Analytics

Once your post has been published on your chosen platform, Buffer will give you a breakdown of how well it did. It will show you how many likes/shares/comments/retweets you got. This helps you to see what sort of content your readers are engaging with, and especially what you are posting when. Buffer also adds a little star to posts that have done the best (calling them 'Top Posts') so you can easily scroll through and see what has worked best for your content. This helps you to determine when your followers are online and when they are engaging.

In the image below you can see how the following Facebook post performed (you can see how many comments/likes/clicks on the link I posted/shares and also how many people the post reached). From this post I can see that it only reached 380 people. I know that I have 1800+ fans on Facebook and yet only 380 of them saw this post. Interesting. Some of the analytical elements are for paid for members of Buffer (such as the 'Most Popular' tab but I have yet to need any of their added features and am very happy with the free version so far!).

Buffer review CityGirlSearching

For me, I have readers in many different timezones; I am South African (so many of my readers are there), I live in Korea (a lot of my makeup reviews are seen by people in Asia as these products are more widely available here) and finally a lot of my readership is based in the US and Europe too. This means in order to make sure that everyone sees my content, I need something that allows me to schedule my posts for these different timezones (refer to point 3 below!). I use the free analytics section of my own blogging platform (Squarespace) and I use Google Analytics to get a better breakdown of the countries where my readers are based. Once I know where they are based, I can then schedule my posts for optimal times in those timezones.

Scheduling

I mentioned this at the start of this post but scheduling is what Buffer is built to do. Buffer has a new tool for optimizing your posting times. You can either choose your own times and how often you want posts to go out for your different platforms or you can let buffer do the hard work for you with their Optimal Timing Tool. When you add content in the 'Content' tab, those posts will then be added to a list that will publish those posts at the times you have chosen above or let Buffer choose for you: 

Buffer App Review

When I click the above 'Want Buffer to optimize your schedule? Try our Optimal Timing Tool' I get directed to the following page where I can choose which platform I want my optimal times to show:

Once you choose your platform, and the number of times a day you want to post, Buffer uses it's fancy algorithms and spits out a graph like this: 

Buffer App review

From the graph above I can see that if I want to post to Facebook twice a day, the optimal times are between 2pm & 8pm for my chosen time zone (Asia/Seoul). You can then have Buffer automatically replace your exisitng schedule or you can do it yourself in the schedule tab in your dashboard.

Buffer is super easy to add content to. Simply choose which profile you want to add content to, click on the 'Content' tab and begin writing and uploading images. Right now you can see I have zero posts scheduled:

Buffer App Social Media Scheduling review

What's also handy is you can write one piece of content and set it to be posted to all of your social media platforms linked to Buffer. I usually schedule short posts for twitter, and more image based content for Facebook. Although I have noticed that the images I have shared to Twitter get more re-tweets than my written posts (thanks to the analytics tab!).

Buffer Blog

One of my favourite features of Buffer is, funnily enough, their own blog. They have such great articles and guides to all elements of social media and constantly post tips for making the most out of Buffer. Their blog is definitely worth checking out if you want to learn more about the science behind social media. It's a no-frills place to learn more about Social Media.

Blogging Tips CityGirl Searching

TIME SAVING

Because I can post my content ahead of time, it saves me from having to be at my computer and manually post each bit of content, as well make sure I have an image for each one. My brand is very image based and so being able to sit down once a week and schedule social media posts to go out throughout the week saves me so much time. It also means I can turn my phone off when I am out and not worry about posting content. Buffer does all the work for me.

SHORTEN LINKS

This is a big benefit to Buffer. I was using Bitly to shorten my web links, especially for twitter. I actually still use Bitly on the odd occasion when I want to manually post something to Social Media but having a platform that shortens links and schedules posts for me just saves me more time, and that's the point really isn't it. Shortening your links helps you keep to the strict 140 characters for Twitter, and it also helps Buffer to provide you with analytics for the number of people who clicked on your link. And to be honest which of the following looks better on the eye and more 'click worthy':

https://sticky9.com/?pid=117&referral_code=FRIEND2JNT&utm_content=buffer17f3b&utm_medium=social&utm_source=facebook.com&utm_campaign=buffer

or

http://buff.ly/1JumpJ9

Blogging Tips Tricks CityGirlSearching

I have more thing to say about Buffer. While scheduling your posts is a massive time saving tool, do remember that social media is about being social. It's about engaging with people. Don't just set up a bunch of posts and then hope your blog will grow magically. As with any blogging tool, it is designed to be used in partnership with you. You are the person behind the blog and you are not a machine. Here is a really great guide to Social Media automation by the Buffer Blog. It's definitely worth a read. 

Do you use Buffer? Have you found that it's saved you time and helped grow your own blog or website? I'd love to hear from you in the comments below.

Happy blogging!

*I have not been asked by Buffer to write this post or been paid to do so. I simply want to share with you how this great site has helped me become a better blogger.*

Inspirational Instagram Profiles

InstagramInspiration.png

Instagram has been my favourite social media platform for a while now. When I first started I was following all sorts of random people. As the months went by I realised just how powerful Instagram is as a networking tool and I began to look for fellow creatives in my field (lifestyle/travel/beauty bloggers) to follow and I've built real friendships with a lot of them. I even collaborated with someone I met via Instagram on this Boho Bridal styled Wedding shoot (click here to see my photographs). 

A basic search will turn up loads of interesting new brands and people to follow, but I'm not so much interested in the huge corporations as I am the smaller business owners and creatives. I find the people who are in the same boat as I am, trying to take our blogs and businesses out into this big bad world and so much more real, more genuine, and ultimately so much more likely to spend time following you back or commenting and actively engaging in your work. I'm not sure about you but I know that I'd rather have 100 engaging followers than 100 000 fans who simply follow without knowing a single things about who the person is behind my brand. 

I find that the more relatable creatives I follow, the more I am inspired to create better content for my own feed and more my blog. Are there any Instagram profiles you absolutely love? Share them with me in the comments below. Even better than that, share your own profile below and I'll pop by and say hello. 

Here is small list of some of my current favourite profiles on Instagram, simply click each image to find them on Instagram.

Enjoy!

Fall For DIY

How to Plan your own Murder Mystery Party

How to plan murder mystery party

I organised a Murder Mystery party for Farmboys birthday and it went so well that I thought I'd share some details on it in case you too want to host one. I hadn't been to a murder mystery party before, and so really had no idea where to even begin. I started off getting in touch with a girl here in Korea who holds an annual murder mystery event, and she was so incredibly kind. She gave me all the info I needed to get started, as well as as sample character bio's. Her event is the larger end of the scale, with up to 40 people attending. As I only had 22 guest, things were a little easier. You can buy complete party kits online, and there are loads and loads of free printable goodies on Pinterest, but to really save time I followed an awesome plan I found online, put together by Nick Breen (click here).

Nick lays out an entire scenario, characters, backstories & email templates so all the hard work is done. Then it's just up to you to send out characters to your guests and hope they all dress up! I would also suggest asking a friend to help you if you aren't the creative type. I had the help of a very talented friend, Kim, who helped me in creating more characters and their backstories. Thank you Kimmie! I couldn't have done it without you!

Thank you for all the help Kim! Photo taken by Ian Bethune

Thank you for all the help Kim! Photo taken by Ian Bethune

I used Facebook to create an event for the party, and from there was able to send out group messages (I'm sure theses were terribly annoying at times) but they helped to let guests know what was going on, as well as to send reminders for things like directions, starting times & pre-ordering food.

The hardest part of the entire planning process was making sure I didn't send the wrong character information to the wrong person! I sent out a message 3 weeks before with the basic details of the event (time, place & theme) using the following template adapted from Nick Breens site:

You are all guests at an upscale casino in Las Vegas. You have very rare tickets to the best night of excitement on the strip; the famous Elvis Impersonator. It's 8 o'clock and everyone has gathered into the swanky casino bar for the star performer, the best Elvis Impersonator of all time. 
As the show starts, a gunshot echoes throughout the bar. The curtain comes up, and Elvis goes down. The casino's bar doors slam shut and everyone in the bar is now a suspect.

You are requested at the party to determine which of our friends is the murderer. Throughout the night you can talk to any of the suspects to see who they are and to determine if they are the murderer. One person will be the murderer, if you are not the murderer, you can try and trick everyone into believing you are, or you can simply hunt for the murderer.

I will be giving everyone attending a short character backstory. I encourage you to develop your character as much as you want. I have given you a lot of room to be creative with your character. The more you shape your characters backstory, the more believable it will be. Some of the character backstories that I will provide you with will contain clues which you must tell everyone else at the party. Piece together enough clues and you may find the murderer.

In order to guess who the murderer is, you must answer the following three questions;

1. Who Murdered Elvis
2. How did they murder Elvis
3. Why did they murder Elvis.

Each person will be allowed two guesses throughout the evening. All guesses will be made publicly. The first person to correctly guess these three questions will get a prize.  I will be sending out your character information next week so you can prepare a costume etc.  It should be a lot of fun! 

I had 22 guests and so had to create a few more characters than those suggested by Nick Breen on his blog. If you do this, you need to make sure the new character stores tie in with the existing ones. I also suggest creating one or two extra characters in case you have a few unexpected guests. You can make these character roles minor, so that if they aren't in the plot the story still makes sense.

Then I sent out the characters 2 weeks before the event, and a few final reminders in the last week.

I asked Dave (the owner of the Jeonju Diner in Jeonju) if we could host the event at his restaurant. I also asked very nicely if he would be our Elvis too. He was very gracious and went all out in preparation for his role as the murdered showman. It was fantastic.

I was thrilled to see that most people really got into character, and their costumes were great. I had asked guests to start arriving at from 7pm with the aim of the game starting at 8. I did this to make sure that everyone had arrived by the start of the event. If you do this, make sure to let people know they should not be in character until the game starts otherwise you will have people guessing and chatting about their characters, and possibly even solving the mystery before all your guests even arrive! On that note, to keep a real air of mystery, remind your guests to keep their characters secret until the actual party.

I really had a great time, and I think so did everyone else. It was a wonderful change from the usual dinner and drinks shenanigans, and it was great fun hunting for clues and sending people off onto the wrong trail in their hunt for the murderer. 

Let me know if you host your own Murder Mystery party. I'd love to hear how it goes as well as if you have any tips or advice for making things even better.

How To Start A Blog

Blog Tips How To Start a Blog: a Beginners Guide by CGScreative

A while ago I was part of  Caitlyn DeBeer's Creative Business Series, a really great creative series in which a bunch of us bloggers got together and each wrote about something we specialised in. It's a little out of date and there seem to many broken links as most of us have updated our blogs since then but what I shared about blogging then still holds true! And so today I'm going to re-post my tips for those who want to start a blog but have no idea where to gegin. I hope you enjoy this post and find it helpful. I have a number of other posts on blogging that you might like too, click here to read more.

What is a Blog?

A blog is a 'mini-website' in that you ideally are able to run by yourself, without having to have designers make changes for you. A blog is a space for you to share what you love with the world, to journal, to keep memories and of course as a space for you to market and sell your product.

Here are some of the most popular blogging platforms, all of which cost nothing to set up:

Wordpress (to be clear I am referring to the free version of Wordpress, click here for more info), BloggerTumblr

My blog used to be on "Blogger" and that is why it had the 'blogspot' segment on the end. It is completely free and was my favourite platform due to it being so very user friendly and easy to navigate around. Also, it is implemented with Google so if you use Gmail/Google Plus etc everything works seamlessly.

Wordpress is another favorite in the blogging world, but I find it isn't as user-friendly as Blogger. But, if you have to time to fiddle and play around it can be a lot more powerful!

To go "dot com" and drop the 'blogspot/wordpress" you have to buy a domain name through a site like GoDaddy for Blogger, and through Wordpress.com for Wordpress (to learn more about the difference between Wordpress & Wordpress.org click here).

I launched my new website (this one) last year on a relatively new platform called SquareSpace (see image above). It doesn't have a free version (only a 14 day trial for users to test to see if they like it) but with the paid for package it includes a domain name, so you don't have to worry about going through an external site like GoDaddy. And the templates are just gorgeous! Have a look for yourself...click here. Their target markets are artists (photographers, designers, small business owners and bloggers) and their platform is built on providing users with a media rich experience. Think clean lines, and beautiful design. I am so happy with them! My blog looks a lot more professional with SquareSpace and I am able to change all the design myself without any coding!

At the end of the day, what platform you choose is all about personal preference. I know people are often very interested in Wix as their marketing is very good and you often see their adverts all over Facebook, but I found Wix was to hard to make changes an their free platform is very limiting. I would stick with bloggger or make the move straight away to Squarespace if you want to be taken seriously. 

HowToStartABlog

Why Blog?

This is a really important question to ask yourself before you even think about starting as it will form the building blocks of your business/brand. This is different for everyone. Some people enjoy seeing their words and thoughts come alive on the page, others enjoy the feeling of affirmation that comes from gaining another follower or like on Facebook. I have loved meeting new friends through my blog, as well as the outlet it has given me to be creative, something I never dreamed was possible.

Whatever your reasons are for first wanting to start your blog, write them down (I've created a fun brainstorm printable for you to download and print out to help you along your way), so when you start to feel guilty for not having written a post in months don't beat yourself up about it. Instead, go back to your list and remind yourself of the real reasons you wanted to blog in the first place, I'm sure you will feel inspired to get started again. You will go through times of frustration with your blog, and sometimes all thats needed is a little time off to feel inspired again.

BUT if the main motivation behind why you want to start a blog is to make money or to get sent items to review, then I am terribly sorry to bust your bubble but this only happens to a tiny amount of bloggers. If your main goal is to make money, your readers will very quickly pick up on this and stop reading. Your readers want to be entertained, inspired and motivated, so give them that. If you are passionate about your content your readers will be too!

Your Blog Name & Branding

As important as the why is behind your blog, your branding is what differentiates you from everyone else and makes your blog special. If you take your blog seriously, so will everyone who reads it. One way to make that leap into the realm of 'seriousness' is by building a brand around your blog. To help you with this, you need to create a consistent message, and have everything you do, on and off the blog, send the same message. Think email signatures, blog headers, blog side bars, business cards, stamps, personalized stationery...the list is endless. And all of this needn't cost a fortune. The simplest way to build the foundation for your brand is with choosing a particular colour scheme, fonts and a basic design. You can get the help of a graphic designer if you really want to go that extra step, but the majority of the basic blogging platforms like Blogger, offer loads of customization options built into them. Think about your target audience (are they young and funky, in which case bright colours would work well. Or are they slightly older and more conventional in their thinking? Then a modern, clean and classic design and layout would probably work better).

By filling in the free mind map printable found below, you will be able to build your brand around the 'What do you love' section. If you love nature and the outdoors, your chosen colour scheme might revolve around earthy colours like khaki and emerald. Here is a great website to get your mind around colour combinations...Design Seeds. Here are a few more tips for the basic design of your blog to help you formulate your brand {click here}

After you've given some thought to your branding, now here comes the hard part. Picking a name for your blog. Your blogs' name sets the tone for your brand (and of course will have implications for showing up in google searches) so pick carefully. See who already has your name, or anything similar to it with a basic google search. Choose something that won't be outdated in a few years (and you should definitely be seeing your blog in terms of the future and "In a few years time" kind of way. 

Don't let this overwhelm you. We all have to start somewhere (click here to see my first few blog posts, eek...I'm glad I have them to look back on!) we learn by experience and our tastes change as we get older. Embrace that and let your blog grow with you into something you are proud of. 

HowToStartABlog

How to Find or Create Content

I find I am at my least creative when I stare at other peoples awesome blogs all day. I find I am unable to think of anything new or original to write about. How I deal with this (and I have my incredibly creative husband to thank for most of my ideas) is to go for a walk, camera in hand, and snap away at anything and everything that takes my fancy. Sometimes I take a notebook and jot down notes about my day, about the people I see around me, about the things I want to do with my life. Pretty soon I have a messy jumble of potential content for my blog. Look around your world, your office, your family, your community for idea's. Do you work with some strange and fascinating people, what about interviewing them on your blog? What about doing a post about a day in your life (with photo's of everything that makes your day unique)? The world around us is so rich with colour and life, its an endless supply of idea's if we just take the time to look.

Your Blog Photographs

I used to think that my blog would become popular by just reposting great content I found on sites like We Heart It and Pinterest. I've now come to realise that there are too many mediocre blogs out there that just repost other peoples creative content. That's why I try to post original content on my blog. That doesn't mean I don't 'borrow' idea's from other bloggers, but it does mean that if I want to showcase an awesome DIY lampshade, I will try to make that lampshade myself, take my own photo's and write in my own words how to go about making one yourself. And I always make sure to link back to the original source of the idea, as a way of saying thank you for the idea.

But now I'm getting distracted...the title of this tip is to take your own photographs. You really don't have to have an amazing camera to take incredible photo's. You just need to play, and fiddle with your camera and the angles to get your photograph just right. This is how I started getting into photography. Etsy has a great article on taking better product photographs, click here to have a read. And I also wrote a post on styling photographs for your blog using just your phone. Click here to read more. 

Don't Over think things

Most bloggers would probably think I'm crazy for saying this, but for me it works. I am a very organised person, I love to plan EVERYTHING and my favourite past time is making lists (can you say *nerd*). But I find that if I spend too long planning a blog post, I lose interest in it and it stays in my draft box for weeks, even months without ever seeing the light of day. If an idea comes to mind, I straight away log onto my blog, start a new post, and I just roll with it. I try not to leave it till the next day to finish it, as I often get distracted by the next post. In some ways I find this helps me stay inspired as I am always putting new content up, and my readers know that they can come back every day or so for something new. This pressure helps me to stay motivated to continue putting posts out there!

HowToStartABlog

Always Be Yourself

Your readers want to know about you, so be true to yourself. This doesn't mean gushing about each and every last detail of your day and how depressed you feel after finding out that your local Woolies Food was out of fresh basil. But rather, this means writing in your own voice and letting your personality shine through the page. Don't be scared to put yourself/your business/your idea's out there, your readers will respond to your 'genuineness'.

Gaining Followers

This is the question I get asked the most by my readers, and it's what I still ask myself! But, I'm afraid there is not secret. There is no hard and fast way to gain 100 new followers on twitter, or to get 1000 new page views in minutes. 

You just have to be patient. You have to provide content that your readers will enjoy, and you have to do so constantly. There is nothing worse than stumbling onto an awesome blog only to see they haven't updated since last year January. A good way to share the blog love is to leave comments on other blogs that you enjoy reading. It's a wonderful feeling getting just one comment on my blog (I am speaking from my own experience here) and if that is the case with you too, then why not take some time to leave thoughtful and meaningful comments on some of your favourite blogs. Don't feel that your one comment may mean nothing if there are 999 others on the blog, as a blogger I can tell you that each and every single comment leaves me with a warm and fuzzy feeling.

Take some time to connect with your favourite bloggers on Twitter and Instagram, reply to each and every tweet your receive, as well as to each comment you may get on Instagram. This helps to build meaningful and long lasting relationships with your readers and followers.

Find your niche, whatever that may be, and stick with it. I have had a real hard time in narrowing down my focus here on CityGirlSearching, I was trying to do too much and was scared to commit myself to one box. I'm not a beauty blogger, but I like writing beauty reviews, I am not a travel blogger, but I do go to some amazing places and I want to share the photographs with my readers, I'm not an expert in fashion but I do like sharing the odd outfit post. All of these different elements led me to define myself as a 'lifestyle blogger' but I still don't let that term fully define who I am here on the blog. This blog is a space for me to share pretty-ness...be it in fashion, beauty, in the home or in another country.

HowToStartABlog

Inspiring Blogs

Here are some of my favourite bloggers (some are local South African ladies, and others are International). Use this list as a guide & to learn from what these ladies are doing right. Focus on their blog design, their photographs, their content, see how they engage with their followers, and then apply it to your own blog:

Nadia vd Mescht beautifully crafted blog by Durban (South Africa) creative Nadia

EmmaJaneNation one of the first blogs I ever started following by lovely local SA blogger Emma (her photography is gorgeous!

Vivianna Does Makeup one of my all time favourite beauty blogs written by Vivianna

A Beautiful Mess a funky and fresh lifestyle blog by Emma & Elsie

MilkTeef lovely beauty and lifestyle blog by the sweet Emma

WishWishWish fashion done right! A gorgeous blog by Carrie

SuperficialGirls another local SA lady; Carlinn, who focuses on fashion & beauty

PinkPeonies lovely Luzanne writes this beautiful beauty blog

PuglyPixel design tips and tutorials from the fabulous Katrina

Lost in Travels a travel blog to inspire your wonderlust (and lots of tips for traveling with your hubby, as well as keeping on a budget!) by Chelsea

I also recently shared a post on my favourite Creative Business inspiration bloggers, click here to see it. 

I could go on for days about starting up your first blog, but the biggest piece of advice I can leave you with today is don't ever give up. I {often} have days where I feel like no one reads this blog, and that I put so much time and effort into it and I get so little back. Other days I want to high five ever person I see because I got more than 3 likes on a photograph on Facebook. So keep at it!

HowToStartABlog

Above is a freebie printable I've created to help you in your blogging journey.

Try to fill it in before you start your blog, to give you more focus and direction. Here is mine, filled out and taped onto the wall, to help remind me of where I am and where I want go. Below is more detail to help you fill in the blog brainstorm printable.

  • Why blog: jot down all the reasons you want to blog, from wanting to be a superstar celebrity to wanting to create a place to journal your thoughts and dreams. Nothing is too small or insignificant.
  • What do you Love: write down all the things you love (eg family, friends, God, nature, fashion, beauty, design, interiors, photography...) then cross off those that are too personal, or those you wouldn't want to publish all over the interweb. What you are left with is a list of elements that make up you! This will help you with later on with your branding.
  • Sharing your Love: list the ways in which you want to blog (through photographs, by writing, by drawing and illustrating, by creating cartoons and other graphic based content). This is how you will express yourself on your blog.
  • Creating Content: List some of the ways I have outlined above here, and any others you can think of (reading other blogs, going for walks, photographing random events and elements, journaling...etc)
  • Growing Readers: List some of the ways I have outlined above (networking, leaving comments on other blogs, tweeting, Facebook mentions, emailing potential clients/others in your industry) and add your own ideas too.
  • Your branding: create a board on Pinterest (you can make it secret if you don't want anyone to see it just yet) and start pining every thing that takes your fancy from colours to fonts, to design, to blog layouts. Have a look at this board for some inspiration. You need to choose a maximum of 3 or 4 colours, then 2 fonts that you want to use to help keep your brand cohesive.

I hope you have enjoyed my post on blogging, and I hope that some of it has been useful to you. If you have any questions, please drop me a comment below and I'll get back to you as soon as I can.

Happy blogging everyone

x

How To Take Better Photos For your Blog Using Your Phone + Free Checklist!

How to Take Better Photographs for your blog using your phone

You don’t have to have a fancy camera to take beautiful photographs for your blog. You can use your phone’s built-in camera, and with a few tips, you too can produce pretty photos to take your blog to the next level. Even though I own professional photography gear, sometimes I just want the ease of snapping a shot right in the moment. And a lot of the time when inspiration strikes, I don’t want to be fiddling around with settings and then end up missing the perfect shot. A lot of the images I produce for my blog are styled and I don’t have the time to get my camera, set it up, export the images to my computer, edit and then finally upload them to my blog. I find that using my iPhone and a few, easy-to-use (and free!) apps, I am able to produce pretty pictures that only take a few minutes to put together. Today I want to share with you how you can do the same.

All the images below were taken on my iPhone 4S and edited with VSCOCam to give them a grainy, film-like texture.

1. Clean your Lens


As with any camera, if your lens is dirty, your photographs aren’t going to come out very clear. It’s such a simple tip and yet has made the biggest change on images taken with my phone. Think about where you phone goes, and now think about the last time you wiped your camera lens clean. If this gives you the shivers, like it did to me, then whip out a piece of cloth and get wiping!

2. Natural Light


Wherever possible, use natural light. I take the majority of my photographs (using both my DSLR & my iPhone) during the day and try as much as possible to maximise the soft, natural light that comes through a window. Harsh midday light is just as hard to work with as a flash, whereas natural light, the kind that streams through a window, produces soft, clean images.

3. Click to Focus


On the iPhone camera app (the standard camera app that comes with the iPhone), there is a yellow square that automatically appears when you want to take a photo. This is your focus setting. You can allow the phone to automatically adjust the focus, or you can over-ride this by clicking where you want to focus when you take a photograph. This is especially useful when you want to create a slightly blurry background, with something in the picture in focus. I often use click-to-focus when I am photographing macro-type shots of make-up and stationery.

4. Self-Timer


I only found out about the self-timer feature on my iPhone when I updated my IOS to the latest version. This is especially handy when you want to take a ‘selfie’. Don’t forget to click to focus before you take the shot to ensure that your face is perfectly in focus and not blurry. 

5. Use a Tripod

Using a tripod (or any home-made version of a tripod) will stabilize your camera and help to avoid camera shake. It can be so frustrating when you set up the perfect shot, click to focus, and then bump the phone by accident and the photograph ends up coming out blurry. I often just use a book and wedge a drinks coaster underneath the phone to adjust the angle (and then set up the self-timer to get the perfect shot).

6. Avoid the Zoom


Especially on the iPhone built-in camera, when you use the zoom it decreases the quality of the photograph. Rather use your own built-in zoom (ie. your feet!) and position yourself to be nearer, or further away from your subject. Unless you have a snazzy new phone, like the Samsung Galaxy S4 or the iPhone 6, I would suggest avoiding all use of the zoom.

7. Background


Using a white background when shooting any product produces beautiful, professional looking shots. The white offsets all other colors and is always complimentary. It looks crisp and clear and really helps to make your subject stand out. Textured backgrounds also work well for product photography, but I find they can also distract from your subject. I have yet to take a photograph on a plain, white background that I didn’t like. 

How to take better photographs for your blog using your phone

8. Angles


Play around with angles. Have fun and go crazy with high and low, close up and far away shots. Use your body to zoom in on particular items if you are styling photographs for you blog. It’s okay to cut off parts of items, and this works particularly well when I shoot make-up or stationery. Consider the two photographs below. The one on the left is the full image, and the one on the right has been cropped therefore removing parts of the image. Can you see the difference? None of the props have been changed and the lighting is the same. The only difference is the angle.

How to take better photos for your blog using your phone

9. Apps


There are so many amazing apps you can use to really make your images pop, from overlaying text to added film effects or textures. My favourite go-to apps are:
– VSCOCam for editing the colour, brightness, cropping, straightening and adding film-like overlays.
– Studio for adding text and graphics.
– ABeautifulMess for hand-drawn overlays and creating collages
– Instagram for connecting with other creatives and sharing my images.
*All of the above apps come in Android and IOS versions.

10. Delete


There really is no point in having 10 of the same image. Be thorough and delete any and all of the ‘extra’ photographs so as to avoid wasting storage space and also to avoid having duplicates. The amount of times I upload the ‘not quite perfect’ image into a blog post and then realise I have to go back and search for the right photo is just annoying. And then I realise I often delete the perfect one and end up having to re-create my images again. Deleting all the nonsense saves you time and will make your life that much easier when it comes to blogging.

How to take better photographs for your blog using your phone

Most importantly, HAVE FUN! Taking photographs should be fun, and with all the great apps out there that are free and easy to use, blogging no longer has to be boring. With just a few minutes of practicing and playing around with your phone, your photographs can look just as good as the pros, and will take your blogging to the next level. I hope you found these tips useful. If you’d like to find out more about the apps I’ve mentioned above you can pop on over to my blog where I have reviewed the Studio App {Click Here} and the ABeautifulMess App {Click Here}.

To help you remember all these tips I've created a FREE printable checklist. It's in my FREE resource library, along with a whole bunch more resources AND free stock photographs just for you. Join the library by clicking the image below:

DIY How to make a gold animal ring holder

DIY How to make a Gold animal ring holder

Are you tired of loosing your rings, putting them down somewhere only to forget where or even worse putting them on the hand basin and watching them get bumped down the drain? Then this DIY is for you! These gold animals are the same ones I made in my last DIY where I made these cute >>> Gold Animal Glass Jars.

It's amazing just how much one can achieve when armed with a can of gold spay paint, am I right or am I right?

DIYHowToMakeRingHolder

What you Need

Gold Animal figure (click here for the DIY)

-think about what kind of of animal you'd like, one with a long tail or neck works well to hold rings

a small bowl/plate

superglue

DIYHowToMakeRingHolder

Directions

Simply apply a drop of superglue to each foot of your chosen animal and gently place onto your bowl.plate of choice. Make sure to leave it to dry completely before placing anything on it.

I hope you enjoyed this DIY! I have a few more things planned with my can of gold pray paint so make sure to stay tuned for more DIY posts.

How To Clean your DSLR camera lens

How To Clean Your Camera Lens

The last time I was editing my photographs I realised I had a few funny small blotches on parts of my photos. After wiping my computer screen I realised with horror that the marks must have been from my camera. I have since gone about finding the best way to clean my lenses at home, without having to send them in. Here are few tips I've picked up as well as a few basic things to keep your camera in tip top condition.

HowToCleanYourCameraLens

Use an air blower, like the one pictured above to remove loose dust particles. Simply press the bulb end and air will be forced out of the spout. This is the easiest and safest thing to try first with your lens.

When dust and/or smudges are on your lens glass, use a microfiber cloth designed for optical lenses to wipe it off. Make sure to use a clean microfiber cloth, as those cloths can hold dust, dirt and oil from your fingertips which can then be transferred to your lens. Be careful when cleaning the glass. If you do get something like sand on your lens and you rub it with a cloth, you may scratch your lens. Use a soft brush to brush off dirt or sand. Do not rub those away as they may cause scratches.

Change your lenses indoors (or in your car if you are out and about) if you can manage it. If you are outdoors, try and block the wind with your body as it can blow dust, dirt and other nasties into your camera and lenses.

Once you change lenses, quickly place the end cap on the removed lens, to prevent dirt and dust from setting into it. Also, quickly attach the new lens to the camera, to prevent dust and dirt getting into your camera sensor. And, while changing lenses, point them downward so dust and dirt don’t settle in.

HowToCleanYourCameraLens

Keep the lens cap on the front glass when you're not using your lens. Even better, place the lens in the protective cover that comes with it, or put it away in your camera bag.

Use a filter or lens hood to protect the lens glass from getting scratched or broken. 

Do you have any other tips for cleaning your lenses and keeping them in tip top condition?

How To Make Garam Masala Spice for curries

HowToMakeGaramMasalaSpice

Garam Masala is a blend of ground spices used to add flavor to Indian curries. I made a delicious butter curry recently, and the main ingredient was Garam Masala. Living here in South Korea means limited access to foreign food stores, so I had to make my own version of the spice using what I had on hand in my grocery cupboard. All I can say is the aromas given off from this mixture is heavenly and will make your home smell incredible. 

There are many varaiations of this spice, but this is my version using what I had on hand in my grocery cupboard.

HowToMakeGaramMasalaSpice_0006.jpg

Ingredients:

1/2 cup whole coriander seeds

1/4 cup whole cumin seeds

5 cloves

2 star anissed

4 bay leaves

8 green cardamom pods

2 sticks of cinnamon

2 dried red chiles (use more if you prefer more of a kick)

HowToMakeGaramMasalaSpice

Method

1. Dry roast the larger seeds separately to the smaller ingredients to avoid burning.

2. Once cooled combine in grinder until a fine powder is formed.

3. Store in an airtight container (click here to see how to make this gold animal glass jars)

HowToMakeGaramMasalaSpice

And now you have your very own Garam Masala to add to curries. I will be posting a delicious recipe for Butter Chicken Curry soon.

Happy cooking!

How to share Instagram photos to your Blog Facebook Page

HowToShareInstagramPhotosToBlogFacebookPage

Have you ever wondered where all those annoying hashtags on people's photographs on Facebook come from? The majority of the time those images have come from Instagram where those hashtags help you to get more followers and build a bigger audience. It can be a little annoying when people post the same thing on all their personal social media platforms but, what if you want to be able to do this for your blog or business Facebook page? It's super easy and I'm going to show you how.

Once you set this up on Instagram don't worry about flooding your Facebook feeds, you will still be given the option to share it onto Facebook/Twitter etc each time you upload a photo. 

Step 1 Click on the options wheel (on Android it will be 3 vertical dots, on a Windows phone it will be 3 horizontal dots in the top right hand corner) on your Instagram Page Feed

HowToShareInstagramPhotosToFacebook

Step 2: Scroll down your options page (or preferences page for a Windows phone) until you find Linked Accounts/Share Settings.

Step 3: Tap Facebook and then link your accounts by providing your Facebook login info

HowToSaveInstagramPhotosToFacebook

Step 4: Choose either your personal Facebook Timeline or one of your Blog/Business pages to link to

HowToSaveInstagramPhotosToFacebook

Step 5 Get Sharing! Now when you share your image, if you click 'Facebook' your image will be sent straight to your Blog Facebook Page.

HowToShareInstagramPhotosToFacebookBlogPage

And you're all done, easy peasy.

Happy posting!

Easy Natural Evening Makeup Look {Video}

NaturalMakepLookVideoCGS

A super easy to do, natural look to wear for evening (or day if you felt like wearing a slightly darker eye during the day). See below for product info.

Enjoy!

PRODUCTS SHOWN IN THIS VIDEO 
-L'Oreal True Match Foundation in R3 C3 Beige Rose
-The FaceShop Dual Veil Concealer in V210
-Maybelline The Colossal Volum Express in Blackest Black
-Innisfree Mineral Single Shadow in #1,#38, #38, #41
-Mac Matte Powder Blush in Harmony
-Revlon Just Bitten Kissable in 015 Cherish Devotion


-Eco Tools Brushes (Mineral Powder Brush & Crease Brush bought on iHerb: http://bit.ly/1Fcex1A
-Innisfree Diagonal Cheek Brush
-Sigma F80 Stippling Brush: http://bit.ly/1Fcex1A 
(the following online store ships Sigma Makeup brushes to South Africa: http://bit.ly/1AZxG09)
-Blistex Daily Conditioning Treatment

I hope you enjoyed this makeup video, let me know in the comments section below what you'd like to see in my next video!

x

Video: How to make your Nail Polish Last Longer & a *GIVEAWAY*

HowoMakeYourNailPolishLastLonger

Hello everyone and welcome to my first Youtube nail tutorial. In this video I will be showing you how to make your nail polish last longer.

All you need is

-a base coat

-a colour polish

-a top coat

 I'll be using Innisfree's Eco Base Coat, Innisfree's #108 colour polish, The Face Shop's gold glitter colour polish & The Face Shop's Gel Touch Nails top coat. 

Click on the video below to start watching.

*Make sure to watch till the end for the GIVEAWAY!!

You can enter the giveaway by either commenting on the video above (you might need to open the video up in Youtube itself to comment under it) or you can leave your comments here on my blog in the comments section below.

Rules:

-Giveaway is open internationally!

-Giveaway closes at midnight on Thursday February 12th & the Winner will be announced on Friday February 13th!

-Share this post on Facebook/Twitter/Instagram for more entries (please make sure to use the #citygirlsearching hashtag and tag me in your posts so I can keep track of all your entries).

GOOD LUCK!

DIY How to Make Gold Animal Glass Jars

How To Make Gold Animal Glass Jars

Welcome to the next instalment in my #DIYDaysInKorea series. These posts are about making beautiful things for your home, whether that home is in South Korea, South Africa, or any where else in the world. This post follows on from the Gold Animal Fridge Magnets and these jars are what I used to store the Fig jam I blogged about last year.

If you are based here in Korea and would like to join one of my DIY days (click here to see what went on at the previous get togethers we've had) you can pop on over to the Facebook group for more information.  It's a wonderful place to meet new friends and spend an afternoon.

I hope you enjoy this series and that you leave feeling inspired.

x


DIY Gold Animal Glass Jars

#DIYDaysInKoreaGoldAnimalGlassJars

You Will Need

-plastic animals (I found these at my local Daiso here in Korea)

-can of spray paint (I found this gold one at my local DC Mart)

-glue

-your choice of glass jars/bottles

Directions

Spray your animals with the spray paint. Make sure to place some newspaper down or use a piece of cardboard to prevent your work surface from being covered in paint.

Make sure to hold your can of paint at an equal distance from the animals while spraying to ensure the are covered in an even layer of spray paint. This also stops the pint from dripping. 

Once your animals are dry, you can start gluing them onto the lid of your jars. Try not to use too much glue when sticking them down so the glue doesn't run and form puddles around the animal.

Leave to dry and repeat! Now you have beautiful jars to store all kinds of things in your home. Use your jars to store nuts and seeds, bugger jars and bottles for storing makeup and nail polishes, or use them to store home made jams like this Fig Jam. The options are endless!

I'd love to see your jars if you make them, please share your creations with me on Facebook, Twitter or Instagram using the following hashtag #citygirlsearching.

Happy DIYing!

How to make a Flower Crown #DIYDaysInKorea

DIY How To Make A Flower Crown

Myself and my very talented friend Storm, who moonlights as a stylist & florist in her spare time, created this flower crown for a styled photo shoot we did a few weeks ago. We got together one day to brainstorm ideas for fun and creative activities we could do without spending lots of money and so we have started a #DIYDaysInKorea series (we even started a 'hashtag' so you can follow along too!).

If you are based here in Korea and would like to join one of our DIY days (we will be having our first official one on a Saturday in a few weeks time) you can pop on over to the Facebook group for more information. 

These #DIYDaysInKorea posts are about making beautiful things for your home (whether that home is in South Korea or South Africa, or any where else in the world). We hope you enjoy this series and that you leave feeling inspired.

x

How to make a flower Crown #DIYDAYSINKOREA 

CityGirlSearching#DIYDaysinKoreaHowtoMakeaFlowerCrown

Step 1

Get your tools, foliage and flowers together.

You will need a pair of scissors, florist wire, your flowers of choice and of course a cup of tea. 

Forage, pick, buy or pinch a few flowers and foliage for your crown. The crown will need need sturdy foliage to give it structure, as well as comfort for the wearer and to add a green element to it too. We used Boxwood as it is plentiful on the Korean sidewalks. Other foliage that can be used is willow or olive branch as they have flexible stems that twist easily

CityGirlSearching#DIYDaysinKoreaHowtoMakeaFlowerCrown3

Step two

To create the base of your crown you need to use sturdy foliage. We used Boxwood, but willow or olive branch works well too.

Start by gathering a few stems of your foliage (you can use a combination of greens if you’d like) and wrap your florist wire around the base. Continue to add in stems of foliage wrapping the wire around each piece to make sure it is secure. Once it is long enough, join the two ends and secure with wire.

CityGirlSearching#DIYDaysinKoreaHowtoMakeaFlowerCrown2
CityGirlSearching#DIYDaysinKoreaHowtoMakeaFlowerCrown4

Step 3

Next is to add your flowers. For the flowers we chose to use a mixture of silk and fresh flowers. We found that using a selection of bold flowers, such as peonies and roses mixed with a few whimsical flowers such as jasmine or honeysuckle worked well. Make sure the flowers you choose are hardy so that they don’t wilt too quickly while you are working with them.

CityGirlSearching#DIYDaysinKoreaHowtoMakeaFlowerCrown5

To add the flowers cut off the stem at the base of the flower. Pierce florist wire through the center of  the flower and make a hook. This make is easier to attach the flower and position them in an appealing arrangement. 

Secure the flower to the base by wrapping the wire around the foliage.

CityGirlSearching#DIYDaysinKoreaHowtoMakeaFlowerCrown6

Step 4

Lastly enjoy your floral crown! To make your pretty floral crown last a bit longer you can spritz the fresh flowers with water; however the fresh flowers won’t last out of water for longer than a day or two.

CGSTravelBlog_0039.jpg
One of my favourite photographs from the styled shoot...click here to see more.

One of my favourite photographs from the styled shoot...click here to see more.

{DIY} Washi Tape your computer cord

DIY Washi Tape Your Laptop Charger and Cables CityGirlSearching

I'm feeling rather inspired with my latest washi tape collection, and after reading this lovely post by Design Love Fest I thought I'd try something similar with the power supply part of my computer cable. 

The white parts of the MAC cables look really spiffy, but being white in colour they aren't very practical. The washi tape should keep the power house clean now.

It was really easy, and took literally 3 minutes to do. Let me know if you try something similar, or better yet, upload a picture to the blog Facebook page  to share with all my readers. 

Have a lovely Sunday everyone.

x