Giveaway Winner!

To find out who the winner of my recent Korean nail polish giveaway is make sure you visit my Facebook page by clicking here!

Thank you to everyone who entered I hope you enjoyed my last video. There will be lots more to come! In the mean time, here is some nail inspiration:

Video: How to make your Nail Polish Last Longer & a *GIVEAWAY*

HowoMakeYourNailPolishLastLonger

Hello everyone and welcome to my first Youtube nail tutorial. In this video I will be showing you how to make your nail polish last longer.

All you need is

-a base coat

-a colour polish

-a top coat

 I'll be using Innisfree's Eco Base Coat, Innisfree's #108 colour polish, The Face Shop's gold glitter colour polish & The Face Shop's Gel Touch Nails top coat. 

Click on the video below to start watching.

*Make sure to watch till the end for the GIVEAWAY!!

You can enter the giveaway by either commenting on the video above (you might need to open the video up in Youtube itself to comment under it) or you can leave your comments here on my blog in the comments section below.

Rules:

-Giveaway is open internationally!

-Giveaway closes at midnight on Thursday February 12th & the Winner will be announced on Friday February 13th!

-Share this post on Facebook/Twitter/Instagram for more entries (please make sure to use the #citygirlsearching hashtag and tag me in your posts so I can keep track of all your entries).

GOOD LUCK!

Gradient Nail Art Tutorial

DIY Gradient nail art tutorial_Artboard 1.png

My Korean friend Heejoung (who was my model for the spring flower crown photoshoot Storm and I did a few months ago, click here to see the beautiful photographs) came over for tea yesterday and ended up helping me with my first ever gradient manicure. 

This is a super easy to do manicure. It can be adapted in so many ways but works best with 3 colours in varying shades. You need a dark colour, a medium shade and a light shade (but these are not rules set in stone, try mixing it up with any colour combination for a fun alternative to the original gradient nail).

GradientNailArtTutorial

You need 

3 nail polish colours

base coat

top coat

sponge (I first tried with a regular makeup sponge, wich failed miserably. So make sure to use the 'spongey spongey' kind of sponge, if that makes sense. I ended up having to cut my kitchen scourer sponge up to use the end with more 'holes').

Directions

Start with a coat or two of your favourite base coat. This protects your nails from the chemicals inside all nail polish, and prevents your nails from discolouration.  I would suggest painting one coat of a white polish after your base coat as it would make a better 'base' for this kind of manicure.  But it's up to you, I didn't and wish that I had done so as it would have made my colours pop a bit more, especially my lightest shade which ended up looking a little bland.

Then paint your nail polish onto the tip of your sponge. Work quickly so as not to let the polish dry too quickly on the sponge itself. 

Place the sponge on your nail, first applying pressure to the top of your nail closest to your cuticle and then move the pressure to the middle and finally to the end of your nail keeping the sponge in contact with your nail the entire time. You are making a kind of backwards 'C' motion with the sponge. You can also use a side to side motion for the first coat (as pictured above). Once you have you first coat, dab the nail with the sponge to apply more colour. The more you dab, the more natural the gradient look will be. Repeat on all your nails, finishing off with a couple of coats of your top coat to seal in the polish and protect your nails from chipping

Your sponge will make the manicure look textured and not as smooth as a regular manicure. But this can be changed by using a smoother sponge. 

Next you've got a bit of cleaning up to do:

Use an earbud dipped in nail polish remover to clean up your cuticles. You can also apply a lotion or vaseline to your cuticles before painting as this makes the clean up process very easy. I forgot to do this and had quite a job removing all the edges. This is a very messy manicure and does require quite a bit of work to make it look perfect. But the hard work is definitely worth it, don't you think?

Next I'm going to try a pastel combination, what colours do you think would work best?

If you try this yourself, share your work on my Facebook page (@citygirlsearching) or on Instagram (@roxyhutton) I'd love to see what combination you choose.

GradientNailArtTutorial

Korean Stationery Giveaway!

CityGirlSearchingBlogGiveaway

It's my birthday month, and to celebrate I want to give away some of my absolute favourite things from South Korea. I want to thank you for all your comments, tweets, likes and love for my little blog and I thought these cute goodies would do the trick.

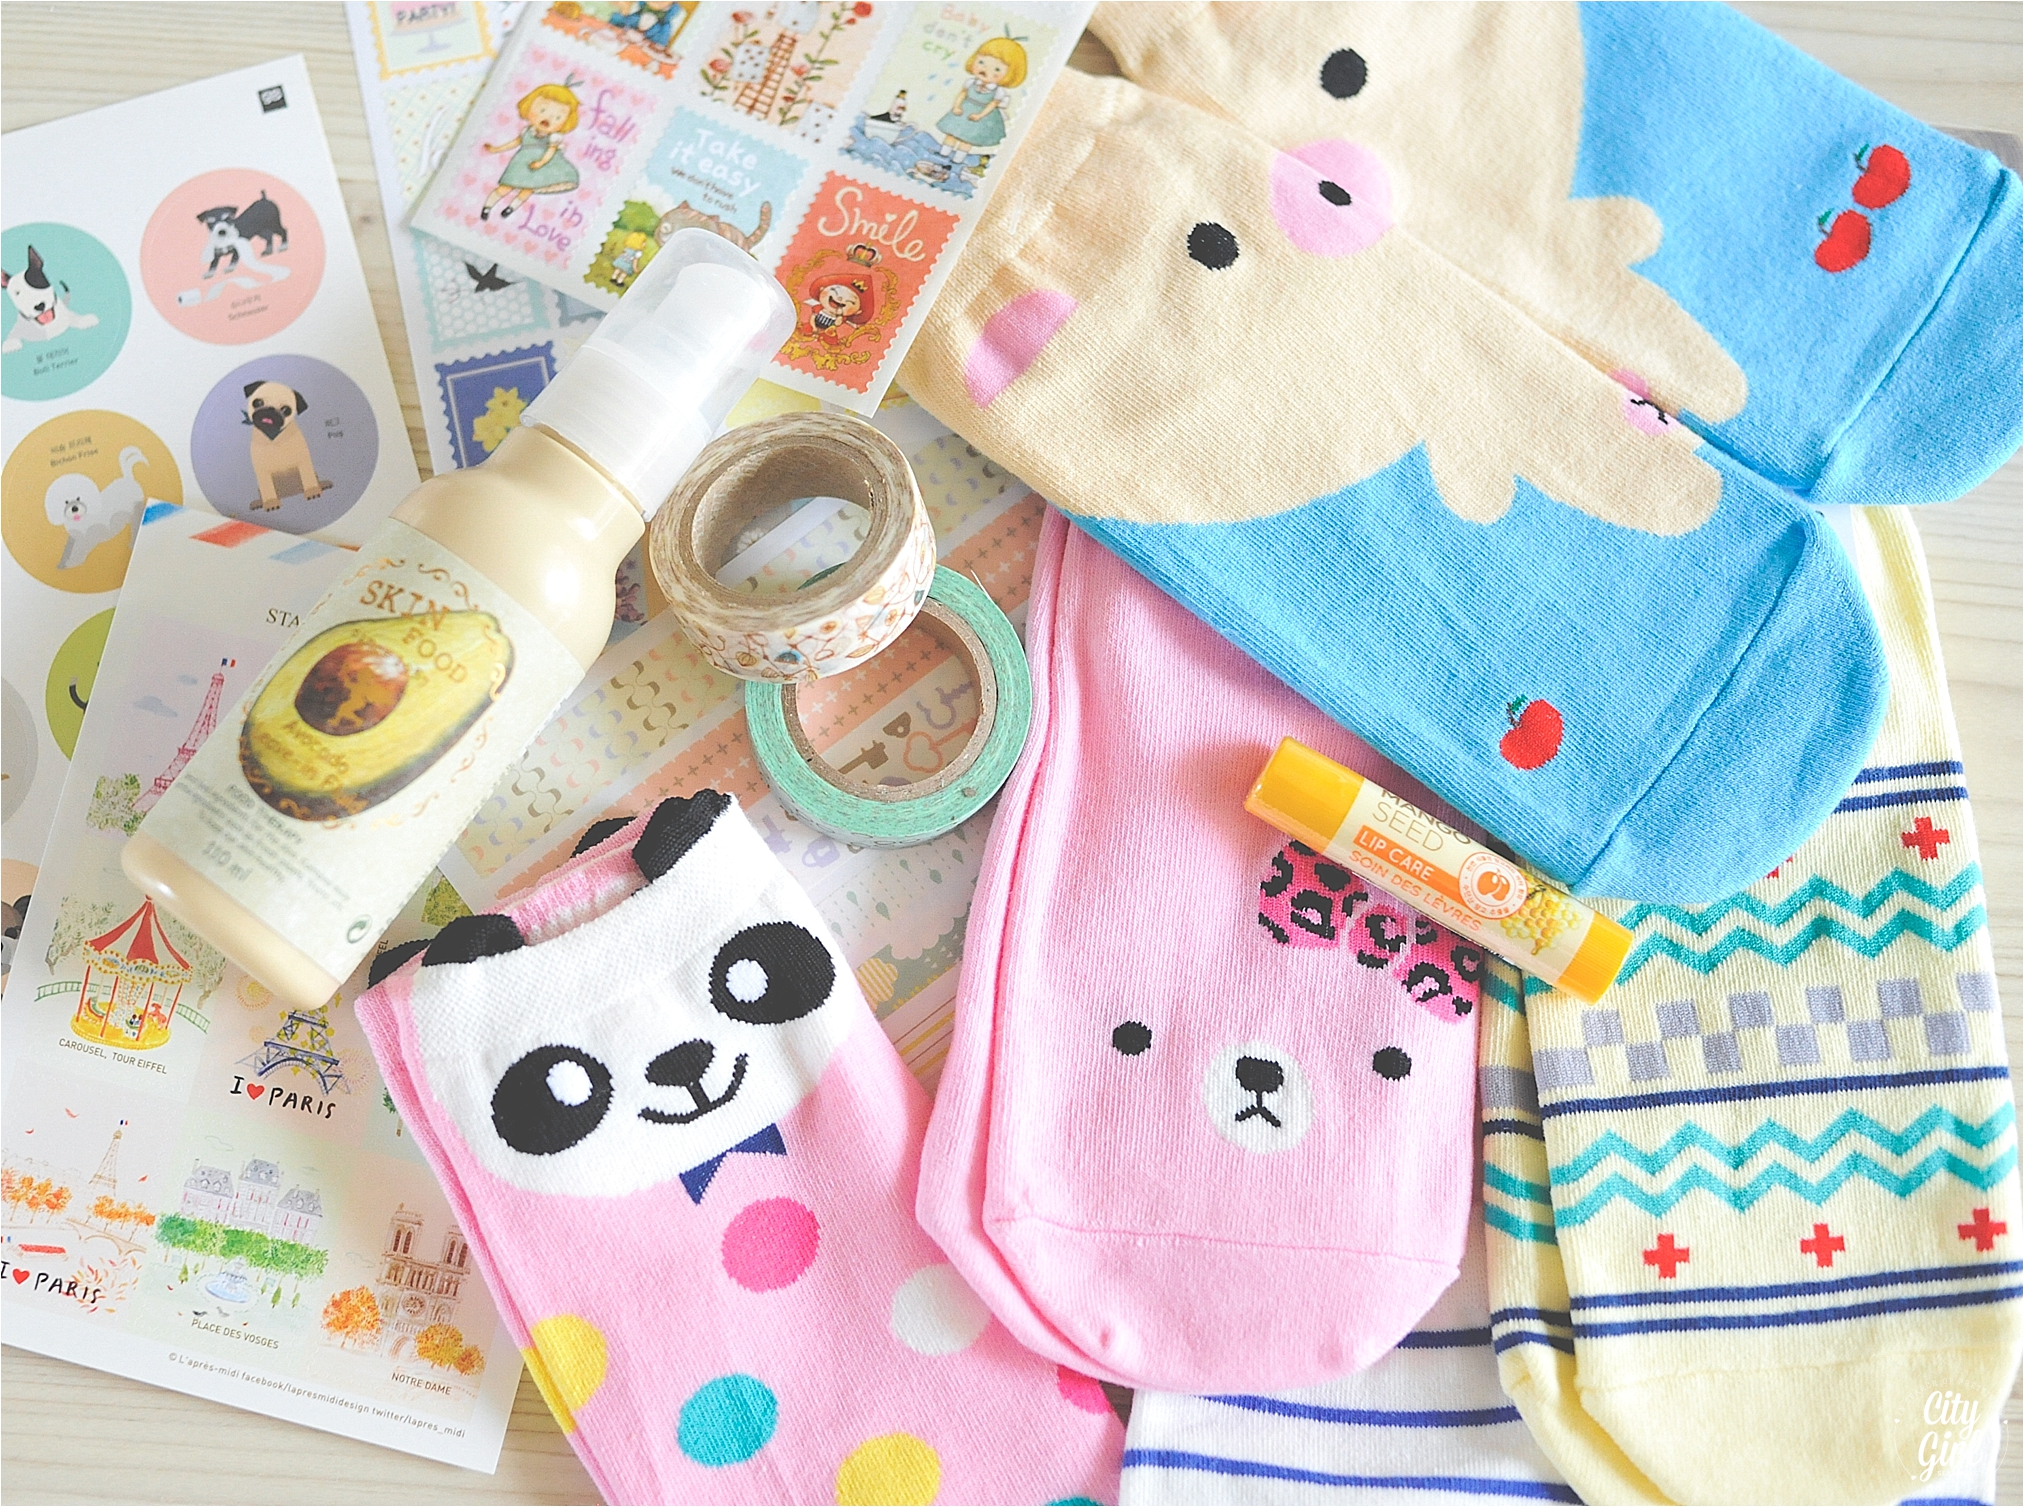
Here's a little list of what will be inside your pretty package:

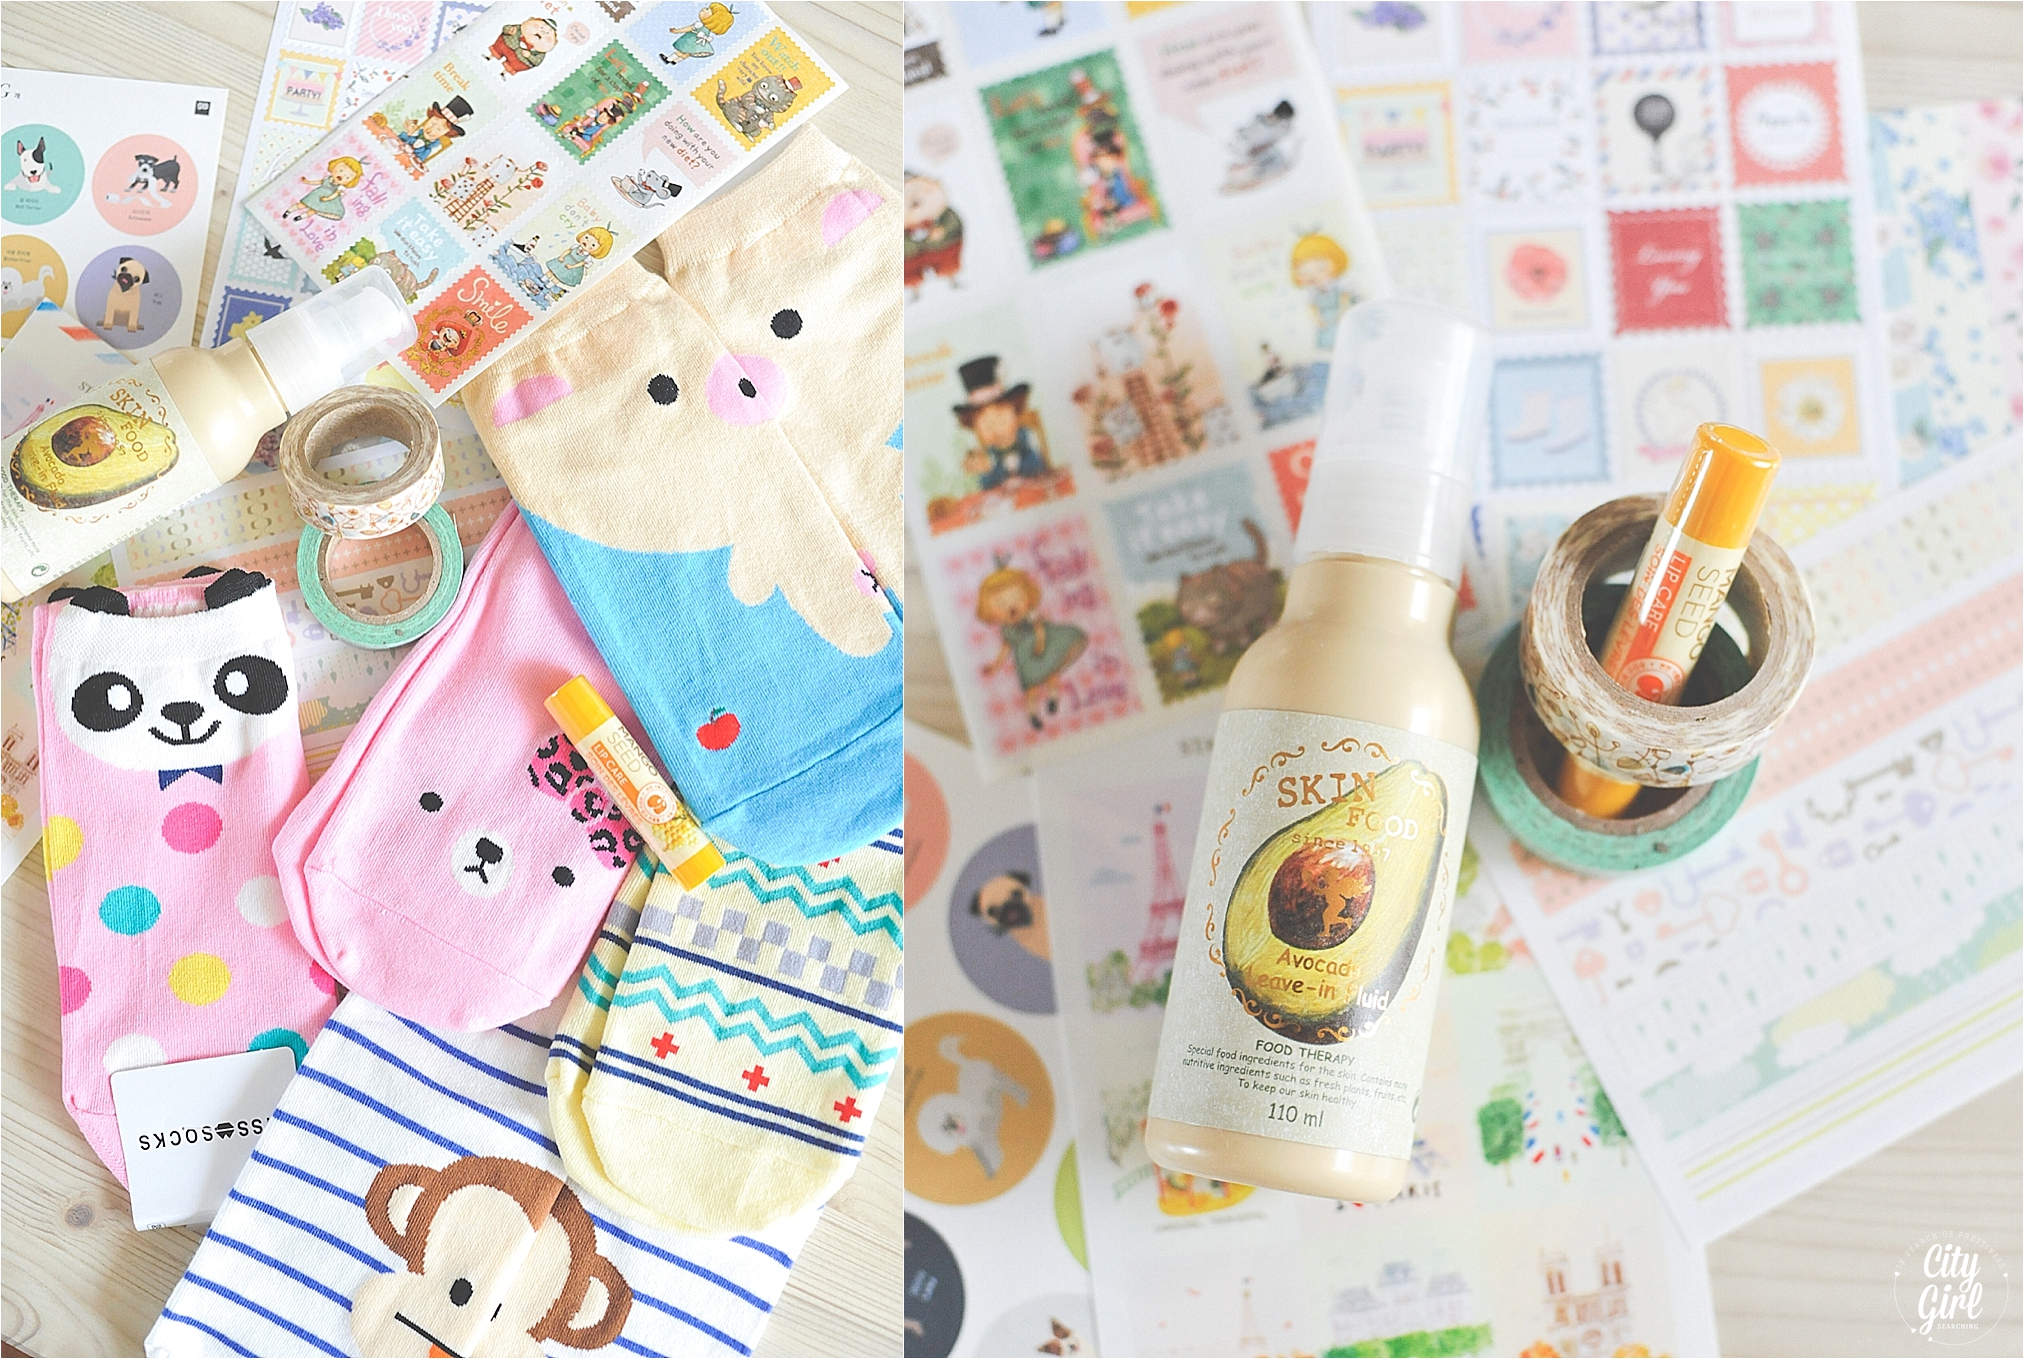
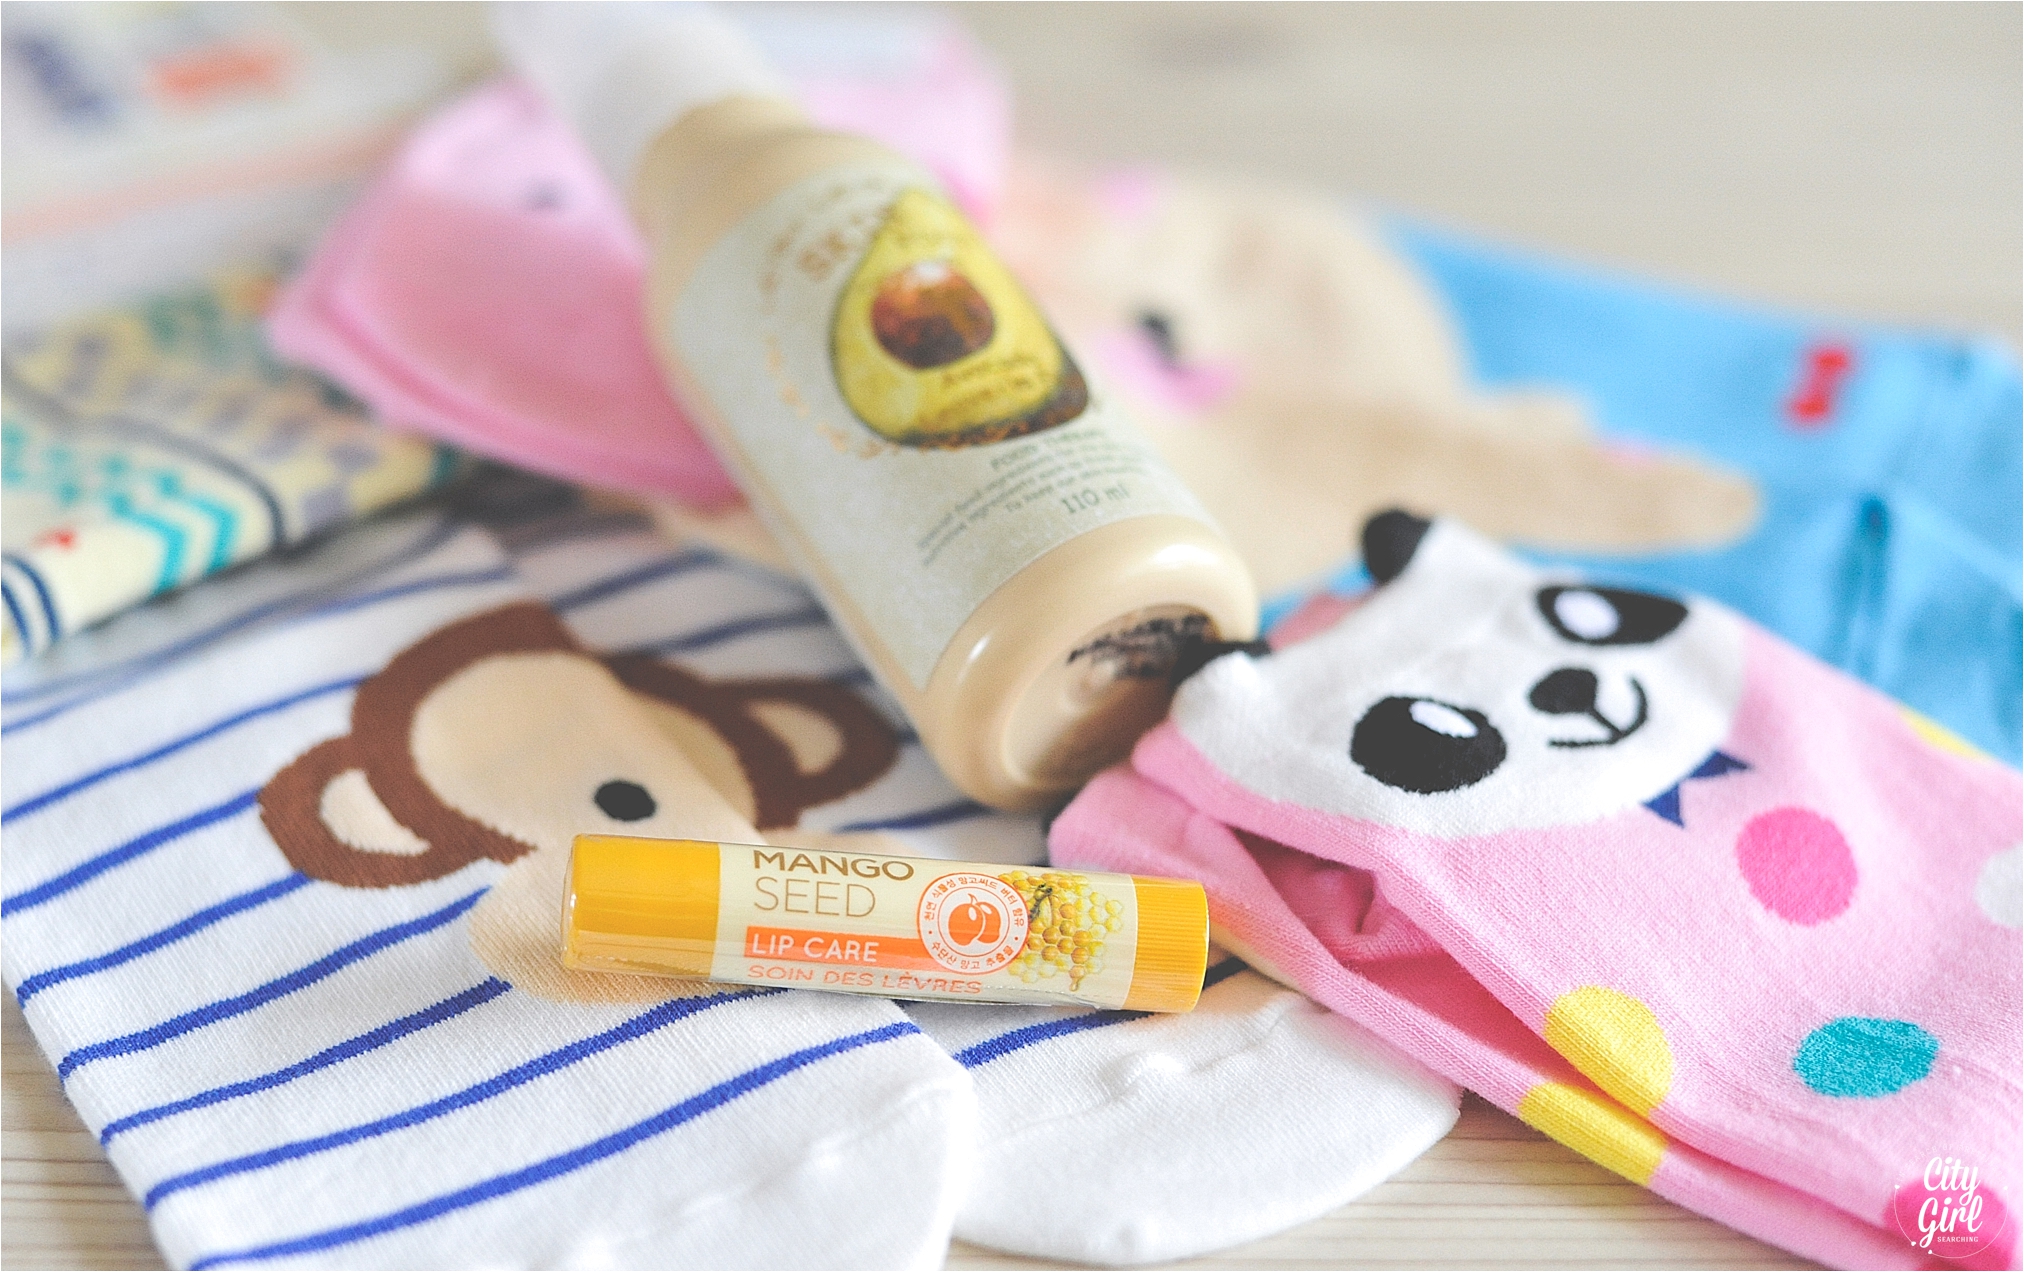
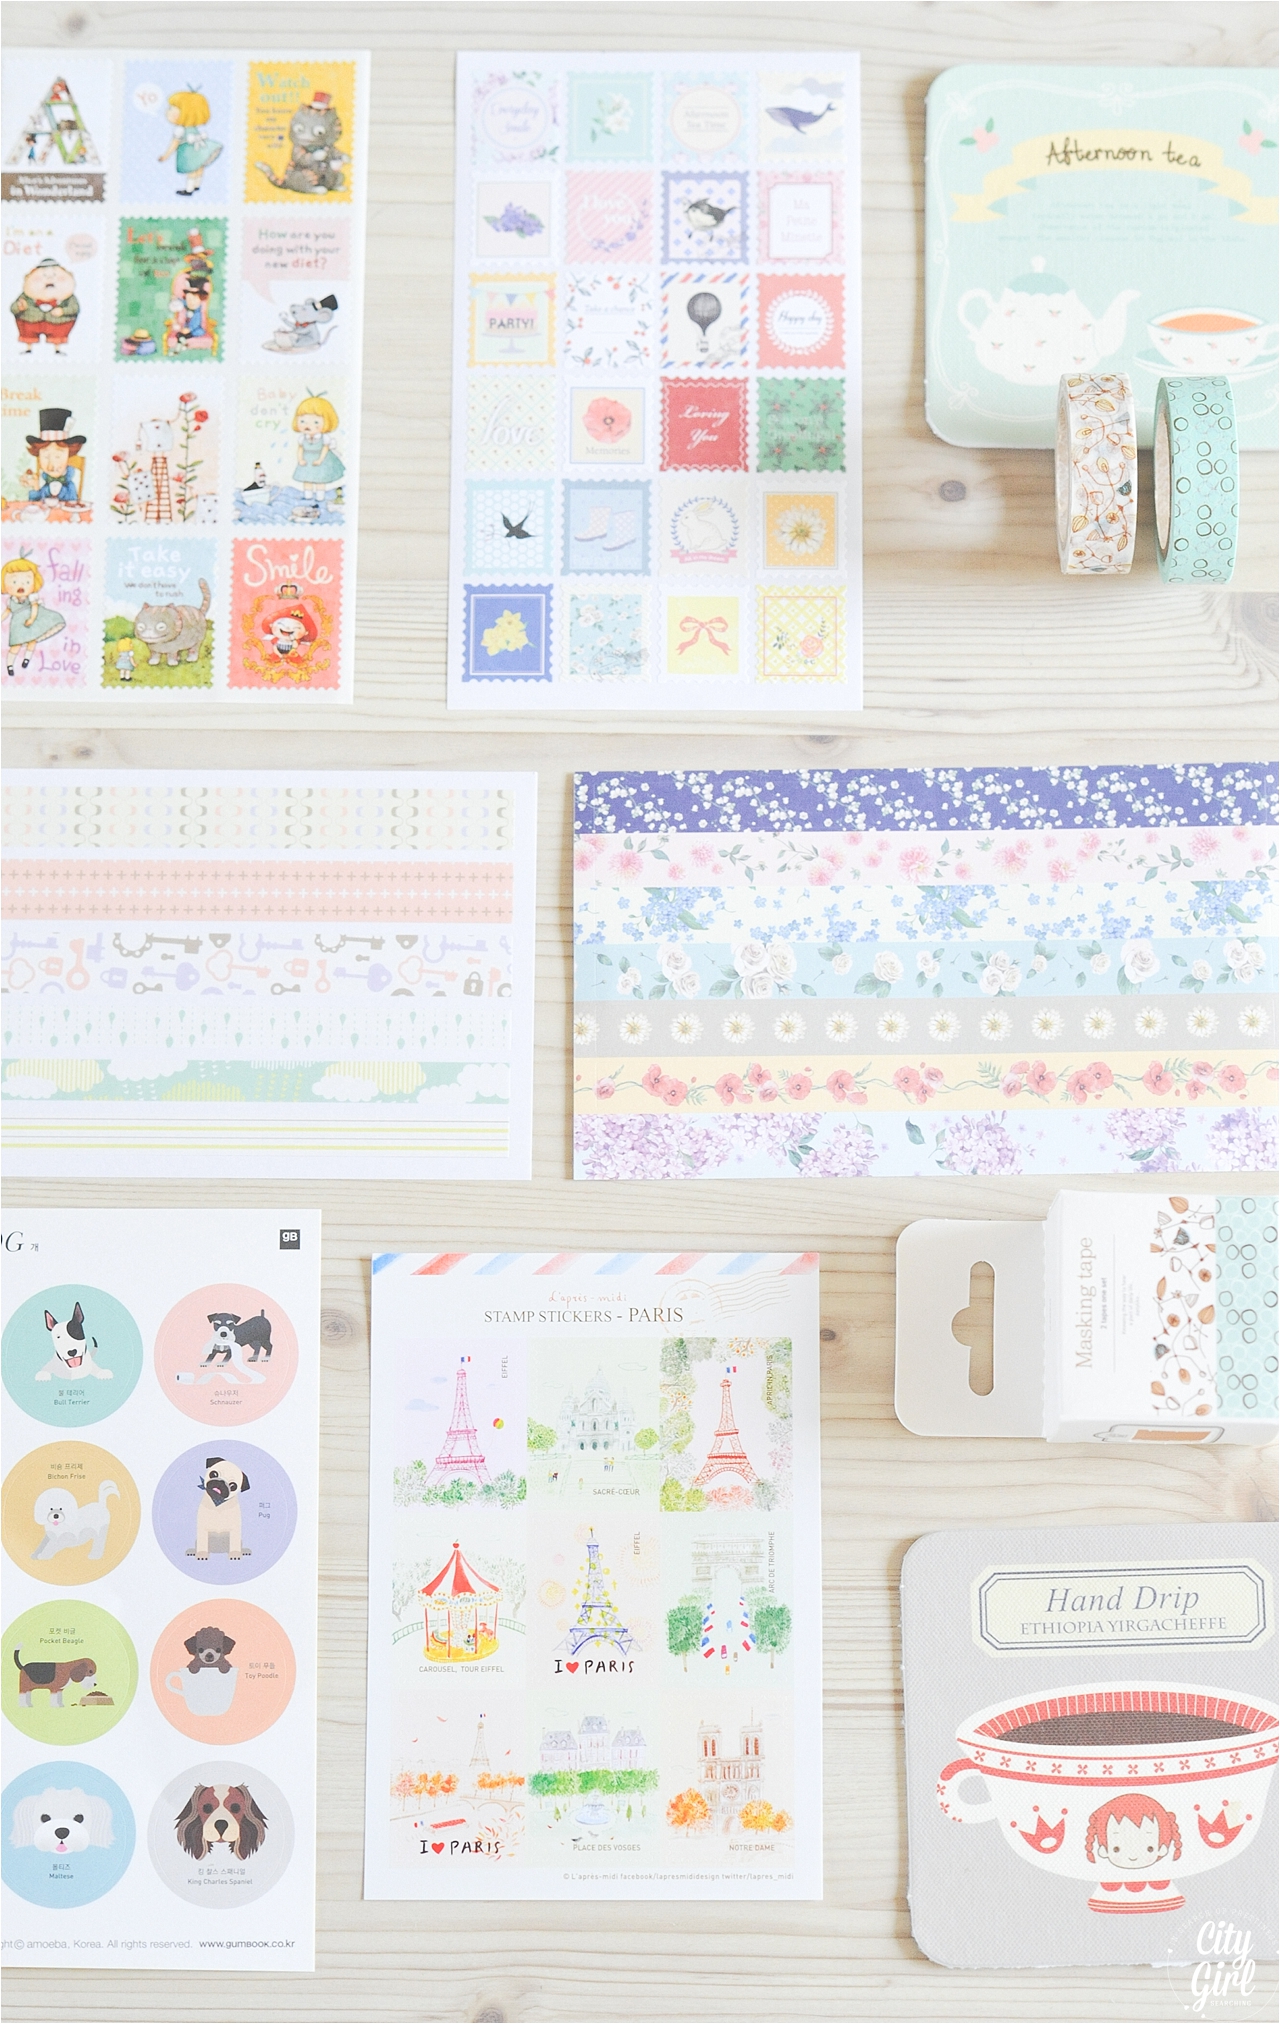
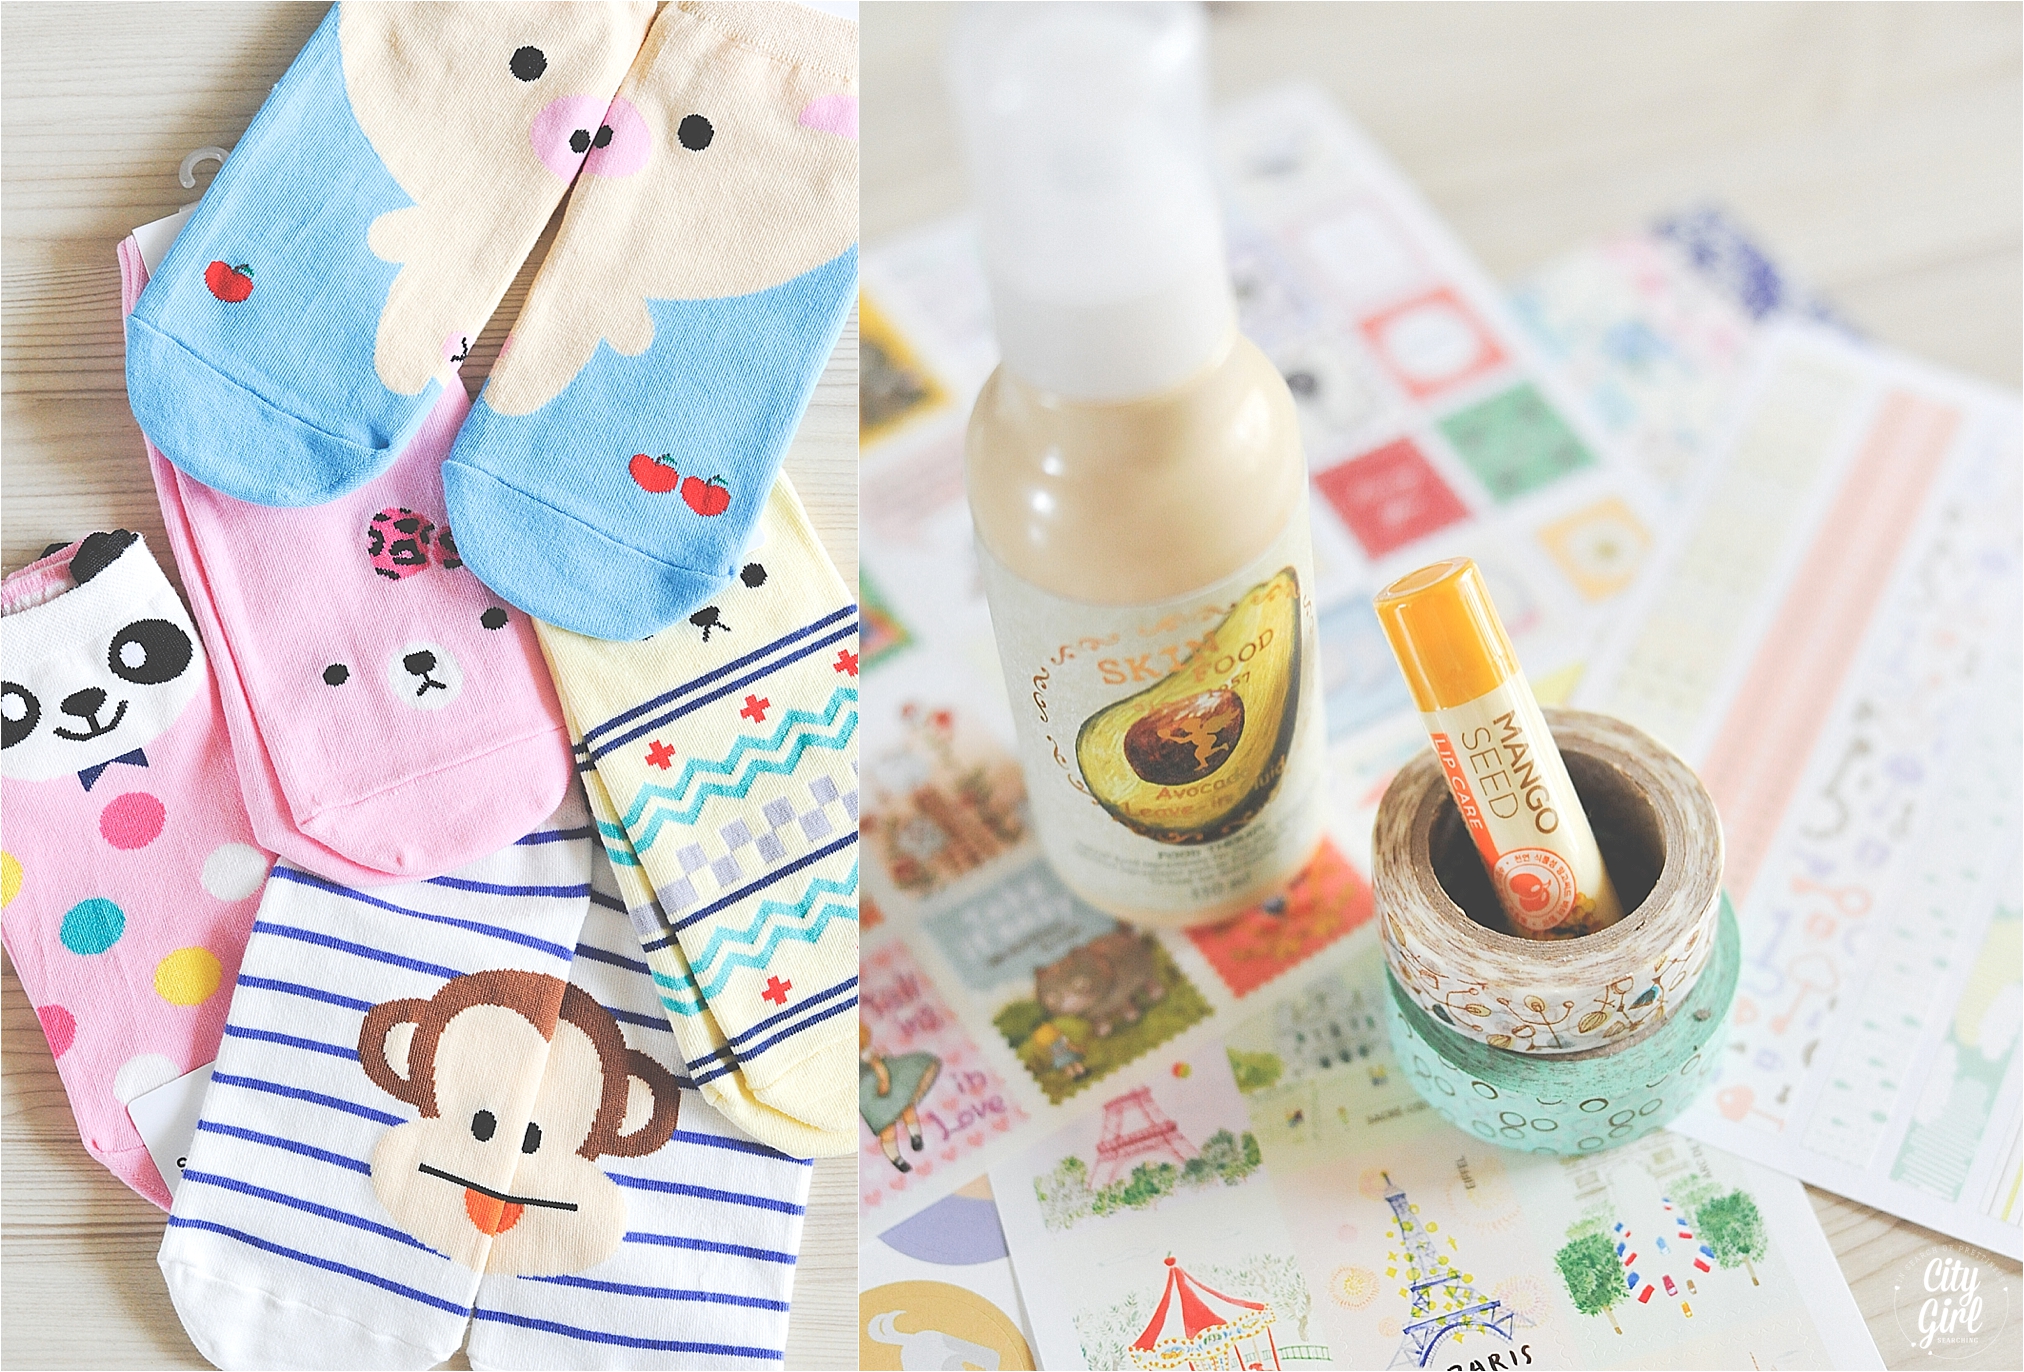
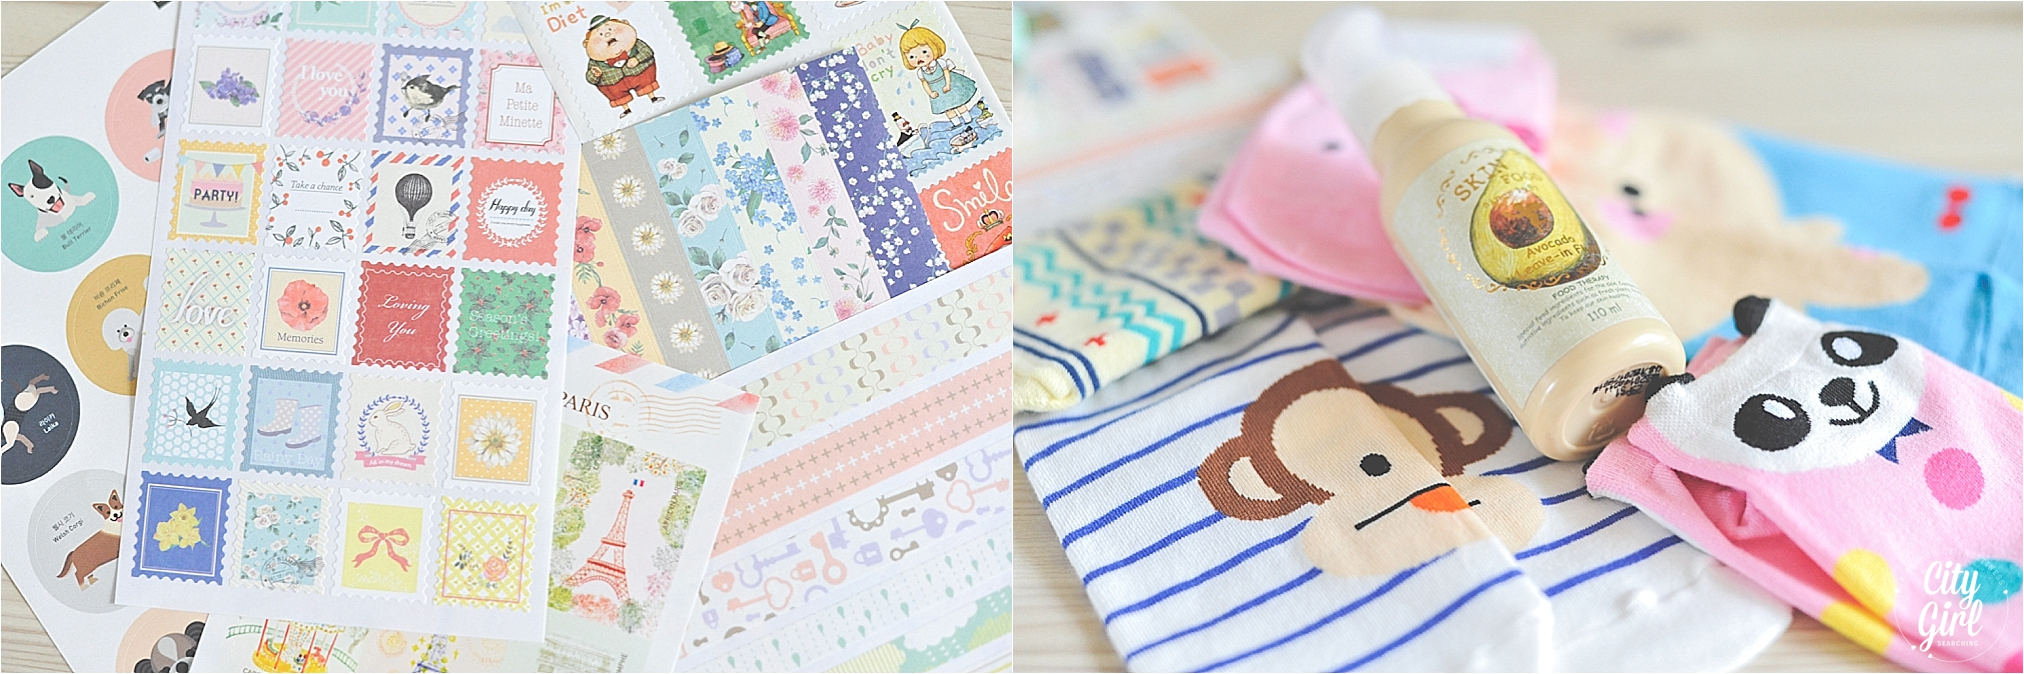
A collection of cute socks

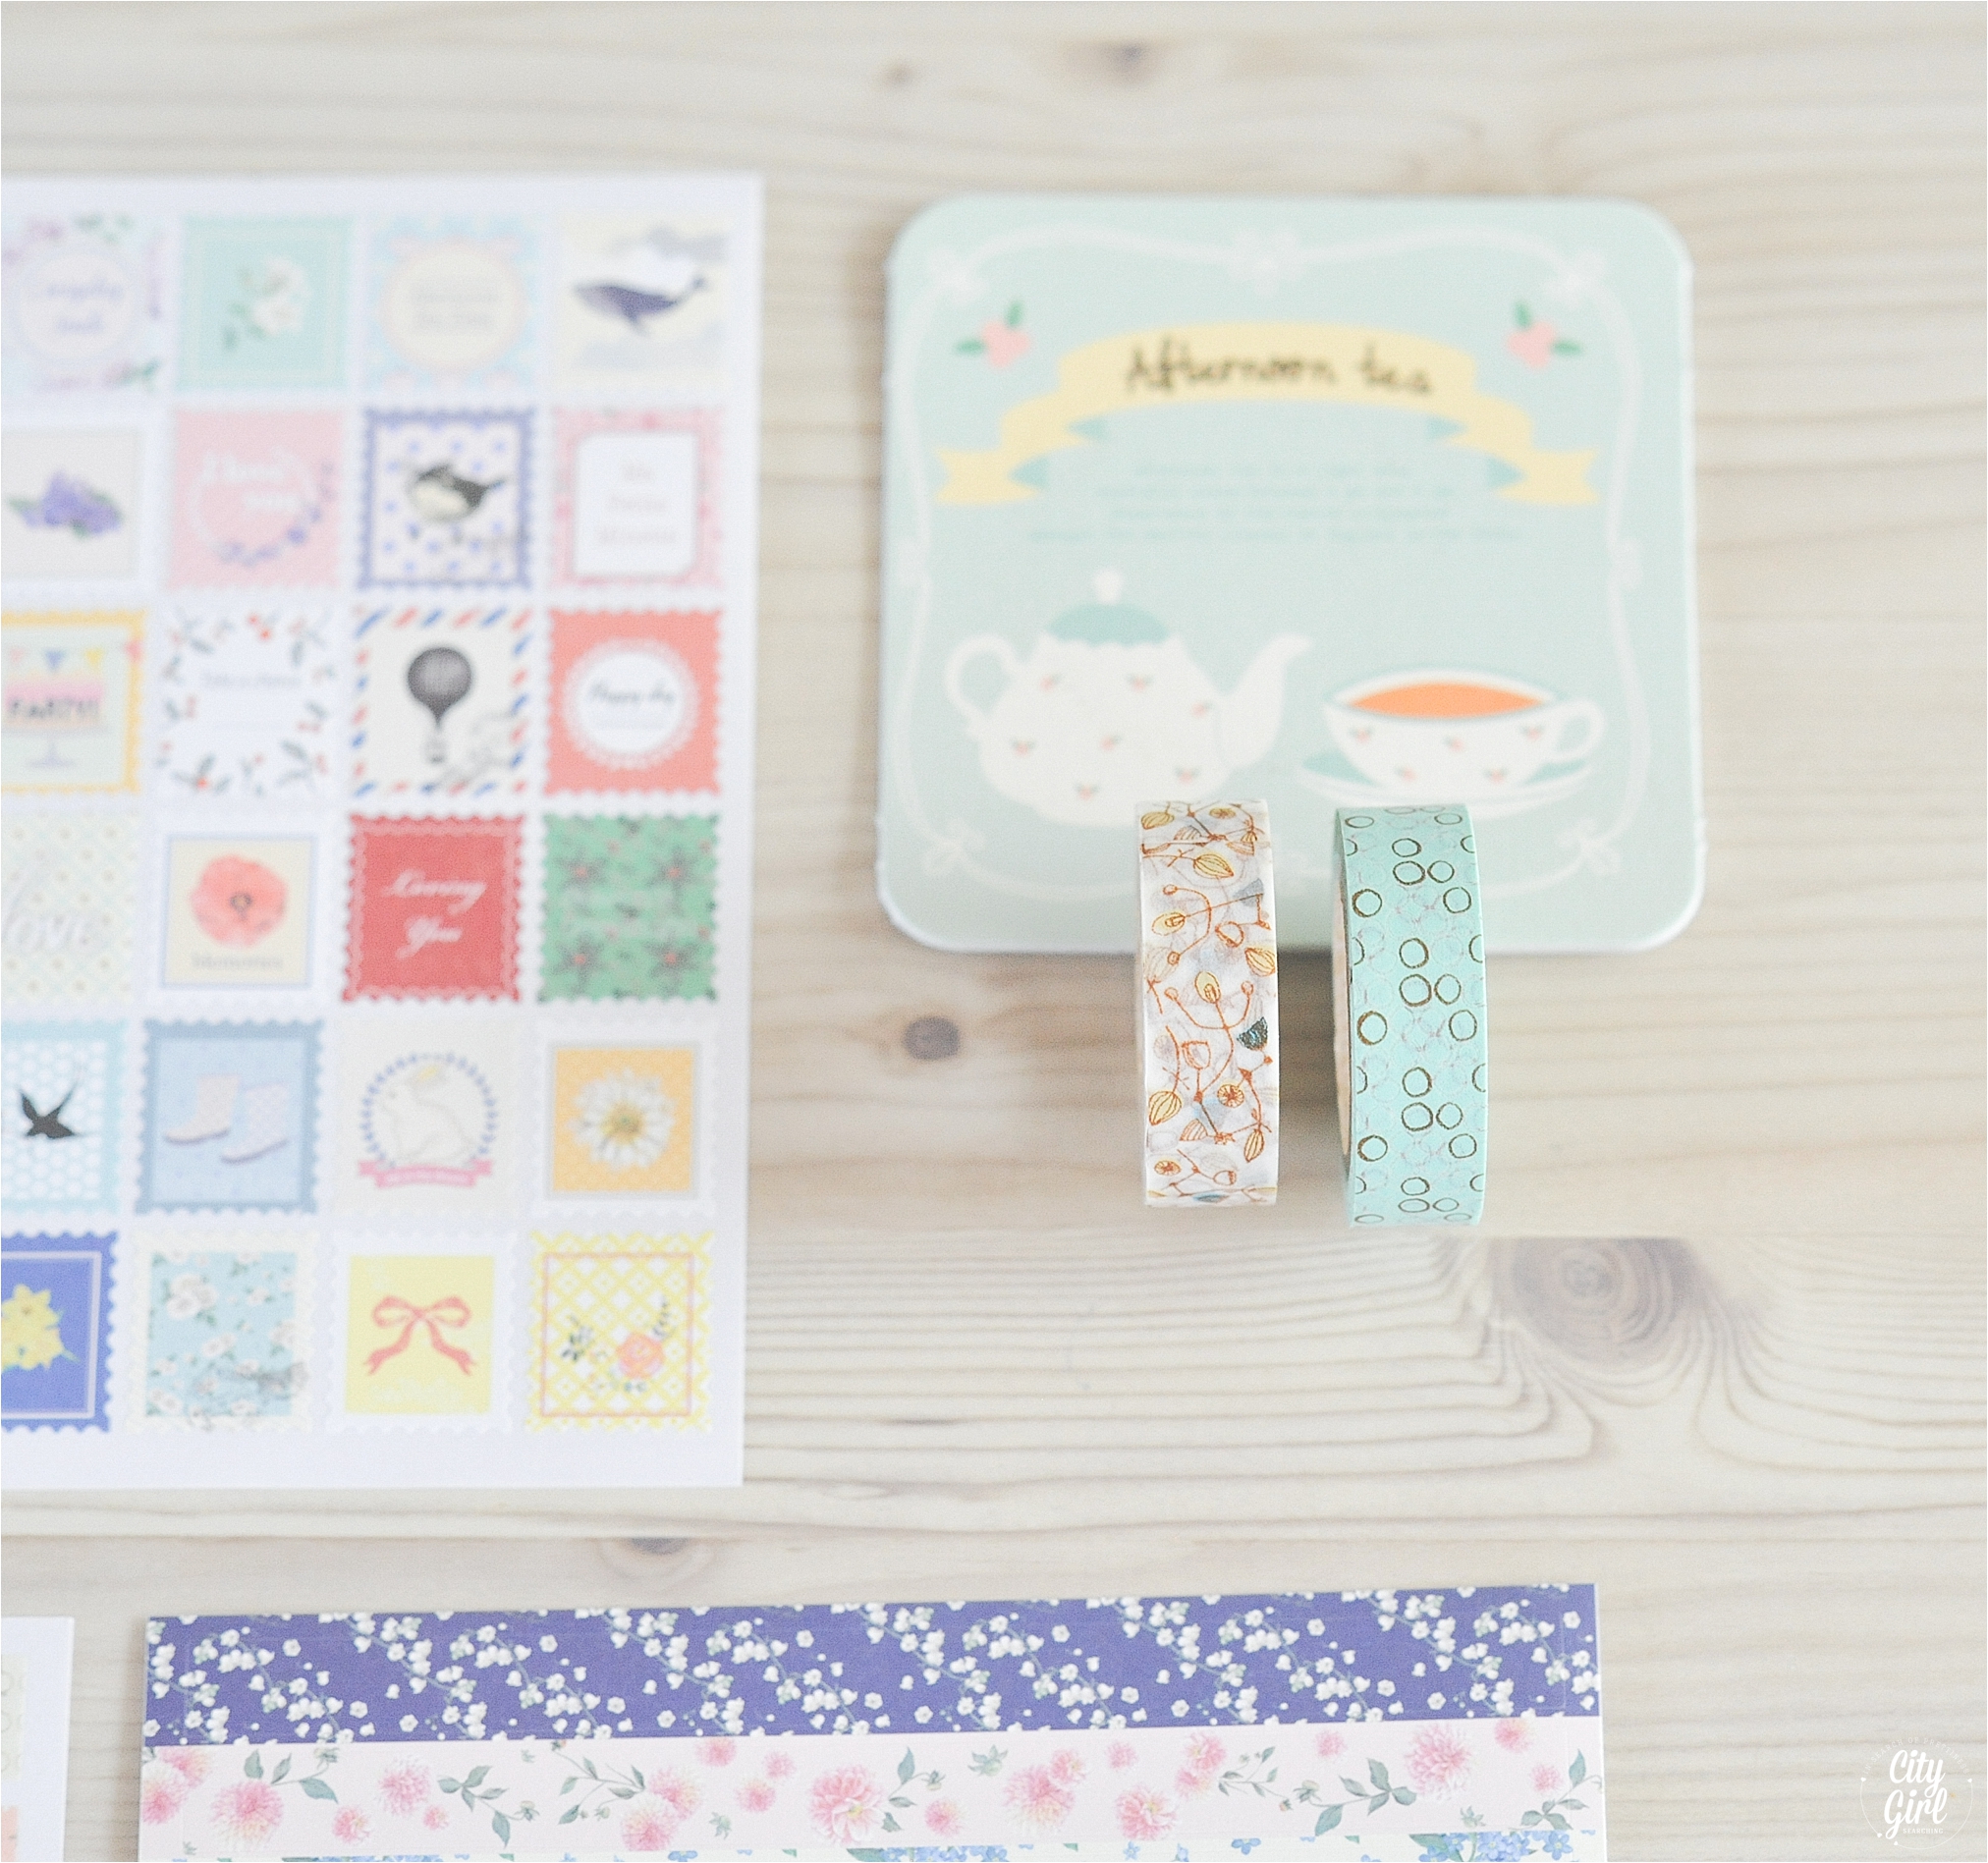
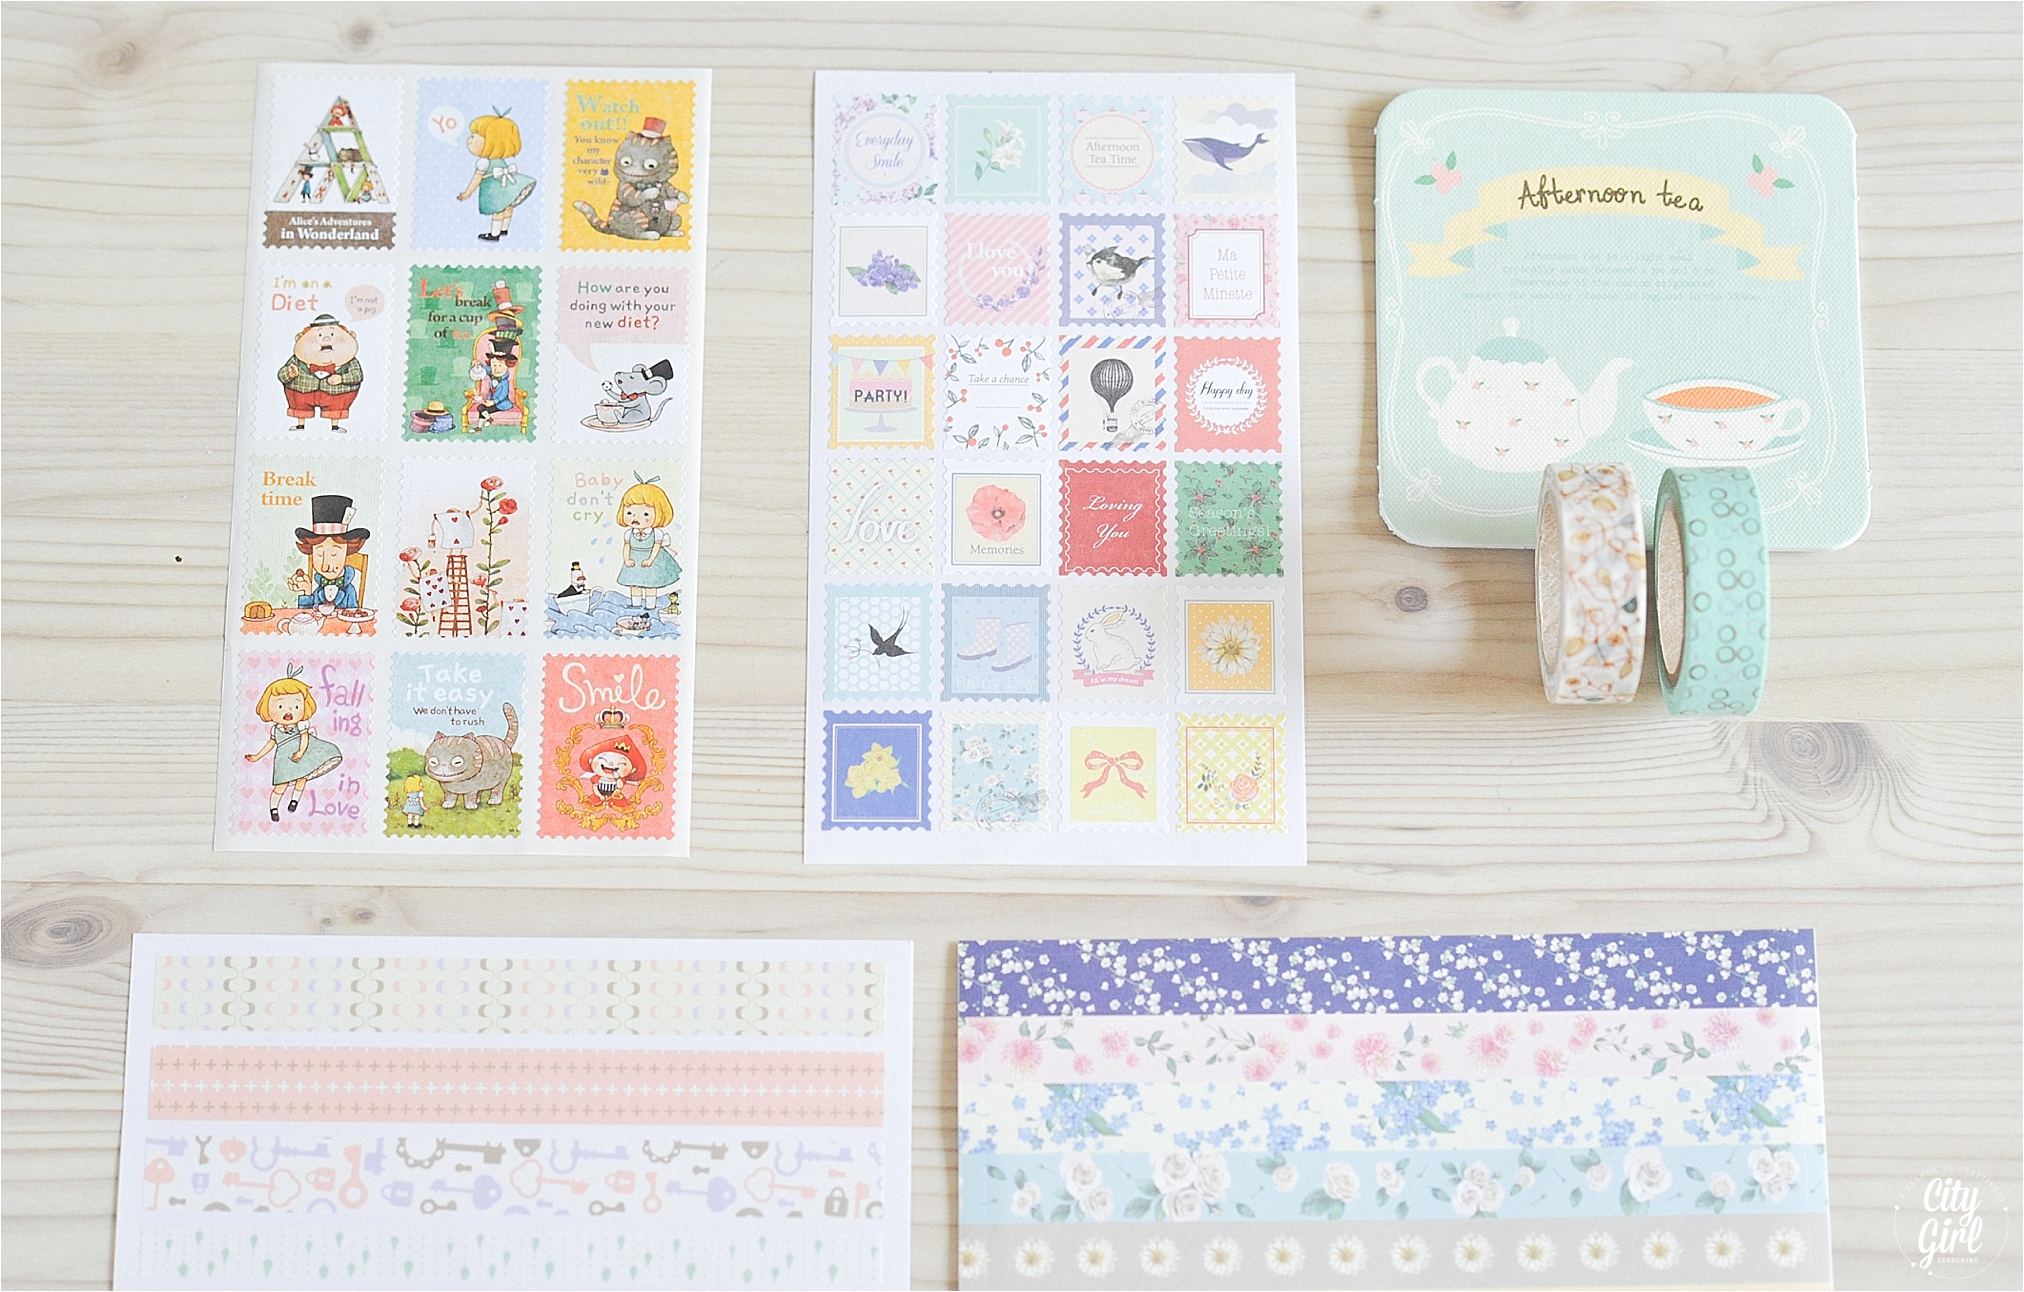
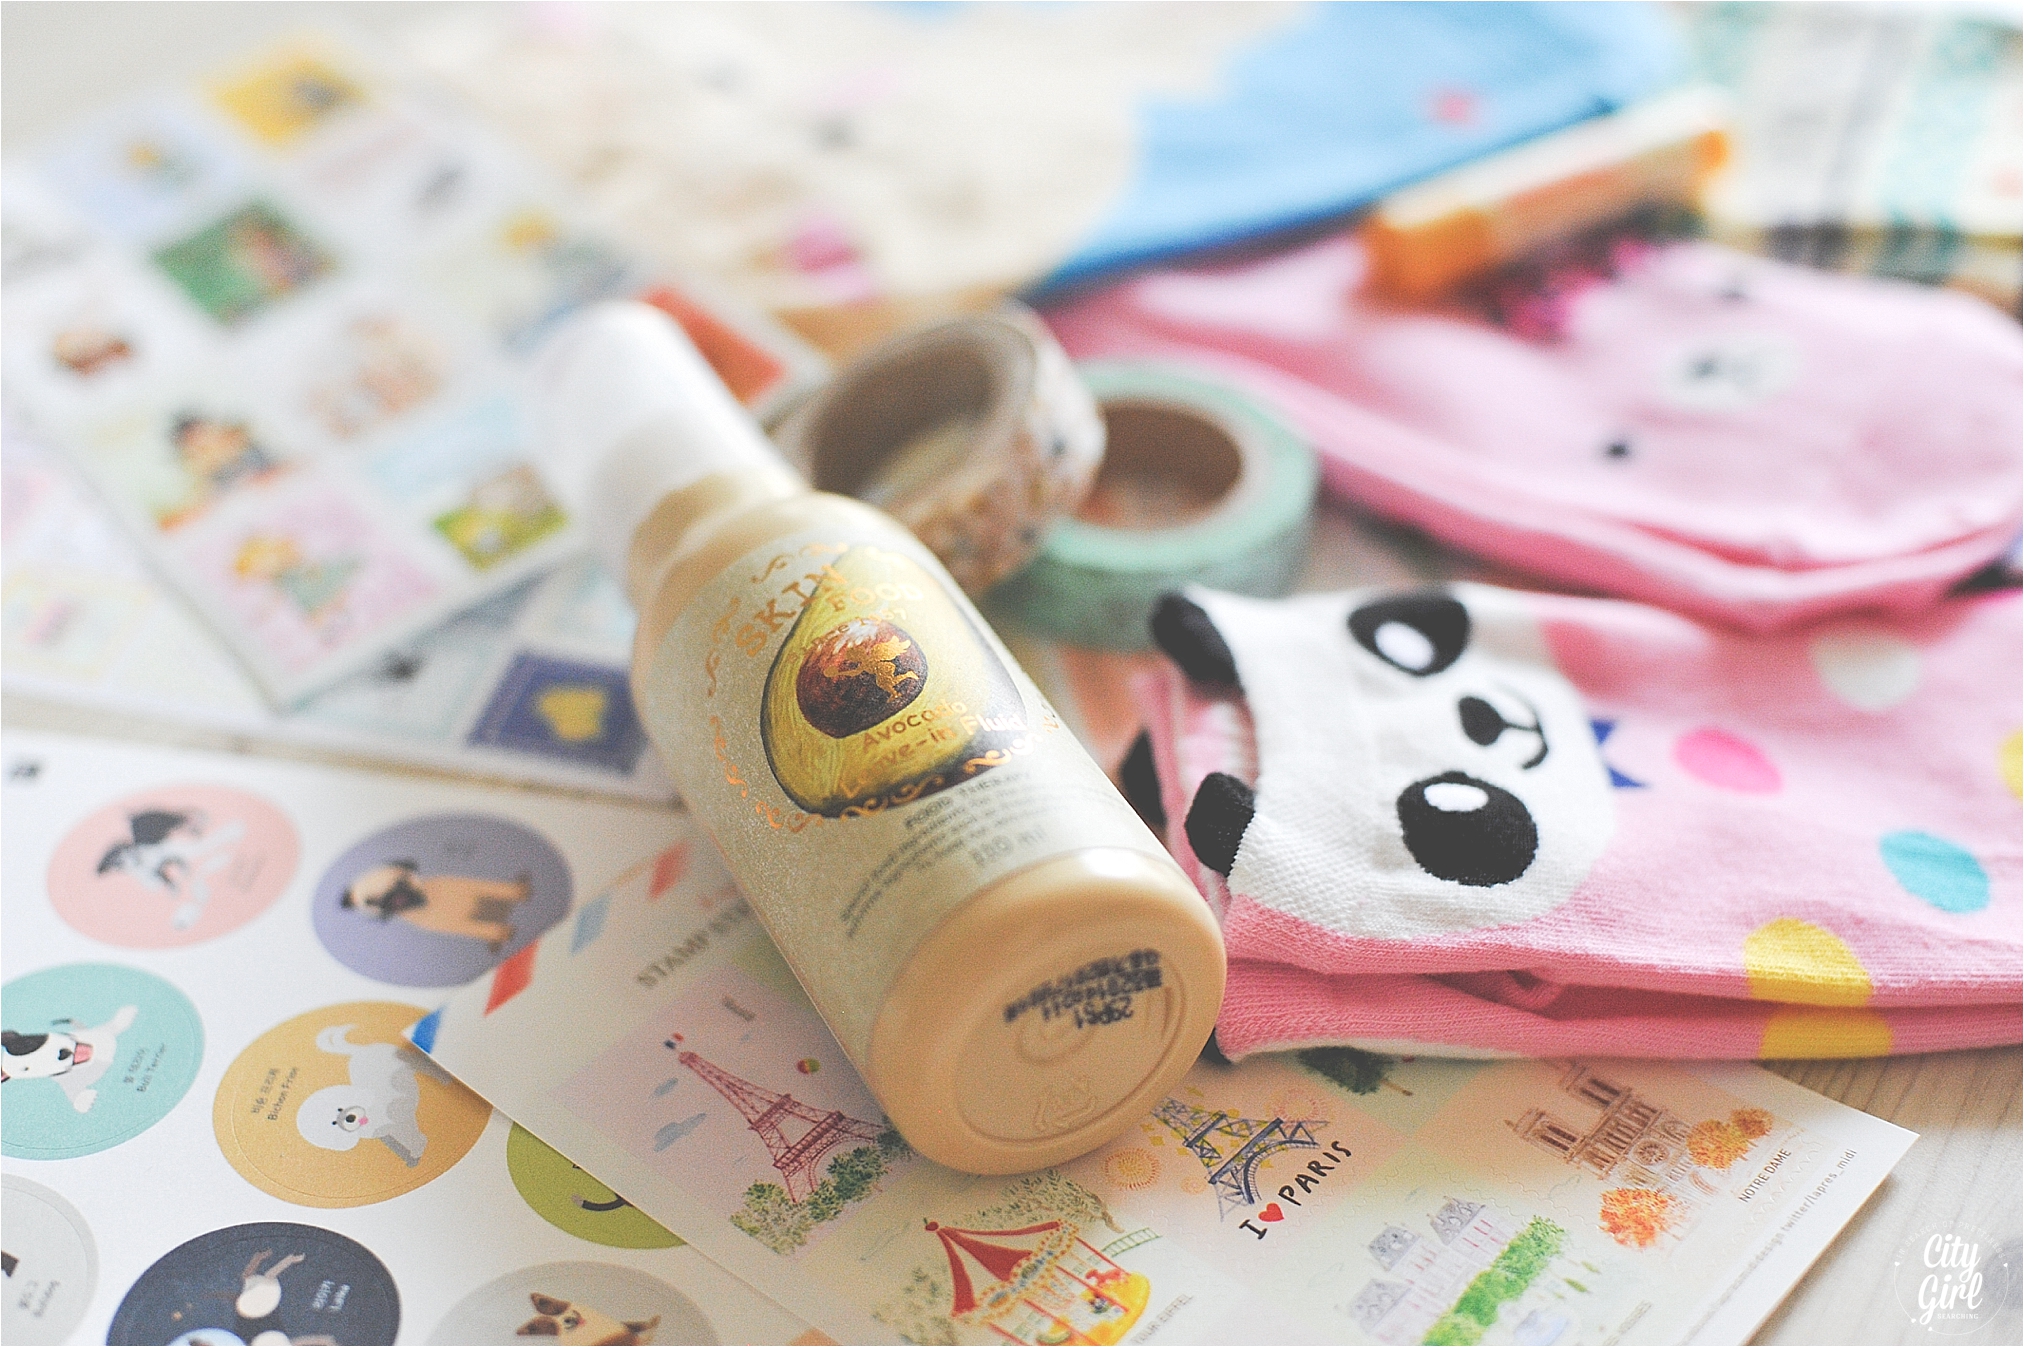
A variety of stickers (some in the form of sticker stamps, puppies and other decorative stickers)

2 rolls of beautiful, high quality washi tape in mint green and gold

Avocado Leave-in Hair Fluid -My absolute favourite hair treatment from SkinFood

Mango Seed Lip Butter from The Face Shop

a few surprise extra's

To enter, just use the easy entering system below. If you have any problems with it, first try refreshing your bowser, or pop me an email (citygirlsearching-at-gmail-dot-com). You should be able to enter from your mobile device too!

Good Luck!

*Entries close on July 29th at midnight.

*This giveaway is open worldwide, in other words open to everyone, wherever you may be in the world

Nail Inspiration

You may not believe me when I tell you this, but I used to bite my nails...badly. Not just the kind of biting that trims your nails, I'm talking nasty nail biting, fingers that I was too embarrassed to let anyone see, and then I would also bite my cuticles. It was horrible. Then I started eating a lot more yogurt and the extra calcium intake gave my poor stumps a little extra strength and I stopped biting. My nails were stronger, they weren't as brittle and finally they stopped chipping and flaking and began to grow slowly. When they started growing they looked better, and I became less embarrassed to show them off and began painting them and taking better care of my hands. Thank you yogurt (luckily I married a dairy farmer so I can have long, strong nails for ever and ever!).

Here are some snaps of what I've been doing to my nails over the past few months. These are very simple nail polish ideas, and usually you only really need 2 colours to achieve the look. Glitter polish is a great addition to your collection as it can update a manicure in a matter of minutes and prolong the wear of your polish by covering up small chips. If you want to read more about growing your own beautiful, strong nails...click here.  Remember to always use a base coat to protect your nails before painting.

Do you have any other nail art ideas? I have yet to really dive into the world of nail art, I don't think I have enough patience to wait for a million layers of paint to dry, but maybe this weekend I can put a few hours aside to get creative.

glitter polish.JPG
photo 1.JPG
IMG_2140.jpg
photo 2.JPG
IMG_3629.jpg
photo 1-9.JPG
photo 1-11.JPG
photo 5.JPG

A touch of glitter {nail art}

photo 1.JPG

I love painting my nails (for me, this means one color on all nails…very boring) but have recently dabbled in the field of nail artistry (not that the picture above is anything fancy or 'artistry' like but with only a few extra minutes and another colour or two, you can really add a little something extra to your standard manicure and update your look). 

Glitter has sparked my fancy lately, and I have been painting one nail differently to all the others. Not just because its effective in it's simplicity, but if you make a mistake, it's only one nail that needs to be repainted, and not the whole bunch (ain't nobody got time for that).

I used a warm greyish mocha colour as my base colour, and then used a rosy pink shade for my focus nail, topped off with a slick of silver glitter from The FaceShop (my all time favourite skincare and makeup brand here in South Korea).

When painting your nails, always make sure to apply a base coat first (to protect your nail base from staining and being damaged) and then a top coat (to extend the wear of your manicure). Here is a post I did a little while ago on growing your own beautiful, strong nails. 

{Nail Art} class with my school girls

Farmboy and I are teaching English in South Korea. We up and left our cosy little lives in Pietermaritzburg in June 2013, and headed back to Asia to make our millions and of course travel the world! 

Farmboy teaches at five schools, two of which are on an island...Crazy stuff! But, every day is different and exciting. He teaches at both elementary and middle schools. I am at one school, an all girls middle school. At first I was really nervous to start teaching the girls, I am after all, foundation phase trained and loved teaching my little kiddies. But after my first day I am convinced God has put us in these different situations for his gain. All our schools suit our different personalities and talents in just the right way.

Besides, now I get to teach English classes like this one:

Growing your own beautiful, strong nails

After posting this photograph  on Instagram I received a number of questions from ladies asking me how I get such 'nice' nails. I've never really thought about my nails very much until now. I mean, I always have them looking neat or painted in a pretty colour, but when it comes to achieving long, strong nails, well then I'm no expert. All I can do is tell you what I do, and then you can try it out and let me know if you get results.

First I have to tell you, although you may not believe me from looking at these photographs, but I used to be a biter. Not a dainty little nibble here and there nail biter, but a proper when-I-chew-all-thats-left-behind-are-stumps-flayed-cuticles kind of biter. So how did I get my nails to look like they do now? Whats my secret? Well, to be honest, I don't have one. Instead of spending a fortune on supplements and OPI nail treatments and manicures and the latest cuticle oil and hand creams, I started eating lots of yogurt. The chocolate chip kind. An increase in dairy for my little body, meant a huge increase in calcium, leading to stronger nails. I used to have a nasty habit of rubbing my nails over my teeth until they would become so weak, they would inevitable break and peel. Then I would just bite them as they looked so terrible anyway and so the vicious circle began. When my body started to respond to the huge injections of calcium two or three times a day, my nails started to grow, little by little. Even a little bit of nail looks better than stubby fingers. Slowly,  my nails were given a chance to strengthen and lengthen. No amount of funny tasting 'bite proof' nail polish could help, and no amount of bribery from my poor mom could get me to kick the nasty habit. It was the good old choc chip yogurt that finally did the trick.

So now that's the growing part done, how about the strengthening part...

Whenever I apply polish, I ALWAYS, ALWAYS, ALWAYS use a base coat on my nails. It doesn't matter the brand (although I have always loved Rimmels Stronger Double Duty base coat ~ click here). Even if its a clear nail polish colour if you don't have a specified base coat on hand, use it! Applying a base coat not only helps to lengthen the life of your nail colour, but its protects your nail bed from the chemicals inside all nail polish. This means you won't be left with yucky yellow stained nails too.

Then, ALWAYS ALWAYS ALWAYS apply a top coat. Not only does a top coat seal in your colour, but it prevents your nail polish from chipping. Your manicure will last longer, you wont be tempted to fiddle with pretty looking nails, and your nails will be protected everyday wear and tear we subject our hands to. 

Lastly, I keep a cuticle oil on my bedside table and rub it in whenever I remember to (I am quite fond of Sally Hansen Vitamin E & cuticle oil which you can pick up for R80 at Clicks & Dischem in South Africa). Keeping your cuticles soft and moisturized can help strengthen your nails.

Lastly, make sure you take care of your hands. Your nails are a lot more fragile than our hands, but get subjected to a lot of rough treatment everyday. Wear gloves when you wash the dishes, use a mild cleansing soap when you wash your hands, massage your cuticles when rubbing in hand cream, and drink plenty of water to keep your body healthy and hydrated.

I have tried hair, skin and nail supplements before, but to be perfectly honest really saw no results. You might have better luck, but they can be pretty pricey and if you aren't looking after the actual nail bed by wearing a base coat, using cuticle oil and wearing hand cream, you're probably undoing the internal benefits of them.

Anyway, I hope you find this helpful. Please know that I'm no expert, and am merely sharing my personal experiences with you. Do drop me a comment if you know any more tricks and secrets for growing beautiful string nails.

xxx