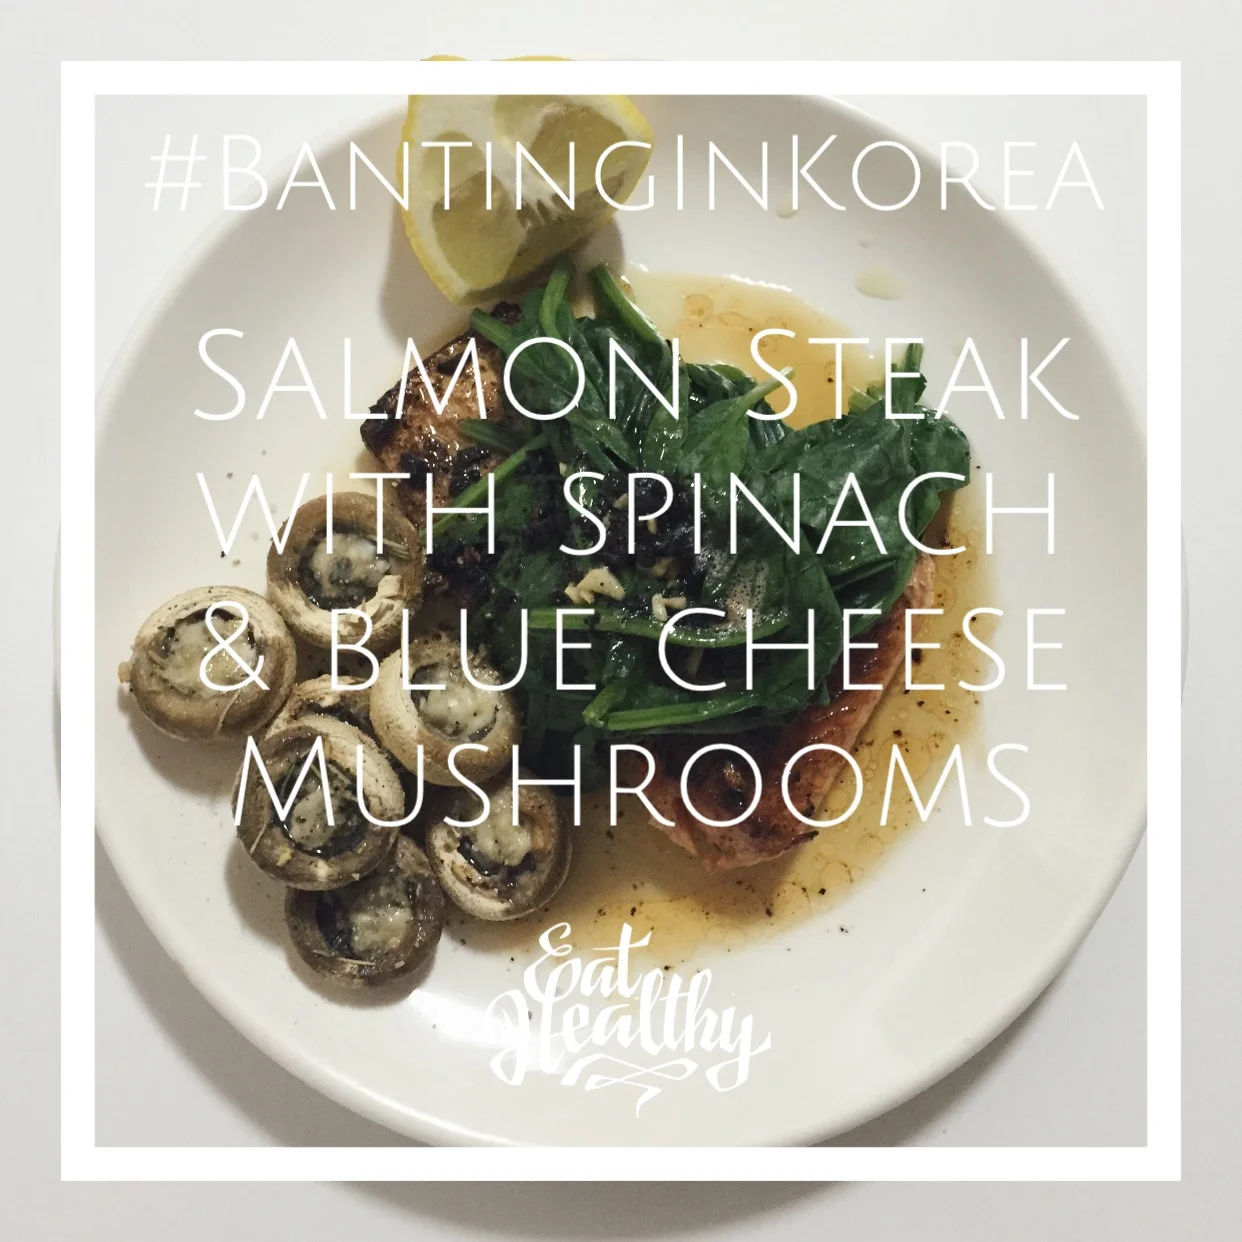
Banting Friendly Dinner Ideas: Salmon, Spinach & Mushrooms

Banting Dinner Idea Salmon Steak Spinach Mushrooms

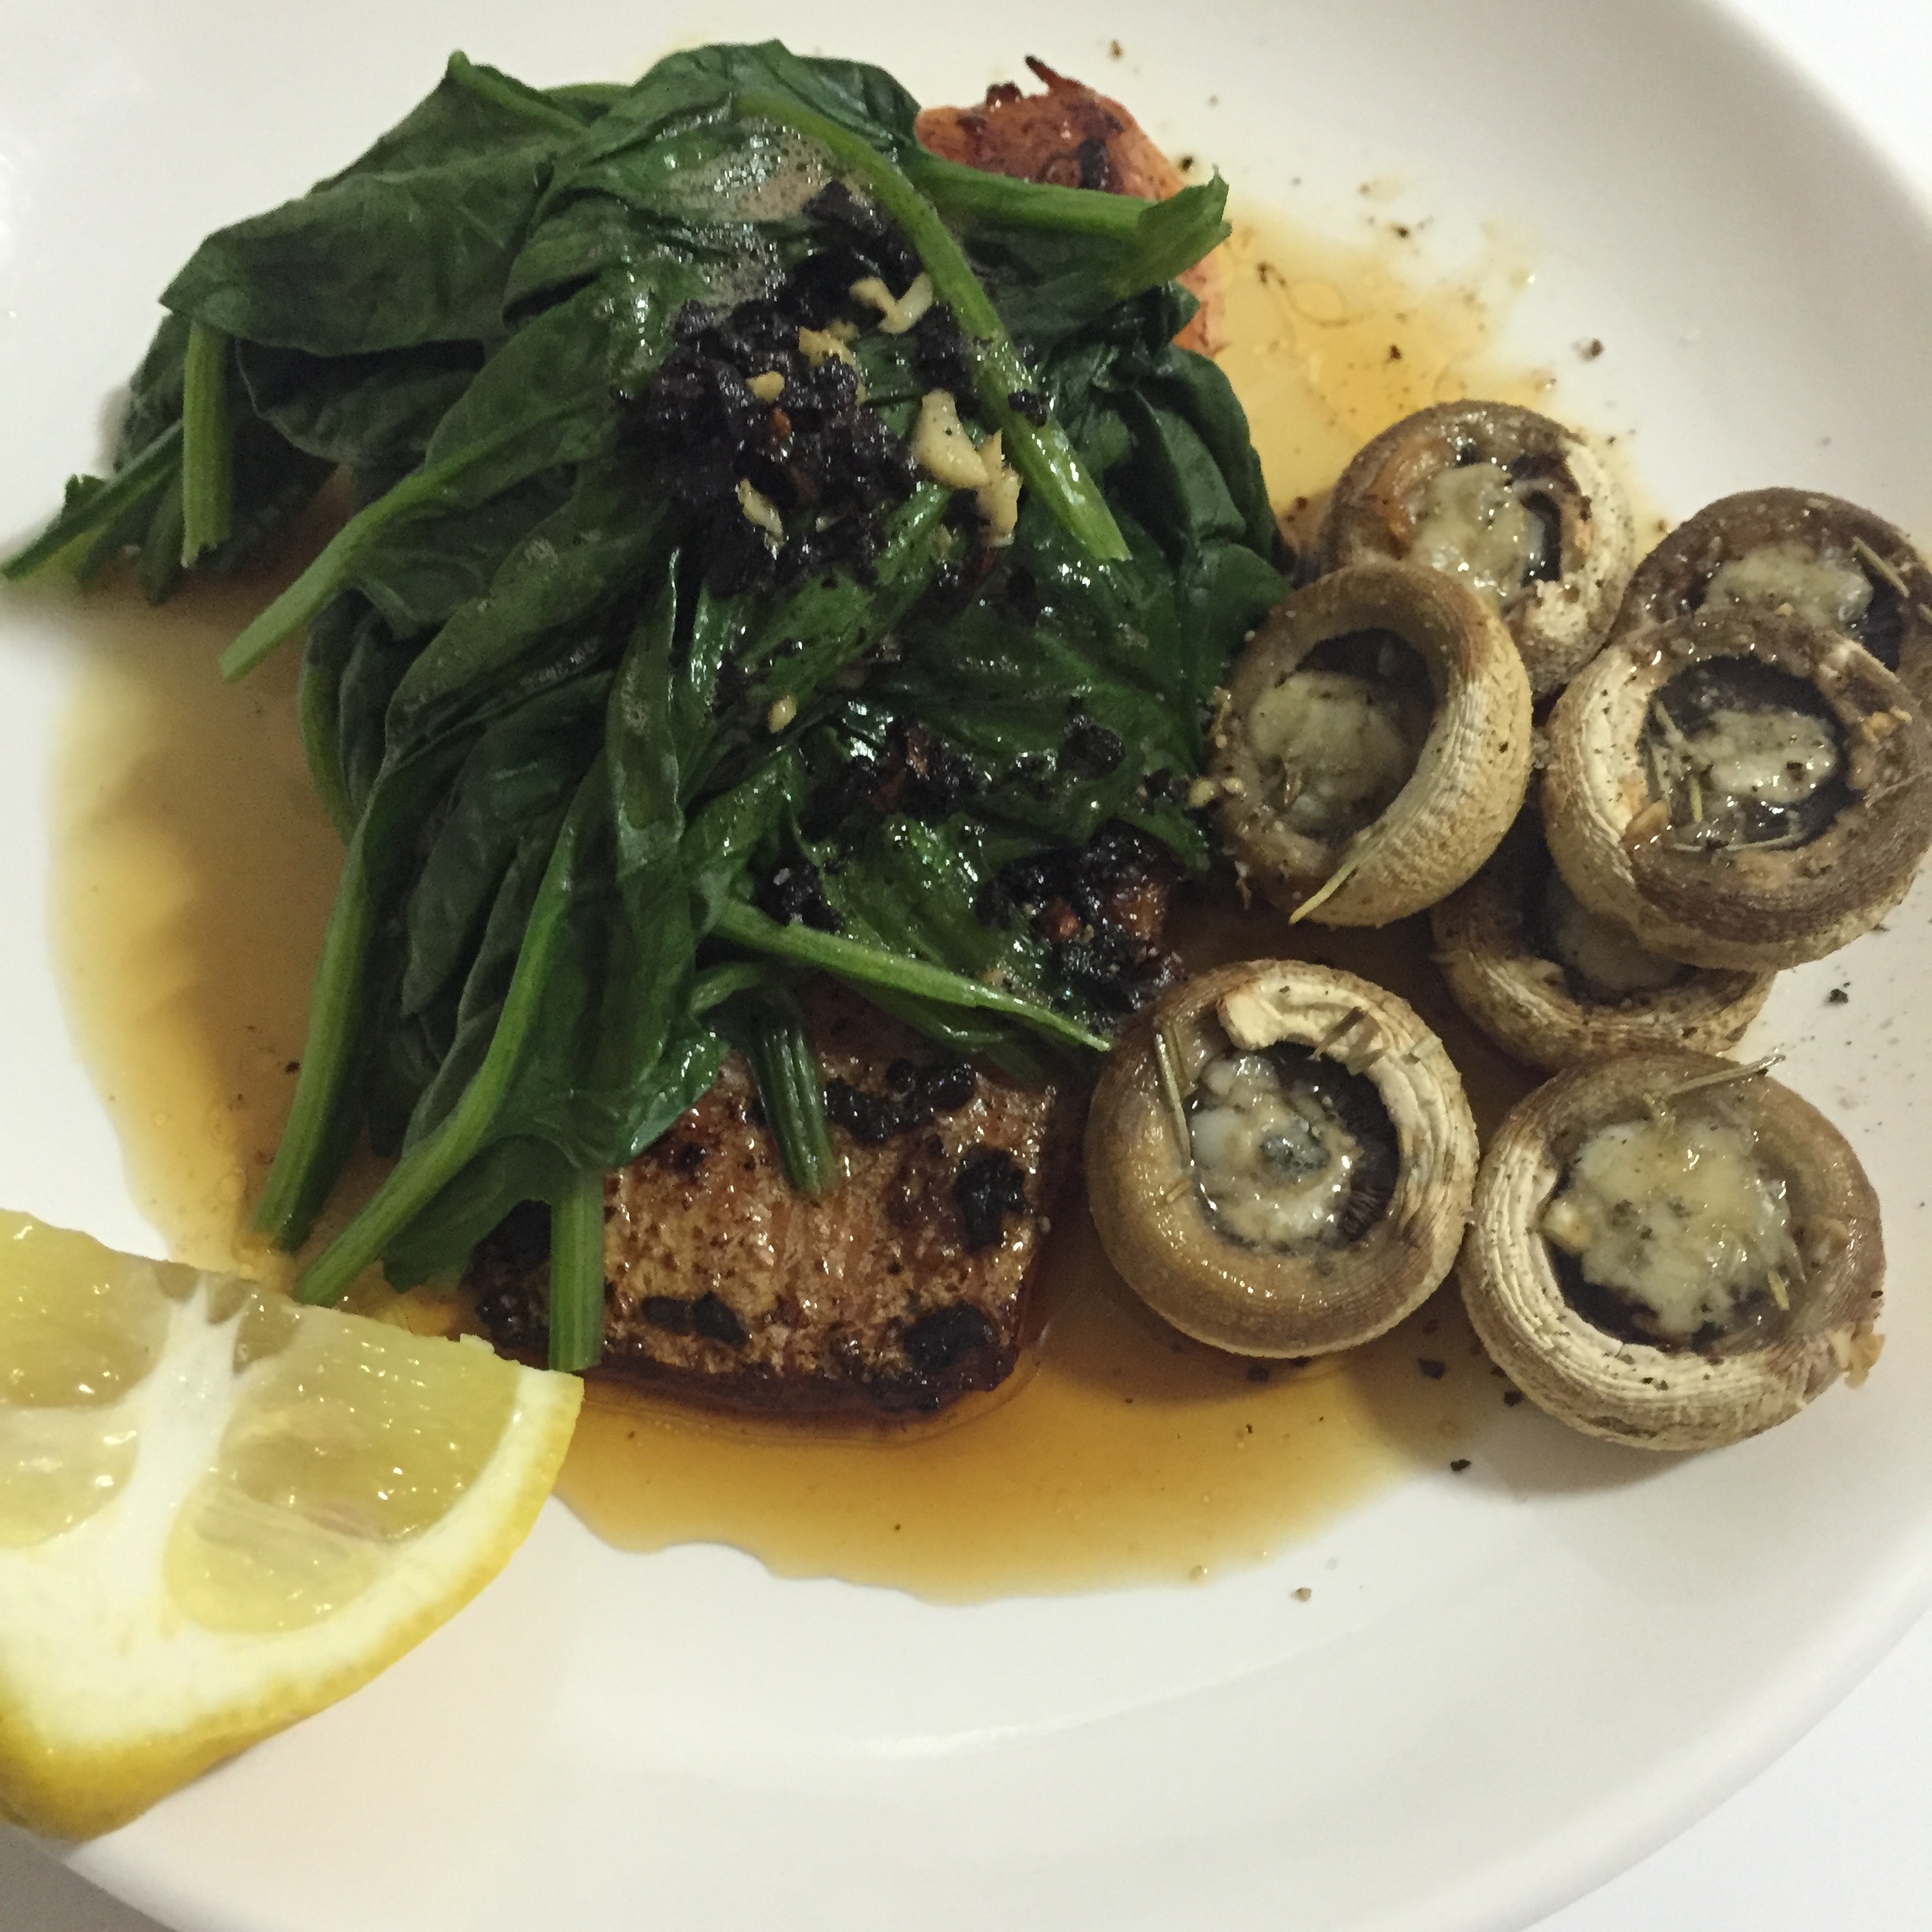
After our recent trip to Borneo (where the slabs of Cadbury's chocolate gave me a shove right off the Banting bandwagon) I am back on track again thanks to meals like this one that Farmboy put together. It's quick and simple to prepare and doesn't require anything too fancy (you could substitute the salmon steaks for any fish and sub the blue cheese for whatever you have in your fridge) but the flavors would then change.

These flavours blended together perfectly and made for a very yummy meal.

Directions

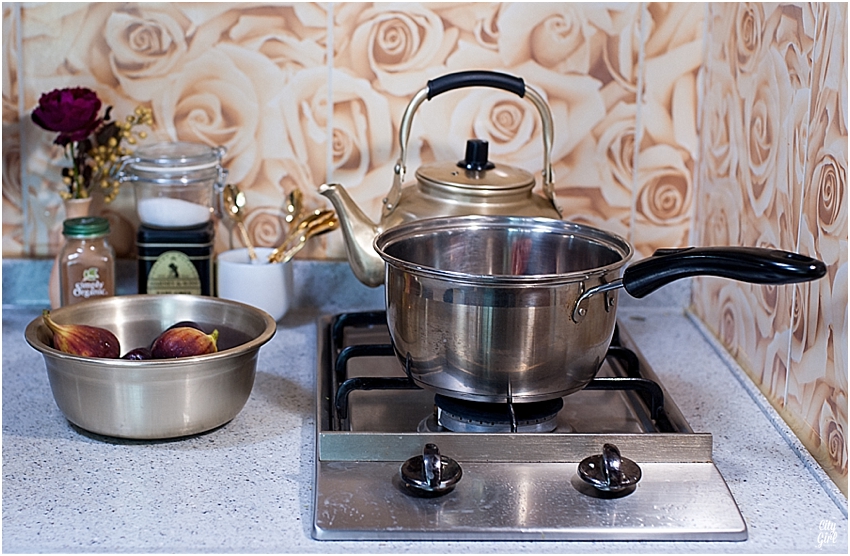
1. Place a pot of water on the boil and steam your spinach.

2. Fry the fish in a blob of butter and roughly chopped garlic until cooked through.

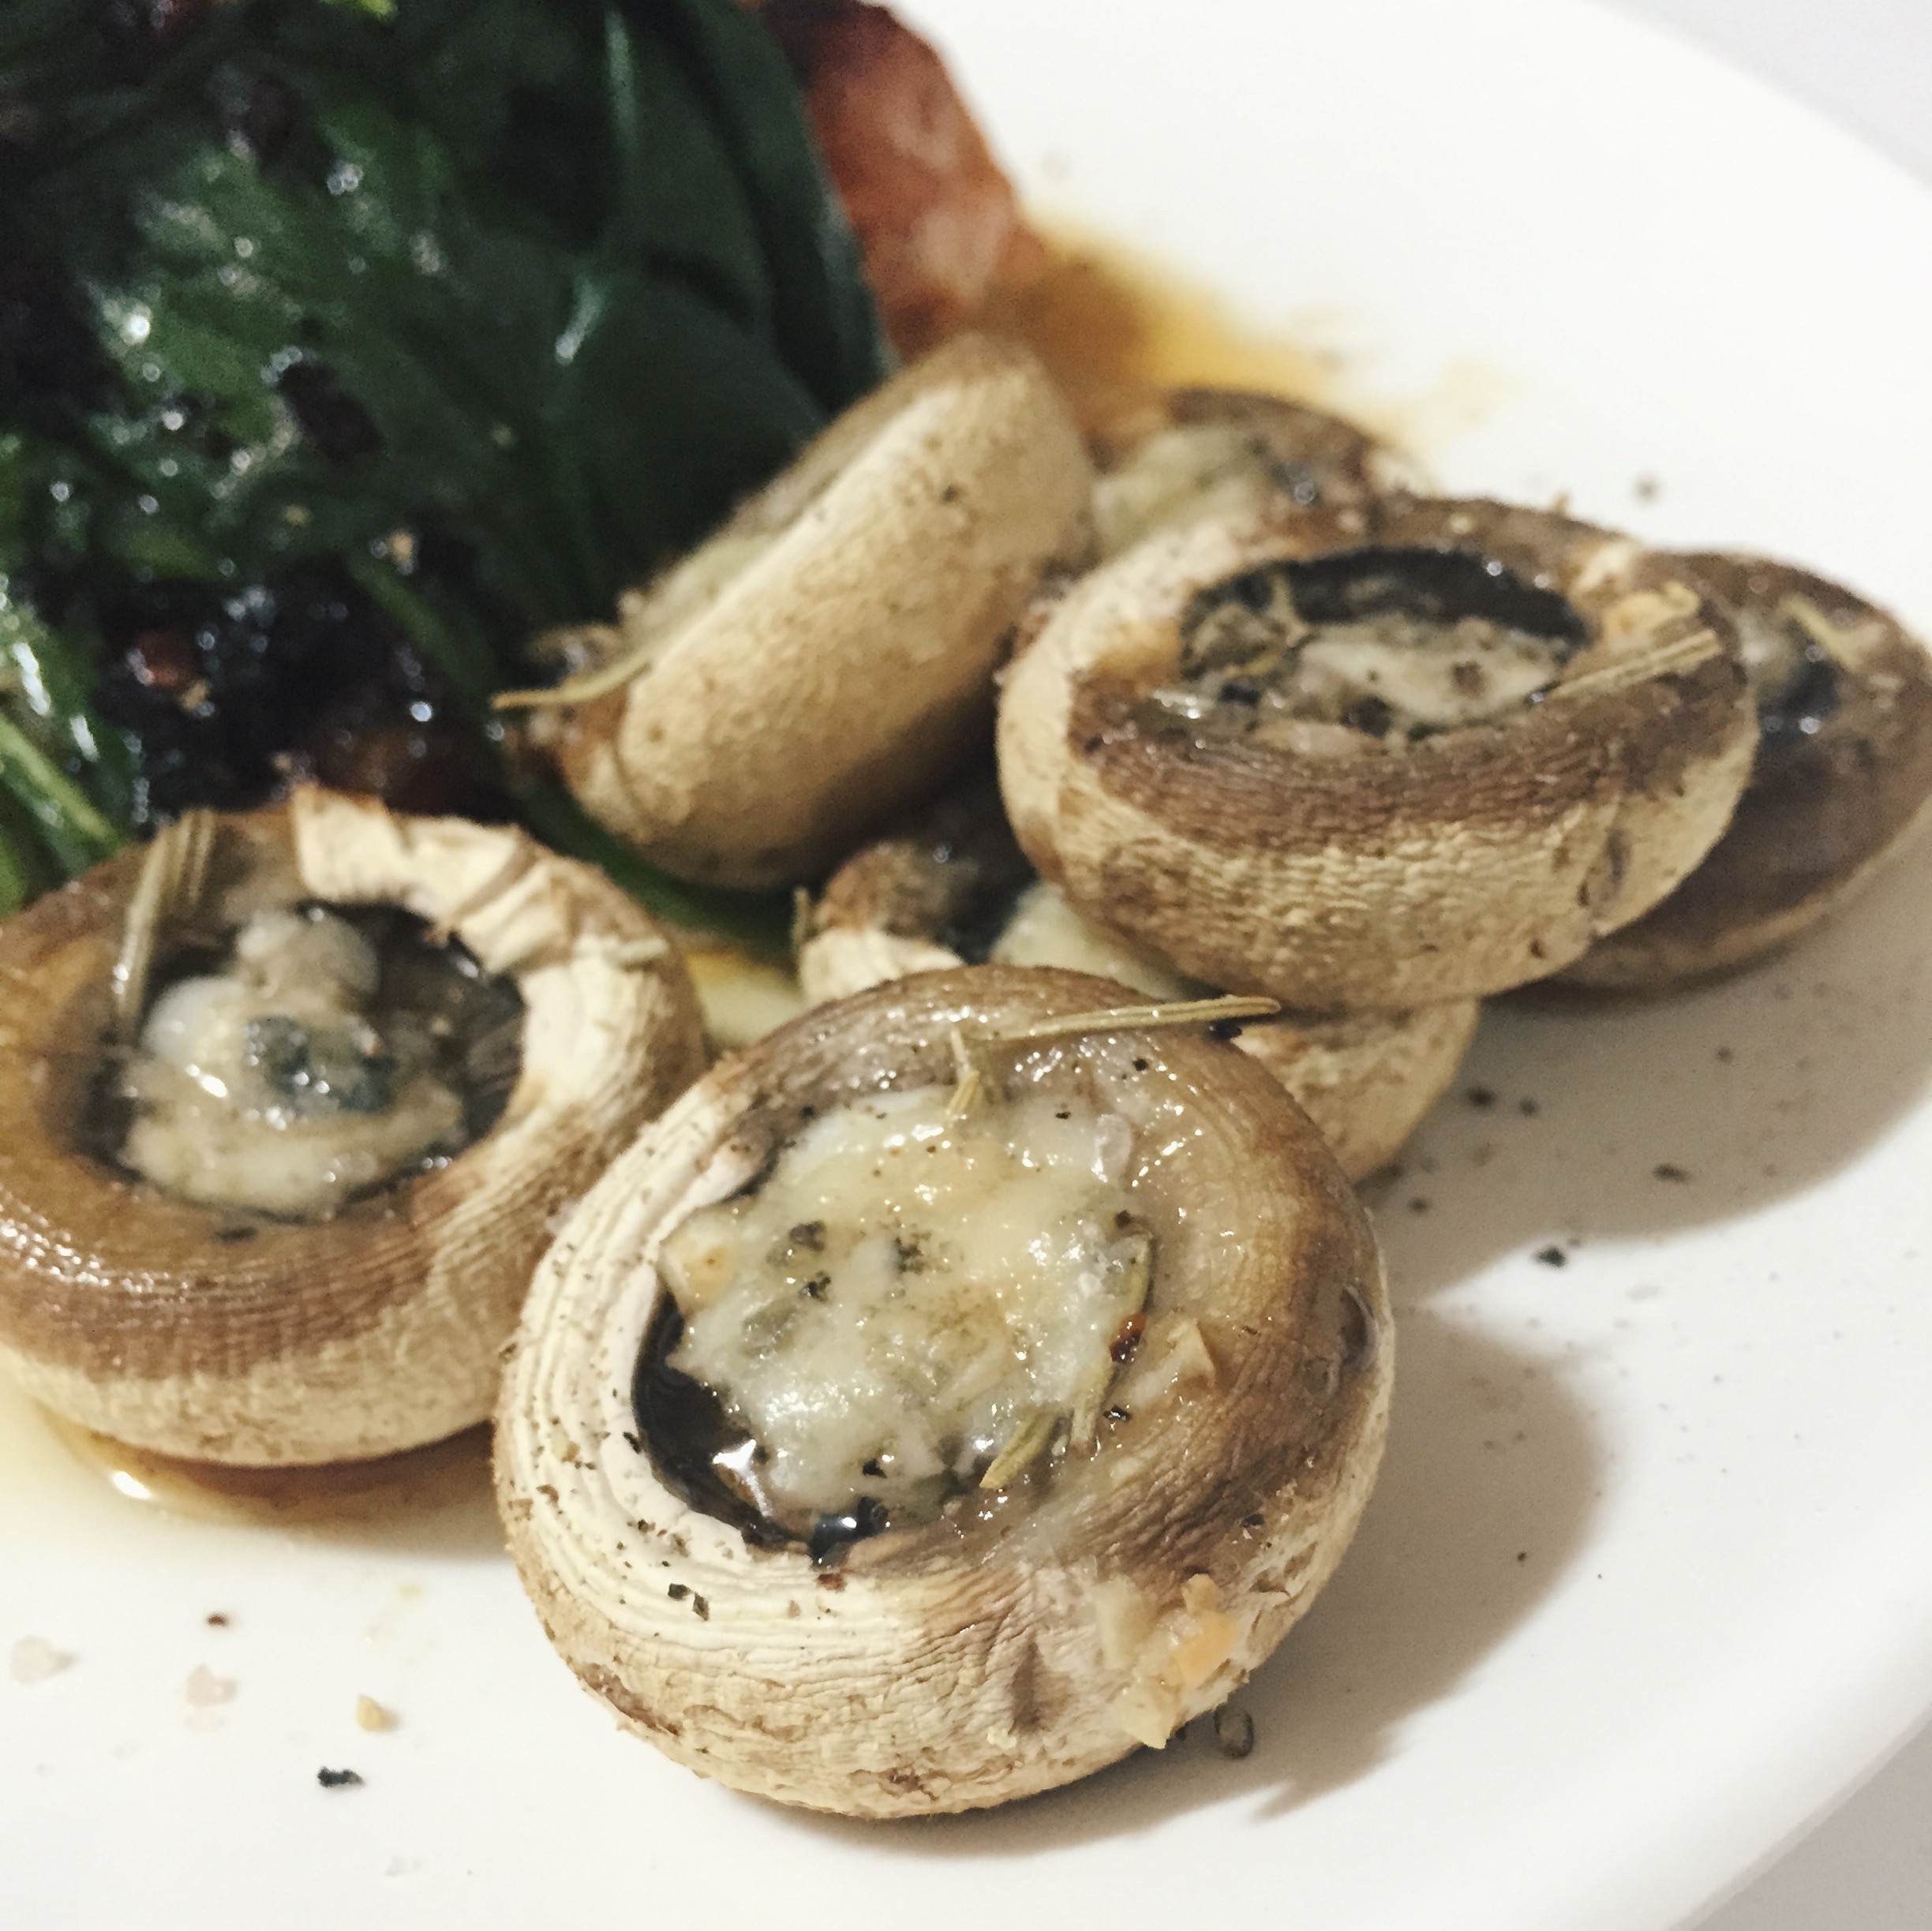
While your fish is frying in the pan, heat up your oven & place button mushrooms onto a tray with chunks of cheese on top of each mushroom. Place into the oven for 10 - 15 minutes, or until the cheese has melted 

Serve your salmon with a slice of lemon &  topped with the spinach (and don't forget to drizzle the garlic butter sauce from the frying pan over your spinach).

Banting Zucchini Lasagna #BantingInKorea

BAntingZucchiniLasagan

A recipe for lasagna that uses ZERO pasta? And still tastes out of this world?! I kid you not, this is one yummy meal. Packed with loads of protein (thanks to the delicious mountains of melted cheese and mince) this is a great meal for the cold winter months.

*Banting is a form of Low Carb High Fat diet (similar in essence to Paleo except that allows dairy). It's much more than a diet though, and followers should be prepared for the lifestyle changes that will follow. You're body will love you for it, I know mine does! To find out more about it click here to read my interview with The Banting Blondes 

I used a store bought pasta sauce for convenience sake (as canned tomatoes are not that easy to come by here in South Korea). You can substitute a lot of things in this recipe (like I did with using dried basil instead of fresh, coconut oil instead of olive oil, cream cheese instead of ricotta as called for by the original recipe by Skinny Taste). Just bear in mind that these things will change the taste of your lasagna slightly. Also, I've just found out you can buy cheese from Gmarket instead of having to trek all the way to your nearest Costco (and it's only a tiny bit more expensive than Costco too!). Click here for the link to the 1kg block. 

Ingredients:  

  • 500g lean mince (pork is the cheapest mince here in Korea but you can substitute for beef or even chicken)
  • 3 cloves garlic
  • 1/2 onion
  • 1 tsp coconut oil
  • salt and pepper
  • 1 can crushed tomatoes (to make my life easier I used a store bought pasta sauce...one of the 'meat variety')
  • 2 Tbsp chopped basil (fresh is best but I can only get hold of the dried kind)
  • 3 medium zucchini, sliced thinly
  • 1/2 tub cream cheese
  • 1/3 cup Parmesan cheese
  • 1 cup cheddar/mozzarella  cheese 
  • 1 large egg


Directions:

1. In a medium sauce pan, brown meat and season with salt. When cooked, drain in colander to remove any fat. Add coconut oil to a pan and saute garlic and onions for about 2 minutes. Return the meat to the pan, add tomatoes/pasta sauce, basil, salt and pepper. Simmer on low for at least 30-40minutes, covered. Do not add extra water, the sauce should be thick.

2. Meanwhile, slice the zucchini into thin slices, sprinkle with salt and set aside for 10 minutes. Zucchini has a lot of water when cooked, salting it takes out a lot of that moisture. After 10 minutes, blot excess moisture with a paper towel. This step took me the most amount of time as I have very little space to spread out in my kitchen.

3. On a gas grill or grill pan, grill zucchini on each side, until cooked, about 1-2 minutes per side. Place on paper towels to soak any excess moisture.

Preheat oven to 350°.

4. In a medium bowl mix cream cheese, parmesan cheese and egg. Stir well. 

5. In a glass casserole dish spread some sauce on the bottom and layer the zucchini to cover. Then place some of the ricotta/cream cheese mixture, then top with the mozzarella/cheddar cheese and repeat the process until all your ingredients are used up. Top with sauce and cheddar/mozzarella and cover with foil.

6. Bake for 45 minutes covered at 180°C, then uncovered 15 minutes. Let stand about 5 - 10 minutes before serving.

Enjoy!

*Adapted from the original recipe by Skinny Taste

DIY How to make Fig Jam

How To Make Fig Jam

Even though this jam is not banting friendly (if you haven't heard of the Banting diet make sure to read this post) but because it's fig season here in Korea, one has to improvise. Storm and I decided not to experiment with Xylitol just yet and made it with good old fashioned sugar. This recipe is incredibly easy to follow and will have your home smelling festive in no time at all. And of course, the jam itself tastes heavenly too.

HowToMakeFigJamEasyRecipe

What you need

Saucepan

Figs (we had about 8 figs)

1/4 cup brown sugar (adjust for the amount of figs...more sugar for more figs)

1 teaspoon cinnamon

a small piece of ginger, finely chopped

Directions

Quarter your figs. Add the figs to a pan and simmer on low heat while adding the sugar and ginger. Keep stirring until the sugar has completely dissolved. You can use a hand held blender to puree your jam, but it's not really necessary. 

When the sugar has completely dissolved add the cinnamon. Keep stirring on a low heat, making sure not to let the mixture burn.

Once everything has dissolved remove from the heat and allow to cool. 

Place in sterilised glass jars. There is an actual method to sterilizing glass jars properly, but we were on a tight schedule and so just soaked the jars in boiling water before use.

Best kept in the fridge and served with cheese!

You can store your jam in these cute gold animal glass jars (DIY coming to the blog soon) or in any glass jar you may have at home.

Banting Broccoli Burgers #BantingInKorea

BantingBroccoliBurgerRecipe

These broccoli burgers are one of my absolute favourite meals to make for dinner .  They are quick and easy to make, filling, delicious and packed full of goodness for your body. These burgers are the second Banting recipe I've posted here on the blog (click here to read more about the Banting diet & lifestyle plan) and as with all Banting recipes are Low Carb High Fat. Click here to see the other #BantingInKorea recipes I've posted here on the blog.

Some people wouldn't go so far as to call them burgers, as technically there's no bun or toppings, but trust me when I say you won't need to have anything to accompany these (except for your favourite sauce). Both Farmboy and I are completely stuffed every time I make them and there are always a few left over for lunch the next day.

If you do try these let me know what you think of them in the comments below!

Ingredients

2 heads of broccoli (pulsed until fine in a blender or food processor)

1 pack of bacon

1 onion

2 or 3 cloves of garlic (depending on how much you like garlic)

ginger (optional...I used a small thumb sized amount)

tablespoon coconut oil (optional, depending on whether you like to cook in bacon fat or not)

1/2 cup almond/coconut flour (we have tried both and they work equally as well, the almond flour makes the patties a little more dense)

2 eggs

salt & pepper

1/3 cup grated cheese

makes 12 patties

Directions

Heat your oven to 180C. Fry your bacon. Then finely chop the onions and garlic and fry them in your bacon fat (or coconut oil) until brown. Leave to cool.

In a large bowl combine the rest of the dry ingredients (broccoli, almond/coconut flour, cheese, salt and pepper). Add the garlic and onion mixture and finally add the eggs. 

Oil a baking tray (with coconut oil) and spoon balls of the mixture onto the tray. I used foil in the pictures below but it was an absolute nightmare removing the foil from the burgers.  Bake in the oven for 15-25 minutes, keep checking on them to make sure they don't burn.

Remove when they are slightly golden on top.

Serve with your choice of sauce (or even salad) and enjoy!

3 Ingredient Carb-Free Banting Pancakes #BantingInKorea

CarbFreePancakesBanting

I have been on the Banting diet (along with the rest of South Africa it seems!) for the past 5 weeks and nothing I have ever done, exercise or diet wise, has done for my body what this eating plan has done for me. I can't believe how my body has changed and responded to it. BUT as with any eating plan, it may not be right for you so please don't feel like this is the only way to loose a little bot of jiggle around your middle. Also I would like to note that I have been exercising very little so far, and my now confirmed 4kg loss has been all due to this eating plan and not from going crazy at the gym. If you want to find out more about  Banting, click here to read an interview I did with The Banting Blondes.

3 Ingredient Pancakes (especially for the Banting Diet)

Here is one of my favourite Banting breakfasts. It's super quick and easy and tastes heavenly (even better than the 'real' flour filled pancakes). Today Farmboy changed things up and added a flaxseeds to our mixture which helped them hold together better, as they tend to be quite fragile in the pan. But that's up to you.

Also, cream cheese is quite expensive not only here in Korea but all over the world. But once you try these you won't want to eat anything else.

BantingPancakes

Ingredients

Makes 4 medium sized pancakes

-1/2 tub of standard cream cheese

-3 eggs

-dash of cinnamon

optional: teaspoon of Xylitol sweetner (I found mine online through iHerb...$11 for 450g)

Directions

Simply mix all your ingredient together in a blender (or by hand if you have the muscle power). One everything is well mixed, grease up a pan with coconut oil and start cooking!

I find my mixture can be very hard to work with as it is very fragile in the pan. Make sure to use lots of coconut oil (I ordered mine off iHerb) to make your life easier when it comes to flipping your pancakes.

Top with a sprinkle of cocoa powder if you need something chocolatey, or with a teeny bit of honey (remember your honey allowance for the day is only 1 teaspoon).

Banting Pancakes

Roasted Chickpeas {recipe}

RoastedChickpeasRecipe

A friend introduced me to this hearty & healthy snack a few weeks ago, and since then I have been trying to perfect my own version. Chickpeas, also called Garbanzo beans, are high in protein as well as being low GI, as a snack they keep you feeling fuller for longer, helping to keep hunger pangs at bay. They are also said to lower cholesterol, so all in all a very good addition to your diet. As with most legumes they are higher in carbs, so don't eat a whole bowl by yourself, sharing is caring!

I have only ever used chickpeas to make hummus, and even then I would cheat by using the can variety, which saves the hours of soaking that goes into the dry ones. Here in Korea it can be rather difficult getting your hands on anything that is not a staple of the Korean diet, and as far as I can tell, my Korean co workers have never heard of chickpeas. I did however find a 1kg bag of them at the Asia Mart, opposite the Jeonju Bus Terminal for W6 000. 

You need to preferably soak chickpeas overnight to soften. If you don't have time to leave them overnight, they can be boiled on the stove too. Boiling on the stove will still take about 2 hours to soften. Click here for more ways to cook them without soaking overnight. 

After soaking, discard the water (you will notice it has a brownish tinge to it) and place the beans in a large bowl. Now you add your choice of seasoning. 

RoastedChickepeasRecipe

To roast the chickpeas you need oil and your choice of seasoning spices. I used Grapeseed oil as we didn't have any olive oil. I then used salt & blackpepper, Ina Paarmans Chicken spice (we stocked up on Ina Paarmans and other seasonings when we came over from South Africa), Robertsons Salt & Vinegar and celery salt. Combine the oil and spices with the chickpeas, rolling them around until coated.

Roastedchickpeasrecipe

Then pop them on a roasting pan, and roast on a high heat for about 30 minutes. Make sure to keep checking on the oven so they don't burn. I used a sheet of tin foil to cover my baking tray to avoid the clean up that usually follows roasting.

Remove from the oven and enjoy. They are best enjoyed straight out of the oven while still warm.

RoastedChickPeasRecipe

Tuna & Broccoli Quinoa Burgers {recipe}

quinoatunabroccoliburgers

I don't do very much cooking at home, I much prefer baking. But on the odd occasion when I do whip out the frying pan, I'm not scared to try new recipes. Especially at 10 o'clock at night. This meal was one of them and this time I got it right. So right in fact that Farmboy ate 9 of the 12 patties.

I adapted the original recipe from here to my kitchen and ingredients here in South Korea. The two pictures I have of them don't do them any justice so you'll have to take my word for it when I say these little patties are tasty beyond measure and so easy to make.

Ingredients

  • 1/2 cup uncooked quinoa
  • 1 cup diced broccoli
  • 1/2 cup minced onion
  • 1 cup drained & flaked tuna or salmon (I used a big tin of tuna)
  • 1/2 cup rolled oats, mixed in a blender to create a fine powder (the original recipe calls for almond flower or gluten free bread crumbs)
  • 2 garlic cloves, minced
  • Sea salt & fresh ground black pepper
  • 2 eggs
  • 1-3 tablespoons coconut oil for frying

Method

1. Cook your quinoa (I boiled it as per this great recipe) and leave to cool.

2. In a medium sized skillet, sauté the broccoli and onions in 1-2 teaspoons of coconut oil over medium heat until they are begin to turn soft, about 5 minutes. Remove from heat and cool.

3. In a large mixing bowl, combine the quinoa, broccoli and onions, tuna, oats and garlic. Season with lots of sea salt and fresh ground black pepper to taste.

4. Stir in the eggs.

5. Warm a tablespoon of coconut oil in a skillet.

6. Measure out a 1/4 cup of the mixture and press into a patty shape. Gently ease onto the skillet. 

7. Reduce temperature to medium low, and fry the patties for 3-5 minutes on each side, or until they are golden brown. Keep adding more coconut oil to the pan as needed. Serve warm or at room temperature with slices of lemon and sweet chile sauce.

TunaBrolccoliQuinoaBurgers

How to make your own cottage cheese {recipe}

HomemadeCottageCheeseRecipe

This is one of the easiest things I have ever made, and I was able to do it right here in South Korea with only 2 ingredients! It's super easy to do and so yummy, we won't ever be buying store bought cottage cheese again.

HomemadeCottageCheeseRecipeSouthKorea2

Ingredients

2 liters of milk (I used whatever milk I could find in the stores here as I can't understand the Korean labels, but you could try it with full cream, half fat and fat free milk)

1/3 cup vinegar (you can use either white vinegar or apple cider vinegar. I've made it with both and haven't noticed a difference).

HomemadeCottageCheeseRecipeSouthKorea1

Directions

Heat up the milk to 120F or 45C in a large pot or pan. I didn't have a thermometer and so heated up the milk until it was a hot, shower temperature. You can add salt/pepper/rosemary/herbs to the milk to flavour your cheese. You should be able to touch the milk without scalding yourself. Turn off the heat and add the vinegar, stirring slowly so as not to break the curds. It will start to curdle right away.

Cover and leave to sit for about half and hour.

Drain the curds and whey using a muslin cloth, or any other piece of cotton fabric. Drain completely. What will be left is your cottage cheese. Store in an air tight container. If it's a little on the dry side, you can add cream or more milk to your mixture. You will also need to add salt as the taste will be a little bland. It should keep for about 10 days, but ours has never lasted more than a day, it's just so good!

Serve with sweet chile sauce and fresh coriander for maximum yumminess. 

HomemadeCottageCheeseRecipeSouthKorea3.jpg

Peanut Butter, Banana, Oatmeal & Chocolate Chip cookies {recipe}

Oh my these cookies are yummy (freshly baked as well as eaten just out of the mixing bowl). I found the original recipe on one of my favourite food blog's Sally's Baking Addiction when looking for a use for my brown bananas and oats (or oatmeal). These cookies are wholesome (they are in fact gluten free as they contain no flour) and are super easy to whip together. They contain no flour, sugar, milk or eggs.

I had them for breakfast (only one morning as I had eaten just about all of them the night before!) and they gave me so much energy, and kept me feeling full for the morning, thus stopping me from reaching for all the snacks in my staff room. Plus, they are filled with only good & healthy ingredients so you can absolutely justify eating cookies for breakfast.

An important thing to note is you need instant oats for this, not rolled oats (but you can whizz your whole, rolled oats in a blender on high for a few minutes to get instant oats). 

Happy baking!

x

Ingredients

  • 2 and 1/3 cups (190g) quick oats* (not whole oats)
  • 3/4 teaspoon salt
  • 1 teaspoon ground cinnamon
  • 1 cup (250g) peanut butter (or almond butter as the original recipe called for)
  • 1/4 cup (82g) pure maple syrup (or honey)
  • 2 large ripe bananas, mashed (about 1 cup)
  • 1/3 cup (60g) dark or semi-sweet chocolate chips
  • 1/3 cup (33g) sliced almonds (optional)

Method

Preheat oven to 180C degrees. Oil a large cookie sheet (I use coconut oil and set aside.

Combine all of the ingredients into a large bowl. Using a large rubber spatula or wooden spoon, mix until all of the ingredients are thoroughly combined. The dough will be sticky and thick.

Roll into balls using a teaspoon to help shape your cookies.  Drop this amount onto a cookie tray and slightly flatten the tops into desired thickness. They won't spread in the oven.

Bake for 15 minutes until the edges are very slightly brown. Don't bake any longer or the cookies will taste dry. I took my cookies out right before they started going brown, as I like these cookies chewy. After removing from the oven, allow to cool completely (if you can stop yourself from tucking in!).

These cookies will stay fresh at room temperature for 1 week and can be frozen up to 3 months.

*adapted from the original recipe over on Sally's Baking Addiction

Coconut oil banana & chocolate chip cookies {recipe}

image.jpg

My friend Cassandra baked these scrumptious coconut oil banana & choc chip cookies a few weeks ago. They were soft and all kinds of melt in your mouth delicious that I had to give them a try too. I decided I would try make them a little bit 'healthier' and used whole wheat flour instead of regular white flour...what a flop. Anyway, my second batch were just about perfect, having followed exactly what the recipe called for (as most people would have done from the beginning, but I like to improvise, add and supplement recipes with what I have in my cupboard at the time. This works for me more often than not, but I wouldn't recommend it unless you have a husband who will willingly eat anything you bake him).

My little oven here in Korea is a real dragon and heats up to the temperature of 10 suns in only a few minutes. So I baked these for 8 minutes at 100C (and even then I managed to nuke a few while getting distracted by something on Instagram). When you try them yourself I recommend adjusting the time according to your oven, going no more than 12 - 15 minutes before checking on them.

image.jpg

Ingredients (makes about 24 cookies)

1/2 cup coconut oil (melt if not in liquid form)

1 egg

1 ripe banana (I used 4 as I had 4 that were about to turn rather nasty so use according to your taste...the more you add the sweeter your cookies will be and of course the more banana flavour they will have)

1 cup brown sugar

1/2 cup regular sugar

1 teaspoon vanilla essence

1 tablespoon milk

2 1/2 cups flour

1 teaspoon baking powder

1 teaspoon salt

chocolate chips 

Method

1. Mash the bananas with a fork.

2. Cream the oil, egg, sugars, vanilla, milk & banana and mix until smooth.

3. Add the flour, salt and baking powder and mix gently.

5. Finally add the chocolate chips and spoon your batter onto a well greased baking tray (I use hardened coconut oil to grease my pans).

Bake in a preheated oven at 150C for 10 - 15 minutes, or until a light, golden brown.

photo (1).JPG
photo 3.JPG

Let me know if you try these super easy, and oh-so-yummy cookies...better yet, share a picture of them with us on Facebook

How to Blanch Almonds

CGSHowtoblanchalmondsrecipe_0001.jpg

Today I am trying my hand at making almond flour {recipe to come soon} and it is recommended that you use blanched almonds instead of raw almonds to achieve a smoother texture when baking. Blanching almonds is really easy, and far cheaper than buying them in the shops. A lot of baking recipes call for blanched almonds, so save yourself a few pennies by doing them yourself...

You will need:

-almonds

-boiling water

-collander/strainer

All in all this is going to take you a one whole minute (yup! one minute!) to do!

CGSHowtoblanchalmondsrecipe_0002.jpg

Simply place your almonds in the boiling water (I was making 2 cups of almond flour and so had rather a lot of almonds, so I did mine in two batches, using the same water for the second batch). Place the almonds in the boiling water for 60 seconds only - any longer and your almonds will start to soften.

Drain the almonds immediately and place onto paper towel to cool. Then the fun part. Peel the skins off, one at a time (or two at a time once you get the hang of it!) the skins will simply 'pop off' leaving you with perfect, cream white almonds to use in your baking. You can discard the skins, or roast them in the oven with your favourite spices (we have only used salt and vinegar so far) to make delicious, virtually fat free, crispy snacks....yum!